
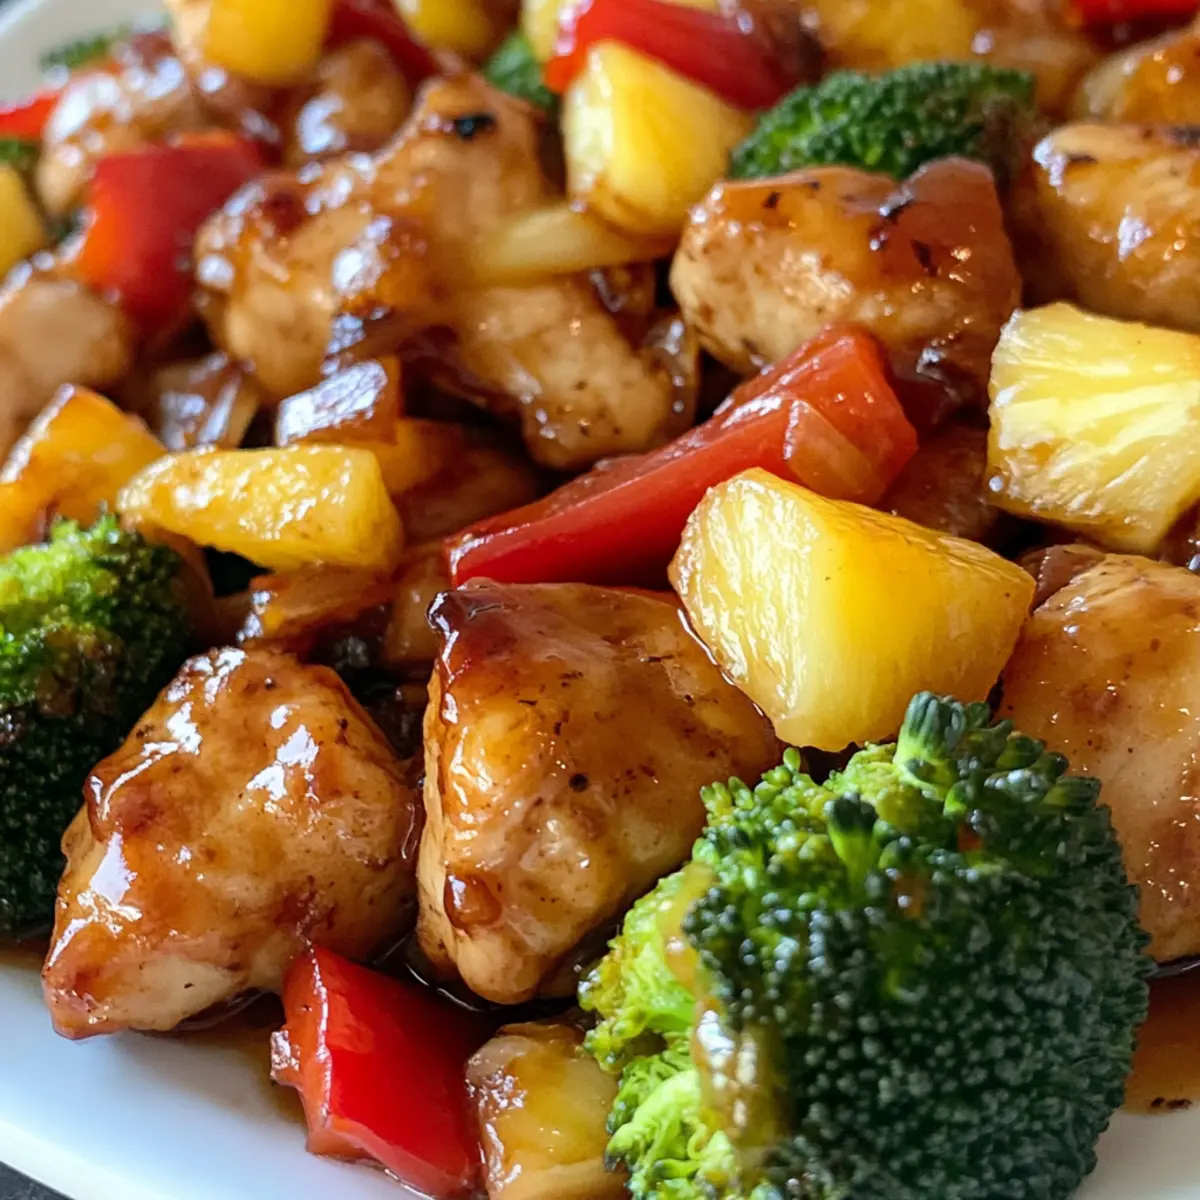
As I stood in my kitchen, the rich aroma of sweet pineapple mingling with savory soy sauce took me back to cozy family dinners filled with laughter. Today, I’m excited to share my Sweet and Sour Chicken Tray Bake—a quick and gluten-free delight that has become a weeknight favorite at our table. With only 10 minutes of prep and just 20 minutes in the oven, this recipe is perfect for those busy nights when you crave a wholesome meal without the fuss. Packed with tender chicken and vibrant veggies, it’s a deliciously balanced dish that promises to please even the pickiest eaters. Plus, its one-tray convenience means less mess and more time to connect with loved ones. Curious to see how this simple recipe can elevate your dinner routine? Let’s dive in!
Why Will You Love This Tray Bake?
Quick and Easy: With only 10 minutes of prep time and a mere 20 minutes in the oven, you’ll have a delicious meal ready before you know it!
Healthy Comfort Food: Combining tender chicken with a medley of colorful vegetables, this dish is not only gluten-free but also packed with nutrients, making it a guilt-free pleasure.
One-Tray Wonder: Say goodbye to the chaos of multiple pots and pans! This Sweet and Sour Chicken Tray Bake makes cleanup a breeze, allowing you more time to enjoy family dinners.
Family-Friendly Flavor: With its perfect balance of sweet and savory, even the pickiest eaters will be asking for seconds. It’s a hit with kids and adults alike!
Versatile Options: Want to mix things up? You can easily swap chicken for tofu or shrimp, or try adding crunchy cashews. The possibilities are endless!
For more delicious meal inspirations, check out our Chicken Bacon Ranch or Savory Chicken Wraps recipes!
Sweet and Sour Chicken Tray Bake Ingredients
For the Chicken and Vegetables
- Chicken thigh fillets – Provides protein and richness; use boneless, skinless thigh fillets for best results.
- Brown onion – Adds depth and sweetness to the dish; substitute with yellow onion if preferred.
- Red capsicum (bell pepper) – Introduces sweetness and color; any bell pepper can be used.
- Broccoli – Contributes crunch and nutrition; also great with cauliflower if preferred.
- Baby Bok Choy – Adds unique flavor and tenderness; can switch to regular bok choy or spinach.
For the Sauce
- Pineapple chunks (in juice) – Provides sweetness and acidity; integral for the sauce; use canned or fresh pineapple.
- Olive oil – Enhances flavor for roasting; substitute with avocado oil if desired.
- Sea salt – A key seasoning to enhance natural flavors; adjust to taste.
- Pepper – Adds warmth and balances flavors.
- Pineapple juice (from canned pineapple) – Acts as a sauce base; keep for perfect Sweet and Sour Chicken Tray Bake preparation.
- Tamari soy sauce – Gluten-free seasoning that adds umami; can use regular soy sauce if gluten isn’t a concern.
- Apple cider vinegar – Introduces acidity and tang; white vinegar is an alternative.
- Honey – Adds natural sweetness; can replace with maple syrup for a vegan option.
- Tomato paste – Serves as a thickening agent and flavor booster.
- Arrowroot starch or corn flour – Thickens the sauce; can replace with tapioca starch if needed.
For the Garnish
- Sesame seeds – A delightful garnish that adds texture and flavor.
- Green onions – Freshness as a garnish; can use chives if needed.
Step‑by‑Step Instructions for Sweet and Sour Chicken Tray Bake
Step 1: Prepare Sauce
In a small pot, mix pineapple juice and apple cider vinegar, adding arrowroot (or corn flour) to create a smooth slurry. Stir in Tamari, olive oil, honey, and tomato paste. Cook this mixture over medium-high heat, letting it bubble for 3-5 minutes until it thickens, then remove from heat and set aside to enhance the flavors for your Sweet and Sour Chicken Tray Bake.
Step 2: Preheat Oven
Preheat your oven to 220°C (fan forced) / 240°C (conventional) / 374°F. While the oven warms, prepare a large baking tray by lining it with parchment paper, ensuring an easy cleanup after you bake your flavorful Sweet and Sour Chicken Tray Bake.
Step 3: Prepare Chicken
Cut chicken thigh fillets into uniform pieces and spread them on one side of the prepared baking tray. Drizzle with olive oil, and season generously with sea salt and pepper. Bake in the preheated oven for about 5 minutes, allowing the chicken to start cooking and develop its savory flavors.
Step 4: Prepare Vegetables
Meanwhile, chop your brown onion, red capsicum, broccoli, and baby bok choy into bite-sized pieces. Add these vibrant vegetables to the baking tray alongside the partially cooked chicken. Drizzle another tablespoon of olive oil over the veggies and sprinkle with salt and pepper to enhance their natural sweetness and flavor.
Step 5: Combine Ingredients
Pour the prepared sauce over the chicken and vegetables in the tray, ensuring everything is well coated. Gently toss the mixture with a spatula, ensuring the sauce envelops all the ingredients without making the vegetables too soggy. This step ensures that every bite of your Sweet and Sour Chicken Tray Bake is flavorful.
Step 6: Bake
Carefully return the tray to the oven and bake for an additional 20 minutes. Keep an eye on it; the chicken should be cooked through and the vegetables slightly charred, creating a perfect combination of textures. The colors will intensify, and the aromas will entice your family to gather for dinner.
Step 7: Serve
Once baked, remove the tray from the oven and let it rest for a couple of minutes. Garnish the Sweet and Sour Chicken Tray Bake with sesame seeds and freshly chopped green onions for a burst of flavor and a beautiful presentation. Serve it on its own or alongside rice, quinoa, or noodles for a wholesome meal.
Make Ahead Options
These Sweet and Sour Chicken Tray Bake are perfect for busy home cooks looking to save time during hectic weeknights! You can chop all your vegetables and marinate the chicken in the sauce up to 24 hours in advance, allowing the flavors to meld beautifully. Simply store the prepared ingredients covered in the refrigerator. When you’re ready to serve, preheat your oven, layer the chicken and veggies in the baking tray, and bake for an additional 20 minutes. This method not only streamlines your cooking process but also ensures your meal is just as delicious and fresh as if you’d made it from scratch. Enjoy effortless family dinners with this simple meal prep tip!
Sweet and Sour Chicken Tray Bake Variations
Feel free to customize your Sweet and Sour Chicken Tray Bake with these fun ideas that will elevate the flavors and textures!
- Dairy-Free: This recipe is already dairy-free, but you can boost creaminess by adding a splash of coconut milk for a tropical touch.
- Protein Swap: Try substituting chicken with tofu or shrimp for delicious variations. Both options will soak up that sweet and sour sauce beautifully!
- Crunchy Add-Ins: Toss in some cashews or peanuts for a delightful crunch that complements the tender chicken and veggies.
- Vegetable Variety: Include other veggies like snap peas or carrots based on what you have on hand. Bell peppers and broccoli are just a start!
- Herb Twists: Fresh herbs like cilantro or basil sprinkled on top before serving add a lovely aroma and freshness to the dish.
- Spicy Kick: If you like heat, sprinkle in some red pepper flakes or chopped chili peppers for an extra zing that balances the sweetness.
- Unique Sauces: Experiment by adding a splash of hoisin sauce or sriracha to the mix for a flavor twist and more complexity.
- Rice Alternatives: Serve with quinoa or cauliflower rice instead of traditional rice, adding nutrition and delicious texture to every bite.
For more inspired meals, consider trying our flavorful Honey Feta Chicken or crispy Air Fryer Sweet Potato Chips!
How to Store and Freeze Sweet and Sour Chicken Tray Bake
Fridge: Store any leftovers in an airtight container for up to 3 days. Make sure to let it cool completely before sealing to prevent moisture buildup.
Freezer: For longer storage, freeze portions in airtight containers or freezer bags for up to 3 months. Thaw overnight in the fridge before reheating.
Reheating: Reheat in the oven at 180°C (350°F) for about 15-20 minutes, or microwave in short bursts, stirring in between until heated through.
Meal Prep Tip: This Sweet and Sour Chicken Tray Bake is perfect for meal prep! Assemble in advance and keep in the fridge until you’re ready to bake.
What to Serve with Sweet and Sour Chicken Tray Bake
Looking to create a delightful meal experience that elevates your Sweet and Sour Chicken Tray Bake? Here are some perfect pairings to complement this dish beautifully.
-
Fluffy Jasmine Rice: The light, aromatic grains soak up the flavorful sauce, making each bite a little taste of heaven.
-
Quinoa Pilaf: Nutty and packed with protein, this healthy alternative adds a delightful texture and keeps the meal gluten-free.
-
Crispy Spring Rolls: These crunchy appetizers bring an exciting texture contrast to your meal, perfect for the sweet and savory chicken.
-
Garlicky Sautéed Broccolini: Enhance the dish with tender yet crispy broccolini drizzled with garlic and olive oil for a fresh touch.
-
Creamy Coconut Coleslaw: The creaminess balances the dish’s acidity while the crunch adds a refreshing element to your table.
-
Fresh Cucumber Salad: Lightly seasoned with sesame oil, this refreshing salad adds a crisp contrast and vibrant color to your meal.
-
Tropical Fruit Salad: A sweet medley of pineapple, mango, and strawberries brings brightness to your plate, echoing the dish’s flavor profile.
-
Ginger-Lemon Sparkling Water: A lightly fizzy drink infused with ginger and lemon will cleanse the palate beautifully before savoring every bite.
-
Chocolate Mousse Cups: End the meal on a sweet note with these rich, velvety chocolate cups, offering a delightful balance to the savory dinner.
Expert Tips for Sweet and Sour Chicken Tray Bake
-
Prep Ahead: Have all your ingredients chopped and ready before you start cooking. This not only makes the process smoother but also saves time!
-
Uniform Cutting: Cut your chicken and vegetables into similar sizes to ensure even cooking. Aim for around 4 cm cubes for consistent results in your Sweet and Sour Chicken Tray Bake.
-
Watch the Sauce: Drizzle about two-thirds of the sauce over the chicken while keeping some aside for serving. This helps maintain the veggies’ crispiness.
-
Crispier Veggies: For those who love a charred texture, feel free to increase the baking time slightly. Just keep a close watch to avoid burning!
-
Taste as You Go: Always taste your sauce before pouring it over the chicken and veggies, adjusting sweetness or salt as needed for a balanced flavor.
-
Garnish with Love: A sprinkle of sesame seeds and fresh green onions adds a pop of flavor and brightness to your Sweet and Sour Chicken Tray Bake—don’t skip it!
Sweet and Sour Chicken Tray Bake Recipe FAQs
What are the best chicken cuts to use for this recipe?
I recommend using boneless, skinless chicken thigh fillets for their richness and flavor. They stay juicy during cooking and complement the sweet and sour sauce beautifully. You can also use chicken breast, but be cautious not to overcook it, as it may dry out.
How should I store leftover Sweet and Sour Chicken Tray Bake?
Store any leftovers in an airtight container in the fridge for up to 3 days. Allow the dish to cool completely before sealing to prevent condensation, which may affect texture. Just reheat it when you’re ready to enjoy your tasty leftovers!
Can I freeze Sweet and Sour Chicken Tray Bake?
Absolutely! You can freeze portions in airtight containers or freezer bags for up to 3 months. To reheat, thaw overnight in the fridge and then warm it in the oven at 180°C (350°F) for about 15-20 minutes, or microwave in short bursts. This way, you can treat yourself to a delicious meal even on the busiest days.
What if my sauce is too thick or too thin?
If your sauce turns out too thick, add a splash of pineapple juice or water and stir to achieve your desired consistency. Conversely, if it’s too thin, mix a bit of arrowroot starch or cornstarch in cold water to create a slurry, then cook it on high heat until it thickens. Always taste and adjust to balance the sweet and tangy flavors.
Can I make this dish vegan-friendly or gluten-free?
Yes! To make it vegan-friendly, substitute chicken with tofu or chickpeas, and ensure your sauces—like Tamari for soy sauce—are indeed gluten-free. For a nut-free option, skip any nut garnishes. Also, using maple syrup instead of honey will keep it plant-based. Feel free to customize the veggies to your liking, such as adding snap peas or carrots!
Is this recipe suitable for kids, and can it be adjusted for picky eaters?
Definitely! The balanced flavors of sweet and sour appeal to both kids and adults alike. If you have picky eaters, consider reducing the vinegar or honey in the sauce for a milder flavor, or serve the sauce on the side for their dipping pleasure. The vibrant colors of the veggies can also entice a fun presentation!
Sweet and Sour Chicken Tray Bake: A Quick Family Favorite
Ingredients
Equipment
Method
- In a small pot, mix pineapple juice and apple cider vinegar, adding arrowroot (or corn flour) to create a smooth slurry. Stir in Tamari, olive oil, honey, and tomato paste. Cook this mixture over medium-high heat, letting it bubble for 3-5 minutes until it thickens, then remove from heat and set aside.
- Preheat your oven to 220°C (fan forced) / 240°C (conventional) / 374°F. Line a large baking tray with parchment paper for easy cleanup.
- Cut chicken thigh fillets into uniform pieces and spread them on one side of the prepared baking tray. Drizzle with olive oil, and season generously with sea salt and pepper. Bake in the preheated oven for about 5 minutes.
- Chop your brown onion, red capsicum, broccoli, and baby bok choy into bite-sized pieces. Add these vegetables to the baking tray alongside the partially cooked chicken. Drizzle another tablespoon of olive oil over the veggies and sprinkle with salt and pepper.
- Pour the prepared sauce over the chicken and vegetables, ensuring everything is well coated. Toss gently to ensure the sauce envelops all ingredients.
- Return the tray to the oven and bake for an additional 20 minutes, until the chicken is cooked through and the vegetables are slightly charred.
- Remove from the oven and let it rest for a couple of minutes. Garnish with sesame seeds and chopped green onions before serving.
Leave a Reply