
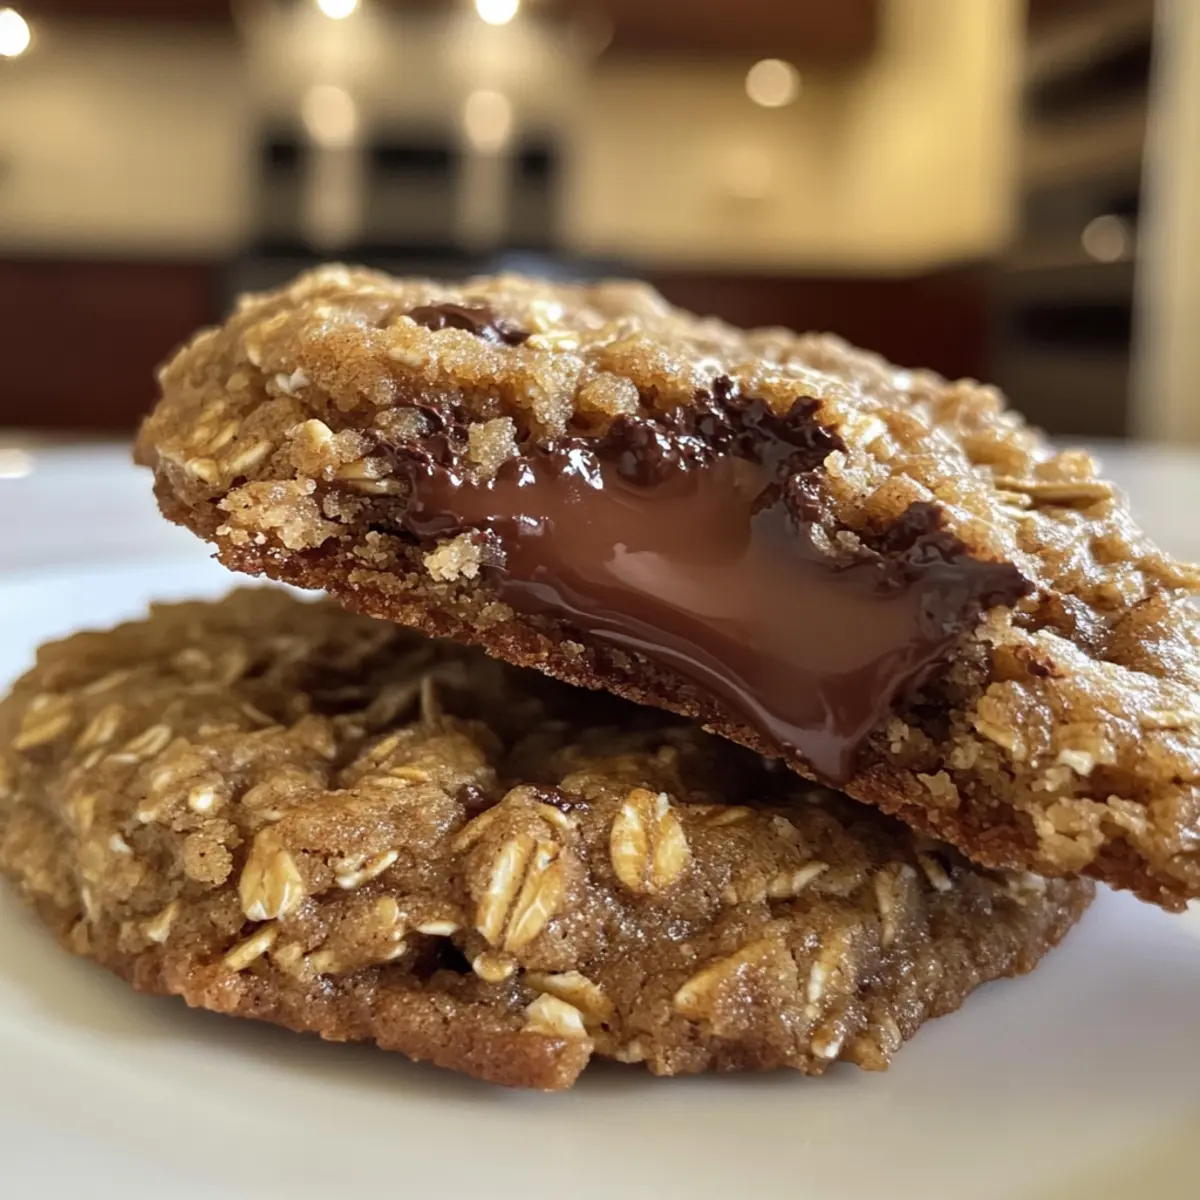
The aroma hit me like a warm hug as I pulled these golden gems from the oven. My 4-Ingredient Crispy Chocolate Oat Cookies combine the richness of chocolate with hearty oats, creating a quick treat that satisfies both cravings and busy schedules. In just a few simple steps, you’ll have a delightful snack that not only captivates the taste buds but also offers a gluten-free option for those in need. With their wholesome ingredients, these cookies bring together a satisfying crunch and a chewy center that’s perfect for sharing—or indulging in all by yourself! Curious about how these simple ingredients can elevate your snack game? Let’s dive into the delicious details!
Why are these cookies a game-changer?
Simplicity at Its Best: With only four ingredients, these cookies can be whipped up in no time, making them perfect for those busy evenings.
Irresistible Flavor: The chocolate and oats meld beautifully, resulting in a harmonious bite that’s both sweet and satisfying.
Gluten-Free Option: Easily adaptable, this recipe allows for gluten-free ingredients, ensuring that everyone can enjoy them.
Crowd-Pleasing Treat: Whether you’re hosting a gathering or just cozying up at home, these crispy cookies offer universal appeal that delights all age groups.
Quick Snack Fix: When the snack cravings hit, these cookies are ready to serve in just 15 minutes, making them your go-to remedy against fast food boredom.
Crispy Chocolate Oat Cookie Ingredients
• Unleash your baking magic with just four simple ingredients!
For the Cookies
- Oats – Essential for structure; opt for quick-cooking oats for the best crispiness.
- Peanut Butter – Adds richness and binds everything together; creamy or crunchy both work well!
- Honey – A natural sweetener and binding agent; maple syrup serves as an excellent vegan alternative.
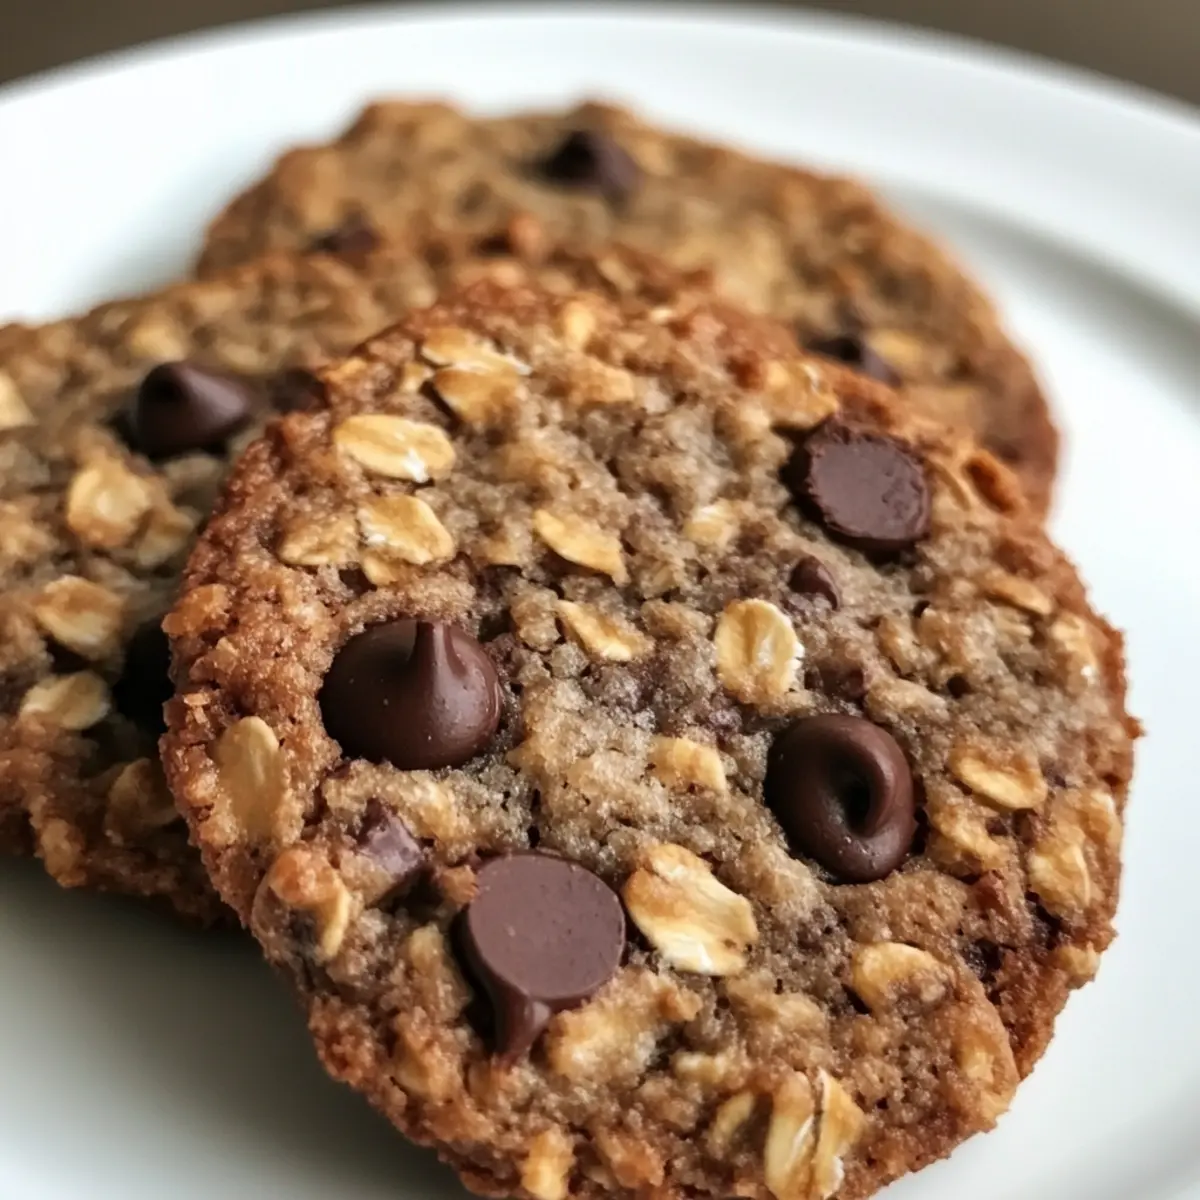
- Chocolate Chips – Provide tasty bursts of sweetness; choose dark, semi-sweet, or dairy-free chips based on preference.
Enjoy these Crispy Chocolate Oat Cookies and elevate your snack game effortlessly!
Step‑by‑Step Instructions for Crispy Chocolate Oat Cookies
Step 1: Preheat the Oven
Start by preheating your oven to 350°F (175°C). While it’s heating, line a baking sheet with parchment paper to ensure the cookies don’t stick and make cleanup a breeze. This step is essential for preparing a warm environment that will help the cookies bake evenly and achieve that perfect crispiness.
Step 2: Mix Ingredients
In a large mixing bowl, combine the oats, peanut butter, honey, and chocolate chips. Use a spoon or spatula to mix everything together until fully incorporated—it should be thick and slightly sticky. This uniform mixture will be the heart of your crispy chocolate oat cookies, so make sure it’s mixed well for even flavor throughout.
Step 3: Scoop the Dough
Using a tablespoon or a small ice cream scoop, scoop out the cookie mixture and place it onto the prepared baking sheet. Space the scoops about 2 inches apart to allow for spreading during baking. You’ll want to see those delightful clumps of oats and chocolate chips waiting to transform into delicious cookies.
Step 4: Shape Cookies
Gently flatten each cookie dough scoop with the back of a spoon. This will help them cook evenly and give them a lovely texture. Aim for a thickness of about half an inch so that they become perfectly crispy on the outside while retaining that chewy center, characteristic of these crispy chocolate oat cookies.
Step 5: Bake the Cookies
Place the baking sheet in the preheated oven and bake for 10-12 minutes. Keep an eye on the cookies, watching for a golden brown color around the edges. They should look slightly puffed and set but will firm up further as they cool, creating that delightful crunch.
Step 6: Cool the Cookies
Once baked, remove the cookies from the oven and allow them to cool on the baking sheet for about 5 minutes. This cooling period lets them set properly before transferring them. After a few minutes, carefully move them to a wire rack to cool completely, where they’ll become even crispier as they cool down.
Make Ahead Options
These 4-Ingredient Crispy Chocolate Oat Cookies are ideal for meal prep and can save you precious time during hectic weeks! You can prepare the cookie dough up to 3 days in advance; simply mix the oats, peanut butter, honey, and chocolate chips and refrigerate the dough in an airtight container. This helps maintain their fresh taste and texture. When you’re ready to bake, scoop the chilled dough onto a lined baking sheet and flatten slightly—bake as directed for that delightful crispy exterior. Enjoy the convenience of having a delicious snack ready to go without sacrificing quality!
What to Serve with Crispy Chocolate Oat Cookies
These delightful treats are perfect for creating a cozy and satisfying meal or gathering around the table with loved ones.
- Milk: A classic pairing, the richness of milk complements the chocolate chips, making every bite even more enjoyable.
- Fresh Berries: Juicy strawberries or raspberries add a refreshing burst of flavor that balances the sweetness of the cookies beautifully.
- Vanilla Ice Cream: The creamy, cool vanilla ice cream provides a luscious contrast to the crispy texture of the cookies, creating a decadent dessert experience.
- Hot Tea: Brew a fragrant cup of chamomile or Earl Grey; the warm, soothing flavors enhance the comforting feeling of snacking on these cookies.
- Peanut Butter Dip: For the peanut butter lovers, a spreadable peanut butter dip adds an exciting twist and extra creaminess to each cookie.
- Nutty Granola: A side of crunchy granola offers a delightful texture that harmonizes with the chewy center of the cookies while boosting breakfast vibes.
- Chocolate Milkshake: Indulge in a rich chocolate milkshake for a nostalgic treat that’ll amplify the chocolate flavor in your cookies.
- Coconut Yogurt: A dollop of coconut yogurt brings a tropical flair and creamy contrast, pairing perfectly with the cookie’s crunch and sweetness.
- Fruit Salad: Bright, zesty fruit salad enhances the meal with vitamins and freshness, making it a guilt-free way to balance your sweet snack.
- Coffee: An aromatic cup of coffee delivers a bold contrast that complements the sweet, rich flavors of the cookies, making for a delightful afternoon pick-me-up.
Storage Tips for Crispy Chocolate Oat Cookies
Room Temperature: Store cookies in an airtight container at room temperature for up to 7 days. This keeps them crunchy and fresh for everyday snacking.
Freezer: For longer storage, freeze cookies in a single layer on a baking sheet, then transfer to an airtight container. They can be frozen for up to 3 months without losing their delightful crispiness.
Reheating: To revive frozen cookies, simply microwave for about 10-15 seconds or pop them in a preheated oven at 350°F (175°C) for 5 minutes. This will restore their warm, inviting texture.
Cookie Dough Storage: If you’re not ready to bake, you can refrigerate the cookie dough for up to 3 days. Just shape and bake when you’re in the mood for a fresh batch of crispy chocolate oat cookies!
Variations & Substitutions for Crispy Chocolate Oat Cookies
Feel free to get creative with this recipe and discover new flavor profiles that delight your taste buds!
- Nut-Free: Swap peanut butter for sunflower seed butter to keep it nut-free while maintaining creaminess.
- Vegan Option: Replace honey with agave nectar or maple syrup to create a completely vegan-friendly treat, so everyone can indulge!
- Texture Twist: Add chopped walnuts or pecans for a satisfying crunch that complements the chewy oats beautifully.
- Fruity Fusion: Mix in some dried cranberries or raisins to introduce a sweet, chewy element that pairs perfectly with the chocolate.
- Spice it Up: Incorporate a teaspoon of cinnamon or a hint of nutmeg for a warm and cozy flavor that enhances the chocolate and oats.
- Heat it Up: Try adding a pinch of cayenne pepper or a teaspoon of chili powder for a surprising dash of heat that balances the sweetness.
- Coconut Bliss: Fold in unsweetened shredded coconut for a tropical twist that adds a lovely texture and depth of flavor.
- Chewy Oat Cookies: For a less crispy cookie, try using old-fashioned oats instead of quick-cooking oats to create a chewier cookie base.
Once you’ve mastered these variations, don’t hesitate to explore serving them alongside a refreshing Vampire Bite Cupcakes for a delightful treat combo. Happy baking!
Expert Tips for Crispy Chocolate Oat Cookies
-
Ingredient Freshness: Always use fresh ingredients for optimal flavor. Stale oats or chocolate can dull the taste and affect the cookies’ texture.
-
Mixing Well: Ensure the dough is well mixed but not overworked. This helps your crisp cookies maintain a nice texture without becoming tough.
-
Watch the Baking: Keep an eye on the cookies during the last few minutes of baking to avoid over-browning. They should be golden, not dark brown.
-
Cooling Time: Allow the cookies to cool adequately on the baking sheet. Rushing this step can lead to soft cookies instead of the desired crispy texture.
-
Storage Solutions: Store leftover crispy chocolate oat cookies in an airtight container. This will keep them fresh and crispy for up to a week—if they last that long!
Crispy Chocolate Oat Cookies Recipe FAQs
What type of oats should I use for the best texture?
For crispy chocolate oat cookies, I recommend using quick-cooking oats. They create a lovely crispy texture and help the cookies hold their shape. If you only have rolled oats on hand, those will work too, but the cookies may be slightly chewier.
How should I store these cookies for maximum freshness?
Store your crispy chocolate oat cookies in an airtight container at room temperature for up to 7 days. This will help retain their delightful crunch. If you need to keep them longer, you can freeze them for up to 3 months. Just be sure to use a heavy-duty freezer bag or an airtight container.
Can I freeze the cookie dough for later use?
Absolutely! You can refrigerate the cookie dough for up to 3 days before baking. If you want to freeze it, scoop the dough into balls and place them on a baking sheet to freeze for about an hour. Once frozen, transfer them to an airtight container or freezer bag. When you’re ready to bake, no thawing is necessary—just bake straight from the freezer, adding an extra minute or two to the baking time.
What should I do if my cookies are too soft after cooling?
If your cookies are a bit too soft and you prefer a crunchier bite, don’t worry! Simply return them to the oven for an additional 1-2 minutes at 350°F (175°C). Keep an eye on them to ensure they don’t over-bake. This will help firm them up.
Are there any dietary considerations I should know about?
If you’re making these crispy chocolate oat cookies for friends with allergies, consider using almond or sunflower seed butter to replace peanut butter for nut-free versions. Also, for vegan options, substitute honey with maple syrup. Always check your chocolate chips to ensure they fit the dietary needs of those you’re serving!
Can I use other nut butters in this recipe?
Yes, you can use other nut butters like almond or cashew butter if you prefer. Each butter will add a unique flavor to your cookies, but the process remains the same! Just ensure you’re using the same amount as stated for peanut butter in the recipe. Enjoy experimenting with the flavors!
Zesty Lemonade Cupcakes for a Sweet Summer Treat
Ingredients
Equipment
Method
- Preheat the oven to 350°F (175°C) and prepare a cupcake pan with liners.
- In a mixing bowl, cream together the softened butter and sugar until light and fluffy.
- Add the eggs one at a time, mixing well after each addition.
- Stir in the lemon juice, lemon zest, and vanilla extract.
- In a separate bowl, whisk together the flour, baking powder, and salt.
- Gradually add the dry ingredients to the wet ingredients, mixing until just combined.
- Scoop the batter into the cupcake liners, filling each about 2/3 full.
- Bake in the preheated oven for 10-12 minutes, or until a toothpick inserted comes out clean.
- Allow to cool for 5 minutes in the pan before transferring to a wire rack to cool completely.
Leave a Reply