
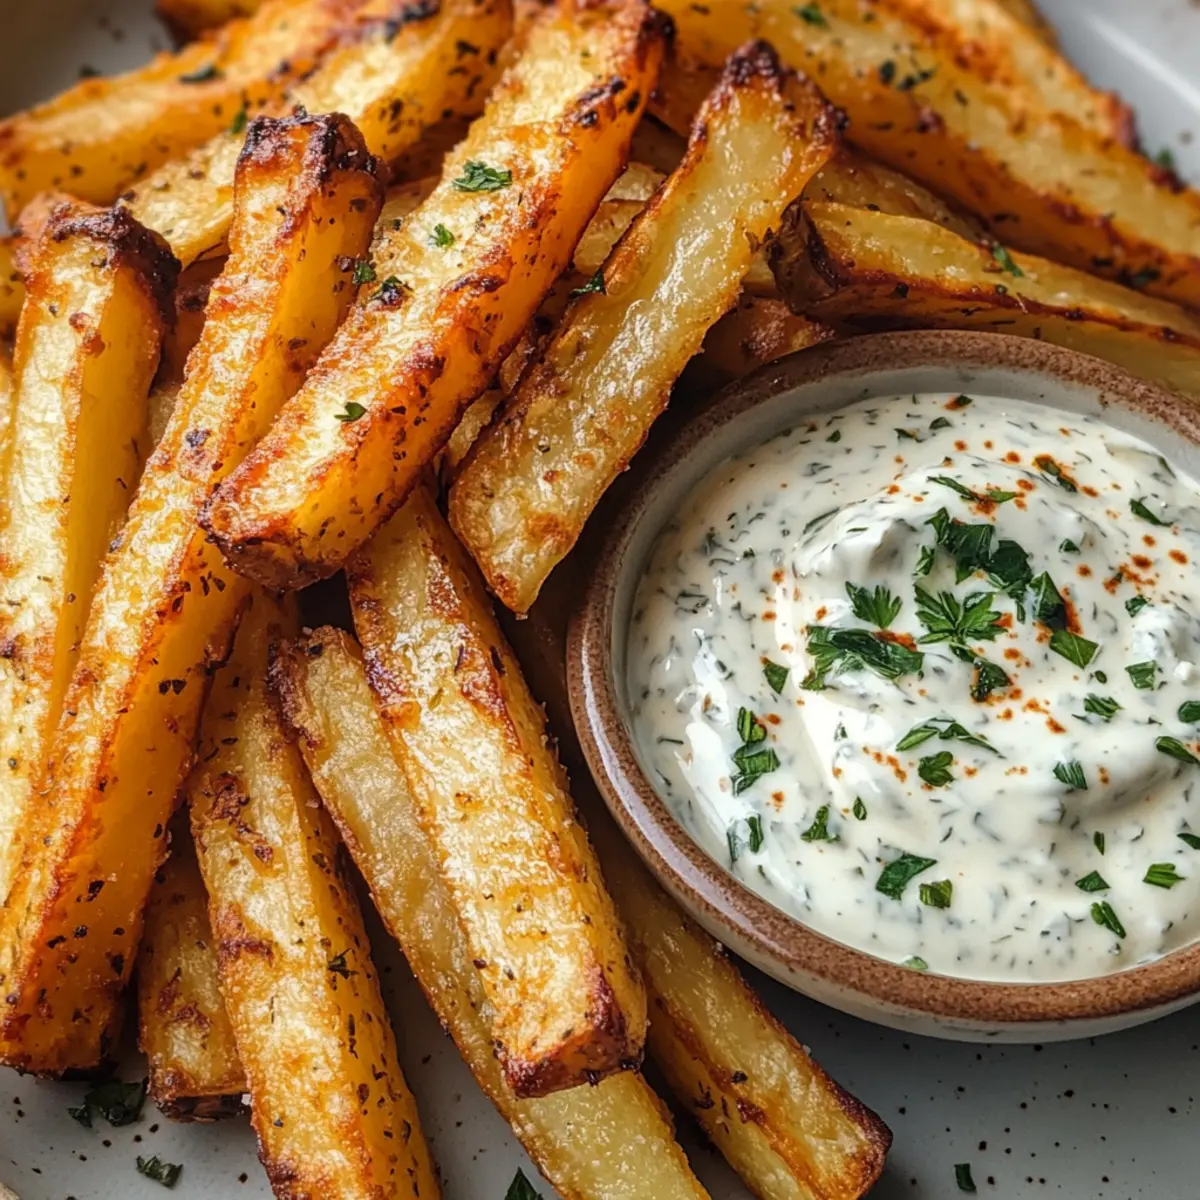
Who says fries have to be unhealthy? When I discovered the delightful world of Baked Turnip Fries with Creamy Herb Dip, it was a game-changer for my snack time cravings. These crispy turnip fries are not just a low-carb miracle; they’re also a deliciously savory alternative to traditional potato fries. Seasoned with aromatic garlic and smoked paprika, they deliver a flavor punch that will satisfy even the pickiest eaters. Plus, they come with a creamy herb dip that enhances their earthy sweetness, making them perfect for a guilt-free indulgence. Quick to prepare and keto-friendly, these fries are ideal for a cozy night in or impressing friends at your next gathering. Curious about how to easily master this recipe? Let’s dive in!
Why Are Baked Turnip Fries So Irresistible?
Irresistible Flavor: The savory blend of garlic and smoked paprika infuses every bite with zest, elevating your snacking experience.
Light Yet Satisfying: These fries provide that crunch you crave without the guilt, making them a healthier option compared to traditional French fries.
Quick and Easy: With just a few simple steps, you can whip up these delicious bites in no time, perfect for busy weeknights or spontaneous get-togethers.
Keto-Friendly Delight: Low in carbs but high in satisfaction, they fit seamlessly into a keto lifestyle and keep both your taste buds and waistline happy. If you enjoy quick dips, you might also love my Cream Pie Dip for a sweet treat!
Crowd-Pleaser: Whether served at a party or as an everyday snack, these baked turnip fries are sure to impress family and friends, appealing to health-conscious eaters and fry lovers alike!
Baked Turnip Fries with Dip Ingredients
For the Fries
• Turnips – Small to medium-sized turnips will provide the best sweetness for your fries.
• Olive Oil – It helps achieve crispiness; feel free to swap it for avocado oil if preferred.
• Garlic Powder – Essential for adding a delightful savory flavor; no substitutions needed here.
• Smoked Paprika – Offers a wonderful smokiness; replace with regular paprika for milder heat.
• Onion Powder – Enhances the depth of flavor; it’s optional but highly recommended.
• Salt and Black Pepper – Vital for seasoning; adjust to suit your taste buds!
For the Creamy Herb Dip
• Greek Yogurt (or Sour Cream) – The perfect base for a creamy dip; use dairy-free yogurt for a lighter option.
• Chives and Dill – Fresh herbs brighten up the dip; substituting with parsley works in a pinch.
• Minced Garlic – Adds a fresh burst of flavor; garlic powder can work temporarily if you’re in a hurry.
• Lemon Juice – Balances the dip with acidity; fresh lemon juice is best, but bottled is also fine.
These Baked Turnip Fries with Dip not only satisfy your cravings but also support your low-carb lifestyle!
Step‑by‑Step Instructions for Baked Turnip Fries with Dip
Step 1: Preheat the Oven
Start by preheating your oven to 425°F (220°C). Line a large baking sheet with parchment paper to prevent the turnip fries from sticking. This will help achieve that crispy texture we all love. While the oven heats, gather your ingredients, and get ready to turn those humble turnips into delicious fries!
Step 2: Prepare the Turnips
Wash and peel 2-3 medium-sized turnips thoroughly, removing any blemishes. Cut the turnips into fry-shaped sticks, aiming for 1/4 to 1/2 inch thick to ensure even cooking. The size is key for achieving that delightful crispy exterior while keeping the inside tender. Once cut, set them aside in a large bowl.
Step 3: Coat with Olive Oil
Drizzle the cut turnip sticks with a couple of tablespoons of olive oil. Using your hands or a spatula, toss them to ensure that every fry is evenly coated. This step is crucial for achieving that wonderful crispiness in your baked turnip fries. Take a moment to appreciate how fresh and bright the turnips look!
Step 4: Season the Fries
In a separate bowl, mix together garlic powder, smoked paprika, onion powder, salt, and black pepper to create a savory seasoning blend. Sprinkle this mixture over the oiled turnip fries and toss again until all are well coated. The aroma from the spices will awaken your senses, promising a flavorful bite!
Step 5: Arrange on Baking Sheet
Carefully arrange the seasoned turnip fries in a single layer on the prepared baking sheet, making sure they’re not overcrowded. This spacing ensures that they will bake evenly and get crispy on all sides. If necessary, use a second baking sheet to allow for proper air circulation.
Step 6: Bake to Perfection
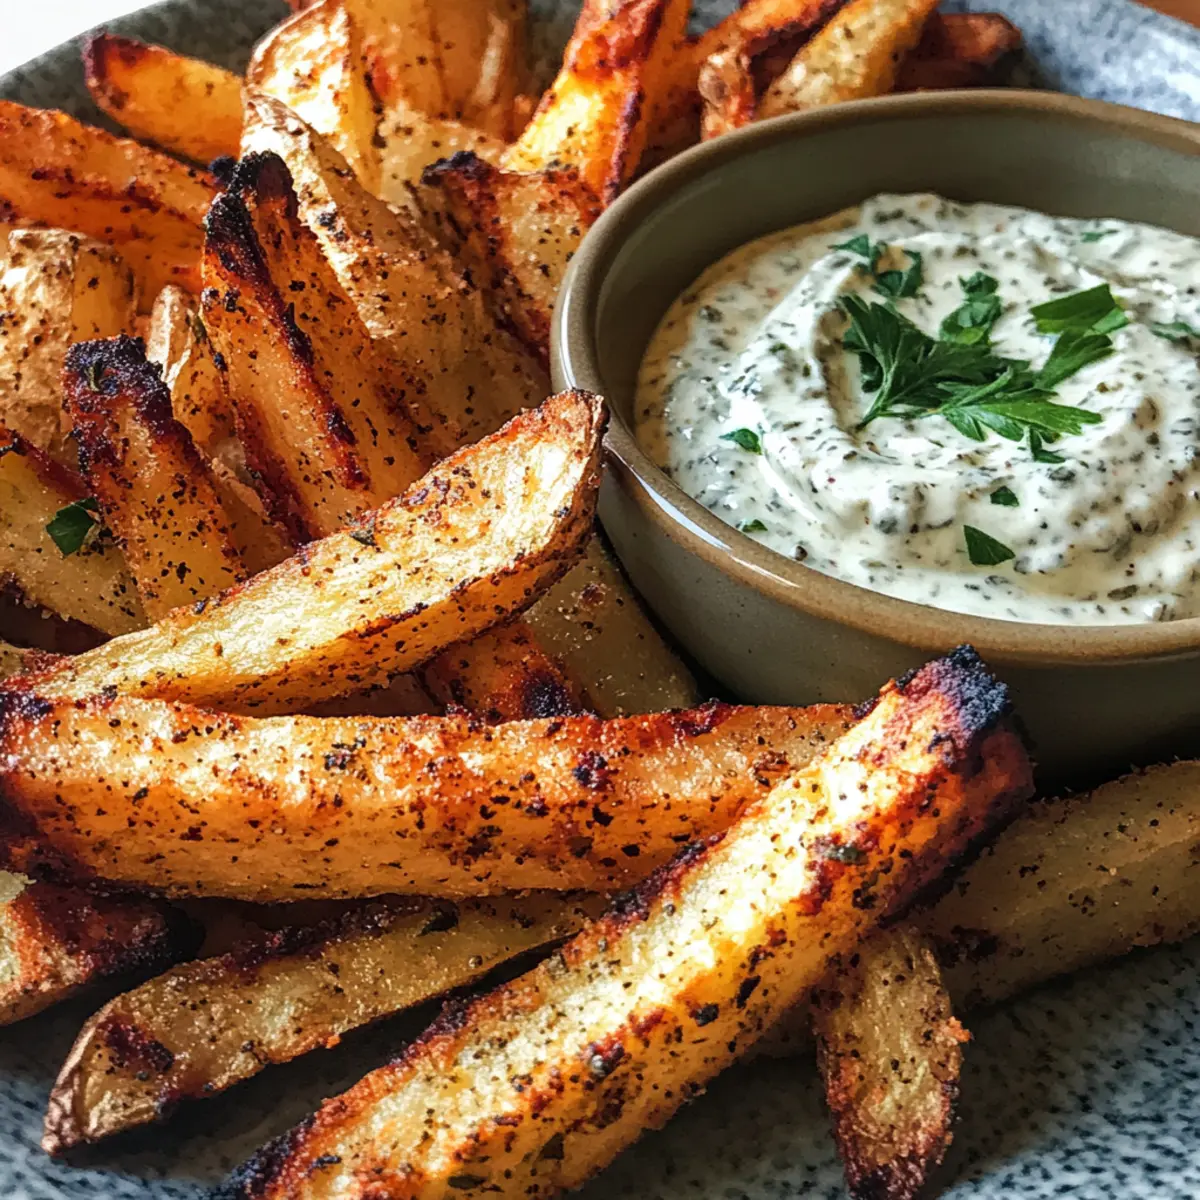
Place the baking sheet in the preheated oven and bake for 20-25 minutes. About halfway through, flip the fries using a spatula to help them brown evenly. Keep an eye on them during the last few minutes; they should be golden brown and crispy, delighting your kitchen with that enticing aroma!
Step 7: Make the Creamy Dip
While the turnip fries are baking, prepare your creamy herb dip. In a medium bowl, combine Greek yogurt, chopped chives, dill, minced garlic, and lemon juice. Season with salt and pepper to taste. Stir until smooth and well blended. This dip complements the earthy sweetness of your baked turnip fries beautifully.
Step 8: Serve and Enjoy
Once the turnip fries are done baking, remove them from the oven and allow them to cool slightly. Serve hot alongside your creamy herb dip for a delightful snack or appetizer. The combination of crispy fries and the refreshing dip is sure to impress everyone at the table!

Storage Tips for Baked Turnip Fries with Dip
Fridge: Store leftovers in an airtight container in the refrigerator for up to 3 days to maintain freshness and flavor.
Freezer: For longer storage, freeze baked turnip fries in a single layer on a baking sheet, then transfer to a freezer bag. They can last up to 3 months.
Reheating: When ready to enjoy, reheat in an oven at 375°F (190°C) for 10-15 minutes to restore crispiness. An air fryer also works wonderfully!
Serving Suggestions: Pair your baked turnip fries with the creamy herb dip for a delicious and guilt-free snack experience.
Make Ahead Options
These Baked Turnip Fries with Creamy Herb Dip are perfect for meal prep enthusiasts! You can wash, peel, and cut the turnips into fry-shaped sticks up to 24 hours in advance, storing them in water in the refrigerator to prevent browning. Additionally, you can prepare the creamy herb dip and refrigerate it for up to 3 days. When you’re ready to serve, simply toss the turnip sticks with olive oil and seasonings, then bake as instructed. This way, you’ll enjoy the same crispy texture and delicious flavor without the stress of last-minute prep, making snacking easier on your busy days!
What to Serve with Baked Turnip Fries with Creamy Herb Dip
Elevate your mealtime by pairing these crispy delights with tasty accompaniments that enhance their flavors and textures.
-
Classic Garden Salad: Fresh greens, tomatoes, and cucumbers create a vibrant dish that balances the rich creaminess of the dip.
-
Roasted Vegetables: A medley of seasonal roasted veggies adds a hearty touch, complementing the earthy sweetness of turnips.
-
Zesty Quinoa Bowl: Nutty quinoa, mixed with fresh herbs and lemon, provides a healthy, protein-packed contrast to the crispy fries.
-
Italian Tomato Bruschetta: Toasted bread topped with marinated tomatoes introduces a burst of flavor, making for an oh-so-delicious finger food combo.
-
Sparkling Water with Citrus: A refreshing drink boosts the flavors, cleansing your palate and enhancing the enjoyment of these baked turnip fries.
-
Chocolate Mousse: For dessert, a rich and airy chocolate mousse completes your meal with a delightful sweetness that’s sure to impress.
Treat yourself and loved ones to a delightful experience by mixing and matching these ideas for your next snack time or gathering!
Expert Tips for Baked Turnip Fries
• Uniform Sizing: Ensure your turnip sticks are cut evenly to allow for consistent cooking. This prevents some fries from being undercooked while others are burnt.
• Avoid Overcrowding: Give your fries space on the baking sheet; this promotes crispiness. If necessary, use two sheets to bake them evenly.
• Midway Flip: Turn the fries halfway through baking to ensure they achieve an ideal crunch on all sides. Keep an eye on them towards the end!
• Choose Younger Turnips: Opt for smaller, younger turnips to avoid bitterness. Soaking the cut fries in cold water for 30 minutes can mellow their strong flavors.
• Oil Adjustment: For a lighter, healthier version, consider reducing the amount of oil. However, remember that this might affect the final crispy texture of your baked turnip fries.
Baked Turnip Fries with Dip Variations
Feel free to make these baked turnip fries your own with these delightful twists and swaps!
-
Dairy-Free: Replace Greek yogurt with a coconut-based yogurt for a creamy, vegan-friendly dip that maintains luscious flavor.
-
Herb Twist: Experiment with fresh thyme or rosemary instead of dill for the dip to add a fragrant twist that enhances the overall taste.
-
Cheesy Delight: Sprinkle grated Parmesan or nutritional yeast over the fries before baking for an added layer of cheesy goodness that melts beautifully.
-
Spicy Kick: For those who love heat, add red pepper flakes to the seasoning mix or serve with a side of sriracha for an exciting flavor boost.
-
Root Veggie Medley: Swap turnips for parsnips or sweet potatoes to create a colorful array of fries. Each vegetable brings its unique sweetness and texture, inviting exploration.
-
Zesty Variance: Add lime juice instead of lemon in the dip for a tangier zing that perfectly complements the earthy turnips.
-
Crunchy Topping: For extra crunch, toss in crushed nuts like almonds or walnuts in the dip, giving it a delightful texture that contrasts with the soft fries.
-
Garlic Lovers: Double up on the minced garlic in the dip for an intense garlic flavor, perfect for fans of aromatic dishes.
These variations are just the ticket to a customized experience! For more delectable recipes, perfect your snacking game with my Ghost Mores Dip or explore a delicious take on Jalapeno Fries. Let your creativity shine!
Baked Turnip Fries with Creamy Herb Dip Recipe FAQs
How do I choose the best turnips for this recipe?
Absolutely! Look for small to medium-sized turnips that feel firm and heavy for their size. Avoid those with dark spots all over or blemished skin, as these may taste bitter. Freshness is key, so give them a gentle squeeze; they should feel sturdy and not soft.
How should I store leftover baked turnip fries?
Store your leftover baked turnip fries in an airtight container in the refrigerator for up to 3 days. To keep them crispy, it’s best to reheat them in an oven or air fryer at 375°F (190°C) for 10-15 minutes. This way, they’ll regain their delightful crunch for your second snacking experience!
Can I freeze the baked turnip fries?
Very! To freeze, let the baked turnip fries cool completely. Once cooled, arrange them in a single layer on a baking sheet and place it in the freezer for about 1-2 hours until frozen solid. After that, transfer the fries to a freezer bag or airtight container, and they’ll hold their quality for up to 3 months. When you’re ready to enjoy them, bake from frozen at 425°F (220°C) for 20-25 minutes.
What if my fries aren’t crispy?
No worries! If your fries lack crispiness, check if they were overcrowded on the baking sheet; air must circulate around them. Ensure you used enough oil for coating, as this helps with the crunch. Lastly, flipping them halfway through baking can ensure even browning, so give that another try next time!
Are there any dietary restrictions I should be aware of?
Yes! As this recipe contains Greek yogurt (or sour cream) for the dip, those with dairy allergies or lactose intolerance can easily substitute with dairy-free yogurt. Additionally, the spices used are generally safe for most diets, but it’s always good to double-check if there are specific allergies involved.

Baked Turnip Fries with Dip: A Delicious Low-Carb Snack
Ingredients
Equipment
Method
- Preheat your oven to 425°F (220°C) and line a baking sheet with parchment paper.
- Wash and peel the turnips, then cut them into fry-shaped sticks.
- Drizzle the turnip sticks with olive oil and toss to coat evenly.
- Mix garlic powder, smoked paprika, onion powder, salt, and black pepper in a bowl and coat the turnip fries with the mixture.
- Arrange the seasoned turnip fries in a single layer on the baking sheet.
- Bake for 20-25 minutes, flipping halfway through for even browning.
- In a bowl, combine Greek yogurt, chives, dill, minced garlic, and lemon juice to prepare the dip.
- Serve the hot turnip fries with the creamy herb dip and enjoy!
Leave a Reply