
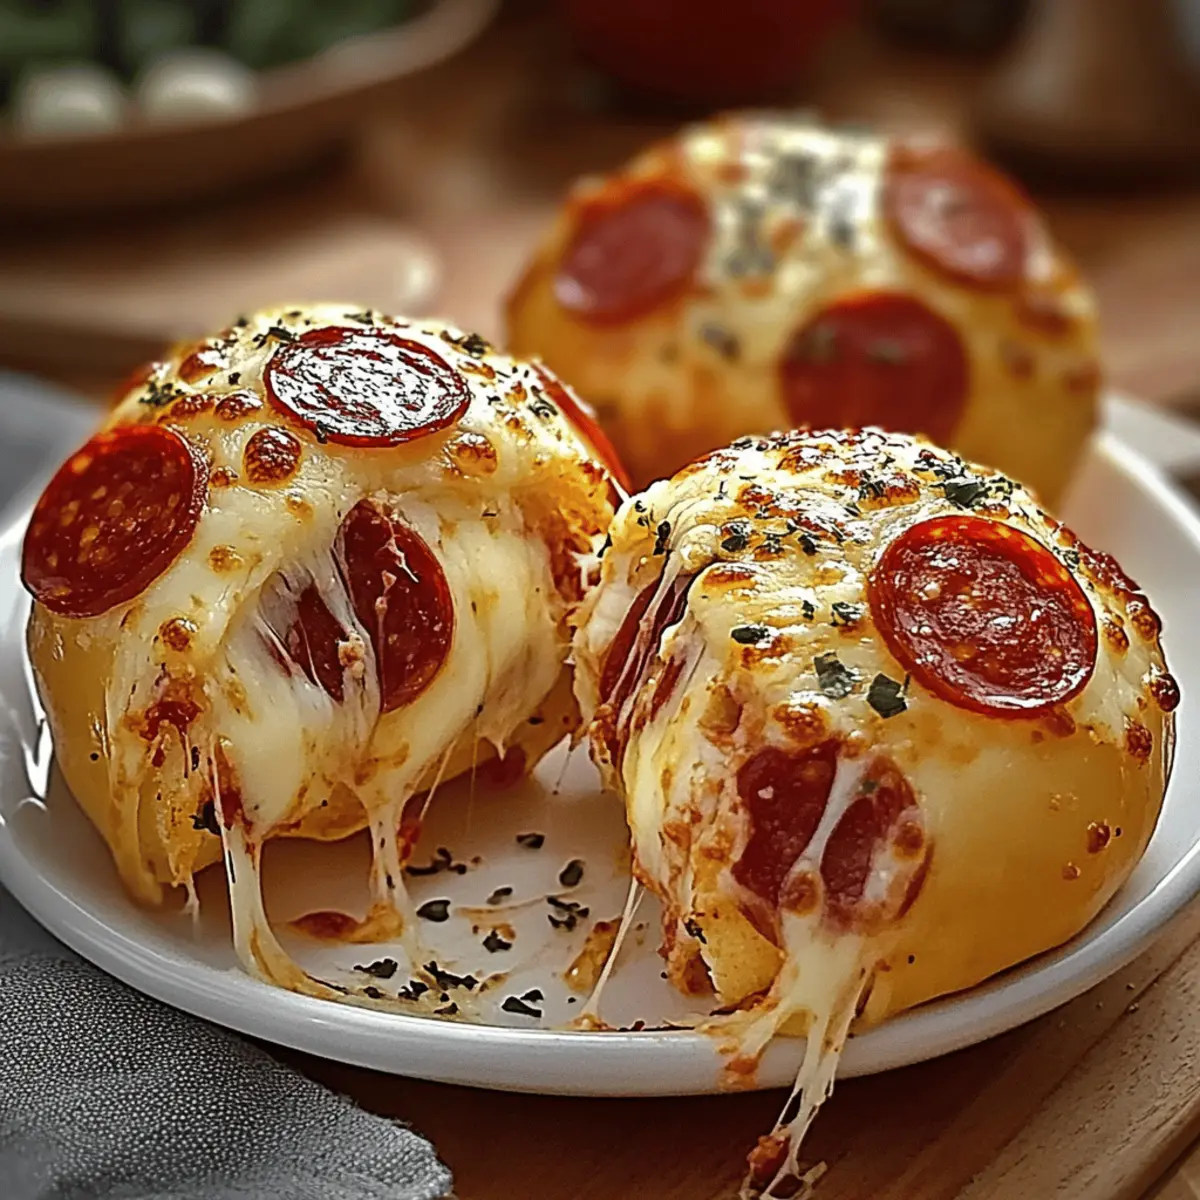
Did you ever find yourself craving pizza but nothing to show for it? Enter Easy Pepperoni Pizza Bombs! These delightful little bites encapsulate the essence of your favorite pizza while being perfectly portable. What makes them even better? They’re not only kid-friendly but also freezer-friendly, meaning you can whip up a batch in no time and stash some for later. Whether you’re hosting game night or looking for a quick family dinner option, these pizza bombs are sure to steal the show. You’ll love the golden, buttery exterior that hugs a gooey, cheesy center packed with pepperoni goodness. Ready to uncover the secret to these tasty treats? Let’s dive into the recipe!
Why Are Pepperoni Pizza Bombs So Irresistible?
Simplicity at Its Best: The recipe is straightforward and perfect for cooks of all skill levels.
Kid-Friendly Delight: Kids adore these cheesy bites, making them a go-to for family meals or after-school snacks.
Freezer-Friendly Convenience: Prepare a big batch ahead of time and store them for those busy weeknights, ensuring a delicious meal is always on hand.
Flavor Explosion: Each bomb delivers all the savory goodness of pizza in a fun, bite-sized form.
Versatile Options: Customize with different cheeses or toppings, making it easy to adapt to everyone’s taste preferences.
With these Pepperoni Pizza Bombs, you won’t just satisfy cravings, but you’ll also transform any gathering into a culinary success!
Pepperoni Pizza Bombs Ingredients
For the Dough
- 2 tablespoons melted butter – Adds a golden finish and rich flavor; brush with extra butter after baking for an irresistible shine.
- 1 can (8 oz) refrigerated biscuit dough – The perfect shortcut that speeds up prep time; crescent roll dough or pizza dough can also be used.
For the Filling
- ¾ cup shredded mozzarella cheese – Melts beautifully for a gooey center; try cheddar or provolone for a different twist.
- ½ cup mini pepperoni slices – These fit perfectly inside the dough; substitute with chopped regular pepperoni or turkey pepperoni for fewer calories.
For the Seasoning
- 1 teaspoon garlic powder – Provides a bold garlic punch that elevates the flavor profile.
- 1 teaspoon Italian seasoning – Enhances the savory profile of the pizza with herbs like oregano and basil.
With these delightful ingredients, whipping up your own Pepperoni Pizza Bombs is not just a cinch; it’s a delicious adventure just waiting to happen!
Step‑by‑Step Instructions for Pepperoni Pizza Bombs
Step 1: Preheat the Oven
Start by preheating your oven to 375°F (190°C). This ensures that your Pepperoni Pizza Bombs will bake evenly and get that golden, bubbly finish. While the oven is warming up, line a baking sheet with parchment paper to prevent sticking and make cleanup a breeze.
Step 2: Prepare the Seasoned Butter
In a small mixing bowl, combine 2 tablespoons of melted butter, 1 teaspoon of garlic powder, and 1 teaspoon of Italian seasoning. Whisk the mixture until well blended. This flavorful butter will enhance the crispy outer layer of the pizza bombs, making them incredibly aromatic and inviting when baked.
Step 3: Flatten the Biscuit Dough
Open the can of refrigerated biscuit dough and pull apart each biscuit. Gently flatten each piece using your hands or a rolling pin to create a larger, more manageable circle. Aim for about 3-4 inches in diameter, ensuring enough space to hold the delicious filling without breaking.
Step 4: Add the Filling
Place a generous tablespoon of shredded mozzarella cheese in the center of each flattened dough circle. Follow this with several mini pepperoni slices, adjusting according to your preference. The cheese will melt and create that gooey center that everyone loves in these Pepperoni Pizza Bombs.
Step 5: Seal the Dough
Carefully pinch the edges of the dough together, ensuring a tight seal around the filling. Roll the dough into a smooth ball, making sure no filling is exposed. This step is crucial as it helps prevent any filling from leaking during baking, keeping each bite delicious.
Step 6: Arrange on Baking Sheet
Place each formed pizza bomb seam-side down on the lined baking sheet. Make sure to leave some space between each one to allow for even rising while baking. Once all the pizza bombs are arranged, use a pastry brush to lightly coat the tops with the seasoned butter mixture.
Step 7: Bake to Perfection
Transfer the baking sheet to your preheated oven and bake the Pepperoni Pizza Bombs for 12-15 minutes. Keep an eye on them; they should turn a lovely golden brown and become beautifully puffed. This lovely transformation indicates that they’re ready to be enjoyed!
Step 8: Cool and Serve
Once baked, remove the pizza bombs from the oven and let them cool for a few minutes. This will help the insides set a bit. Serve them warm with sides of marinara sauce or ranch dressing for dipping. These delightful bites are sure to be a hit at any gathering!
Make Ahead Options
These Easy Pepperoni Pizza Bombs are perfect for meal prep, allowing you to enjoy them with minimal effort on busy days! You can prepare the filling—mozzarella and mini pepperoni—up to 24 hours in advance by combining the ingredients in a bowl and storing them in the refrigerator in an airtight container. Additionally, you can assemble the pizza bombs completely and refrigerate them for up to 3 days before baking. To maintain their quality, make sure to seal them tightly to prevent them from drying out or losing shape. When you’re ready to serve, just bake directly from the refrigerator, adding an extra minute or two to the cooking time for the ultimate cheesy, gooey goodness.
Expert Tips for Pepperoni Pizza Bombs
-
Seal Well: Ensure that each pizza bomb is tightly sealed to prevent any cheese or pepperoni from leaking during baking.
-
Flavor Boost: For an extra kick, sprinkle crushed red pepper flakes or grated Parmesan cheese over the tops before baking.
-
Watch the Bake: Keep an eye on the baking time; ovens vary significantly, so your pizza bombs may need a little more or less time based on their size.
-
Dough Substitutions: Using crescent roll dough will yield a flakier texture, while traditional pizza dough can create a more authentic, chewy bite if you prefer.
-
Cooling Time: Allow the bombs to cool for a few minutes after baking before serving; they will be very hot and their gooey centers need time to set.
These tips will help you create perfect Pepperoni Pizza Bombs every time!
How to Store and Freeze Pepperoni Pizza Bombs
Fridge: Store leftover Pepperoni Pizza Bombs in an airtight container for up to 3 days to maintain their freshness and flavor.
Freezer: If you’ve made a big batch, freeze the uncooked pizza bombs on a baking sheet until firm, then transfer to a freezer-safe bag for up to 2 months.
Reheating: To reheat from frozen, bake at 350°F for 10-12 minutes or microwave in 30-second increments until heated through. Enjoy them warm for the best texture!
Make Ahead: Prepare a batch in advance and freeze them for a quick, delicious snack whenever cravings strike.
Pepperoni Pizza Bombs Variations
Feel free to let your creativity shine and customize these tasty pizza bombs to perfectly suit your taste buds!
-
Vegetarian Delight: Replace mini pepperoni with diced vegetables like mushrooms, bell peppers, or spinach for a fresh, colorful twist. This variation not only tastes amazing, but it also adds nutritional value!
-
Cheese Lovers: Experiment with different cheeses such as cheddar, provolone, or a blend for a unique flavor profile. Mixing cheeses can create an irresistible, melty center that everyone will love.
-
Spicy Kick: Add crushed red pepper flakes alongside the cheese and pepperoni for a bit of extra heat. Spice lovers will appreciate that added flavor burst in each bite!
-
Crescent Roll Twist: Use crescent roll dough instead of biscuit dough for a flakier and more delicate crust. This change brings a delightful lightness that perfectly complements the filling.
-
BBQ Flavor: Swap marinara for a BBQ sauce drizzle, and use pulled chicken instead of pepperoni. This BBQ twist is sure to surprise your taste buds and offer a unique take on the traditional pizza flavor.
-
Mini Pizza Pockets: Roll out the dough thinner and cut into squares before adding the filling. Fold into triangles for cute, bite-sized mini pizza pockets, perfect for dipping!
-
Garlic Herb Butter: Infuse the melted butter with fresh herbs or some Parmesan for an extra flavorful crust. Just a hint of garlic and herb will bump up the aroma and taste!
-
Breakfast Bombs: Swap out the pizza filling for scrambled eggs, cheese, and cooked sausage or bacon for a breakfast version. These will be a hit for brunch or morning gatherings!
With all these variations, your Pepperoni Pizza Bombs can transform into delightful new creations that keep mealtime exciting and flavorful. Looking for more inspiration? Don’t forget to check out our Freezer-Friendly Recipes that make meal prep a breeze!
What to Serve with Pepperoni Pizza Bombs
There’s nothing quite like the warm, cheesy goodness of these pepperoni-filled delights to spark joy in any meal setting.
- Marinara Sauce: A classic dipping partner that enhances the Italian flavors and adds a tangy kick.
- Garlic Aioli: Creamy and rich, this dip adds a sophisticated touch and complements the buttery crust beautifully.
- Fresh Veggie Sticks: Crisp cucumbers, carrots, or bell peppers provide a refreshing crunch, balancing the richness of the pizza bombs.
- Caesar Salad: A side of this classic salad adds a burst of crunch with romaine, parmesan, and tangy dressing, elevating the meal.
- Mozzarella Sticks: For a fun, cheesy experience, serve these alongside your pizza bombs for double the cheesy goodness!
- Sparkling Lemonade: A refreshing drink that cuts through the richness of the bombs, perfect for family or game night gatherings.
- Chocolate Chip Cookies: For dessert, these sweet treats create a comforting close to your meal, sure to satisfy any sweet tooth.
- Pasta Salad: A chilled, flavorful pasta salad adds a lovely variety and makes the meal feel complete and festive.
With these delightful pairings, your Pepperoni Pizza Bombs can transform from a tasty snack into a full-fledged feast everyone will adore!
Pepperoni Pizza Bombs Recipe FAQs
What type of biscuit dough should I use?
For the best results, I recommend using refrigerated biscuit dough as it’s quick and easy. However, you can also opt for crescent roll dough for a flakier texture or traditional pizza dough for a more authentic bite. Each option will yield delicious Pepperoni Pizza Bombs!
How do I store leftover Pepperoni Pizza Bombs?
To keep them fresh, simply store any leftovers in an airtight container in the refrigerator for up to 3 days. This will maintain their flavor and texture for your late-night snacks or quick meals.
Can I freeze Pepperoni Pizza Bombs?
Absolutely! For freezing, prepare the uncooked pizza bombs and place them on a baking sheet. Freeze until firm, then transfer them into a freezer-safe bag. They can be kept in the freezer for up to 2 months. This way, you can have a batch ready to bake whenever cravings hit.
What should I do if my pizza bombs leak while baking?
If you find your pizza bombs leaking, it’s likely due to not sealing them tightly enough. For future batches, ensure you pinch the edges completely closed and roll them into a tight ball. If there’s a leak, don’t worry too much—just enjoy the gooey goodness that escapes!
Are there any dietary considerations for Pepperoni Pizza Bombs?
Yes! For allergen-friendly options, consider using turkey pepperoni or a vegetable mix for a vegetarian version. Always check the labels on your dough and cheese to ensure they meet any dietary requirements. And remember, these can be a fun family snack, but keep them out of reach of pets, as cheese can upset their stomachs!
How long do the pizza bombs take to cook in an air fryer?
If you’re using an air fryer, set it to 350°F (175°C) and cook the pepperoni pizza bombs for about 8 minutes. Keep an eye on them as every air fryer may vary in cooking time. They’ll be perfectly golden and ready to enjoy!
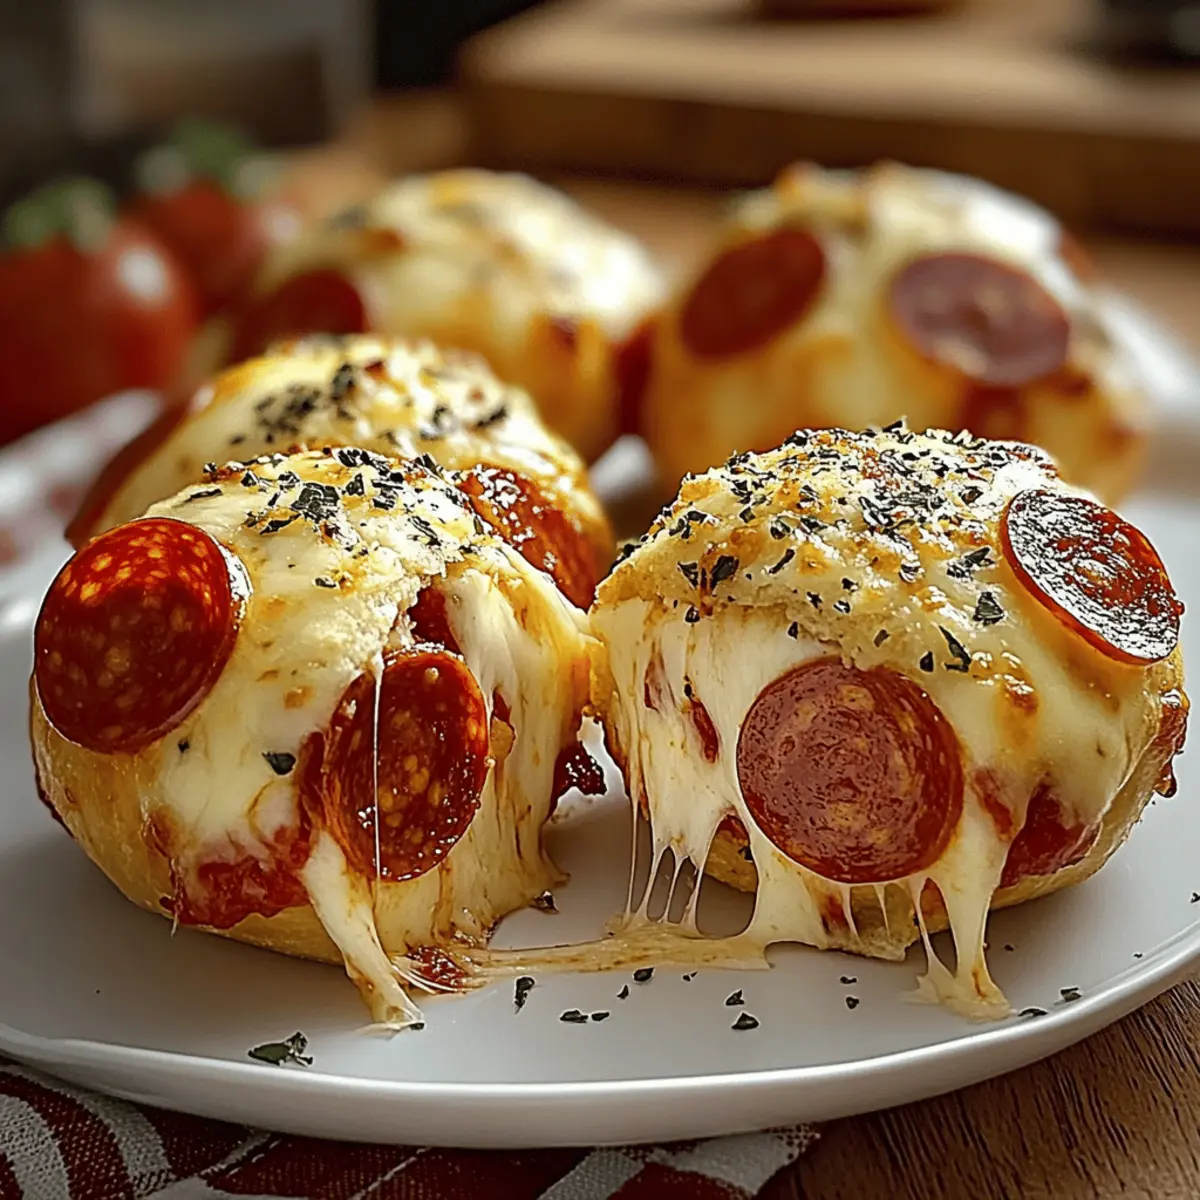
Pepperoni Pizza Bombs: Bite-Sized Cheesy Deliciousness
Ingredients
Equipment
Method
- Preheat your oven to 375°F (190°C) and line a baking sheet with parchment paper.
- In a small mixing bowl, combine 2 tablespoons of melted butter, 1 teaspoon of garlic powder, and 1 teaspoon of Italian seasoning.
- Flatten each biscuit dough piece to create a circle about 3-4 inches in diameter.
- Place a tablespoon of mozzarella cheese in the center of each flattened circle, followed by mini pepperoni slices.
- Pinch the edges of the dough to seal and roll into a smooth ball.
- Arrange the pizza bombs seam-side down on the lined baking sheet and brush the tops with the seasoned butter mixture.
- Bake for 12-15 minutes until golden brown and puffed.
- Let them cool for a few minutes, then serve warm with marinara or ranch dressing.
Leave a Reply