
As I opened my pantry, the inviting smell of caramelized cookie butter wafted through the air, instantly sparking memories of delightful desserts from my childhood. Today, I’m excited to share my take on a No Bake Biscoff Pie, which elegantly combines the velvety richness of cream cheese with the delicious crunch of Biscoff cookies. This easy no bake dessert is your go-to answer for hot summer days or festive gatherings, requiring only a handful of ingredients and minimal prep time. Whether you’re a busy parent or just want to impress your guests with a scrumptious treat, this recipe is a true crowd-pleaser that will make your taste buds sing. Are you ready to whip up this creamy dream dessert and create some sweet memories together?
Why is this No Bake Biscoff Pie irresistible?
Effortless Preparation: This pie requires no baking, making it perfect for those busy days when you crave something sweet without the hassle.
Decadent Flavor: The silky blend of cream cheese and Biscoff cookie butter creates a rich, indulgent flavor that you won’t forget.
Versatile Options: Feel free to experiment with different crusts or cookie butters, ensuring every pie can be a new experience!
Chill Factor: Best served chilled, it’s a refreshing dessert ideal for hot summer gatherings or festive celebrations.
Unforgettable Treat: Impress your loved ones with this creamy delight, perfect for both casual get-togethers and special occasions alike.
Dive into more delicious recipes like these Biscoff Macarons Deliciously or the delightful One Pot Pie.
No Bake Biscoff Pie Ingredients
• Gather these key ingredients for your No Bake Biscoff Pie to create a deliciously creamy dessert.
For the Crust
- Biscoff pie crust – Provides a crunchy texture that complements the creamy filling. Feel free to substitute with a graham cracker crust for a different twist.
For the Filling
- Cream cheese – Delivers richness and creaminess to the dessert. Make sure it’s softened beforehand for easy mixing.
- Biscoff cookie butter – The star ingredient that imparts the pie’s signature flavor. You can swap it with another flavored cookie butter or nut butter for a fun variation.
- Powdered sugar – Sweetens the filling and aids in stabilization. Using brown sugar can add a deliciously deeper flavor.
- Cool Whip – Contributes lightness and volume to the filling. For an even fresher option, try using homemade whipped cream instead.
You’re just a few ingredients away from creating a memorable dessert that your friends and family will adore!
Step‑by‑Step Instructions for No Bake Biscoff Pie
Step 1: Prepare the Filling
In a large mixing bowl, use an electric mixer to beat together 8 ounces of softened cream cheese and 1 cup of Biscoff cookie butter. Blend on medium speed for about 2-3 minutes until the mixture is velvety and smooth. Ensure there are no lumps for the perfect creamy texture, which is a hallmark of your No Bake Biscoff Pie.
Step 2: Add Sweetness
Gradually sift in 1 cup of powdered sugar while mixing on low speed to prevent a sugar cloud. Continue beating the mixture for another minute or until the sugar is fully incorporated and no longer gritty. This step is crucial for balancing the richness of the filling with just the right amount of sweetness that will captivate your taste buds.
Step 3: Fold in the Cool Whip
Gently fold in 1 cup of Cool Whip into the cream cheese and cookie butter mixture using a spatula. Take care to preserve the lightness of the whipped topping, which will elevate your pie’s texture. Continue folding until the mixture is well-combined, turning it into a luscious filling for your No Bake Biscoff Pie.
Step 4: Assemble the Pie
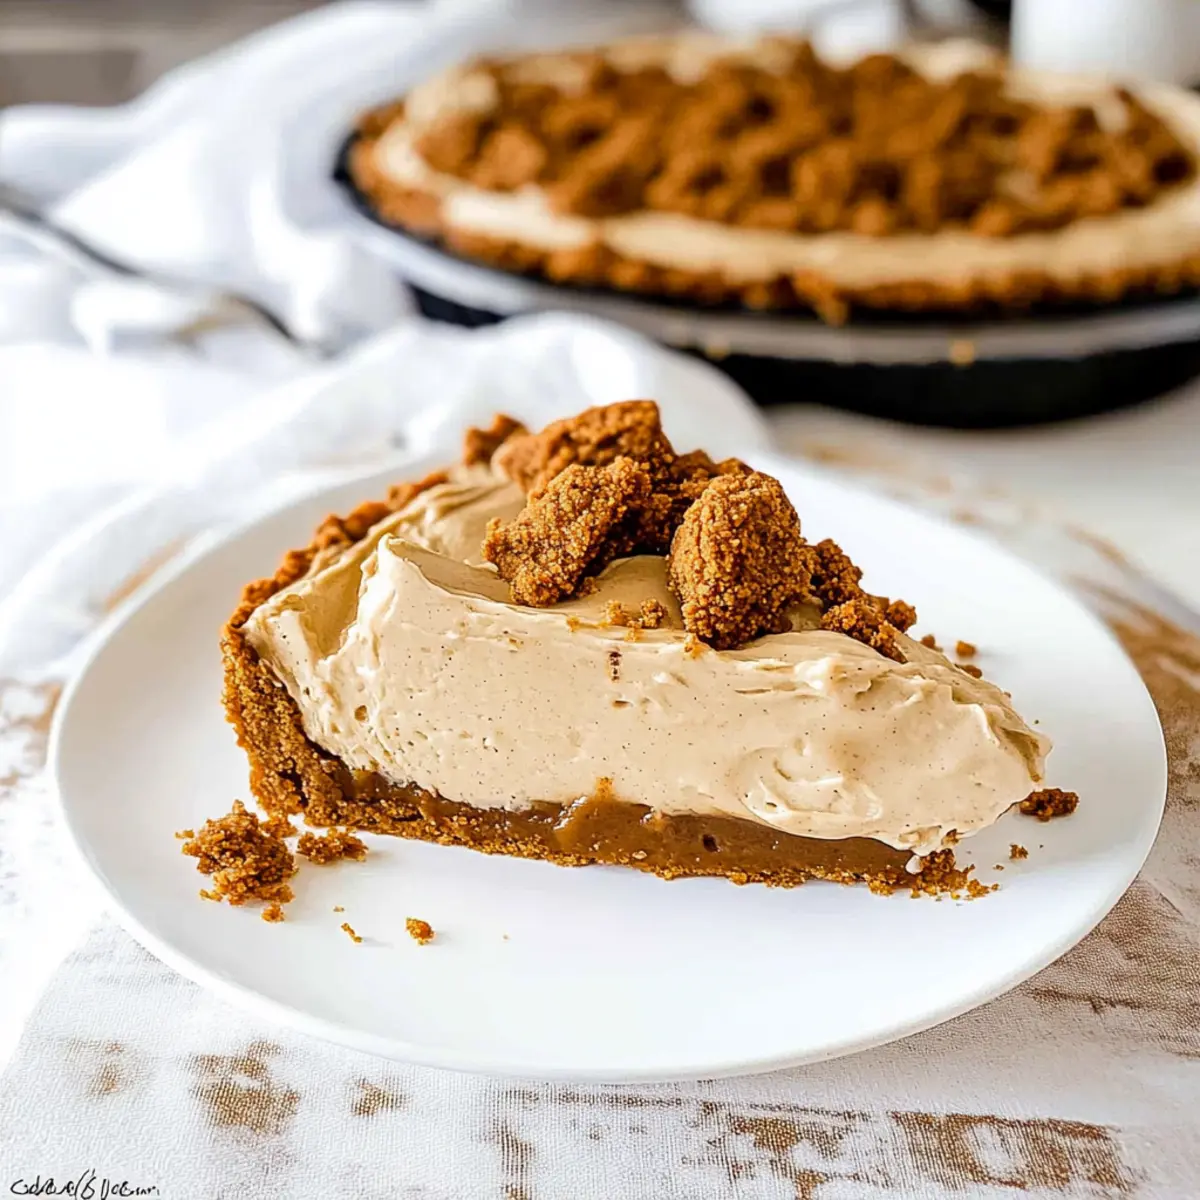
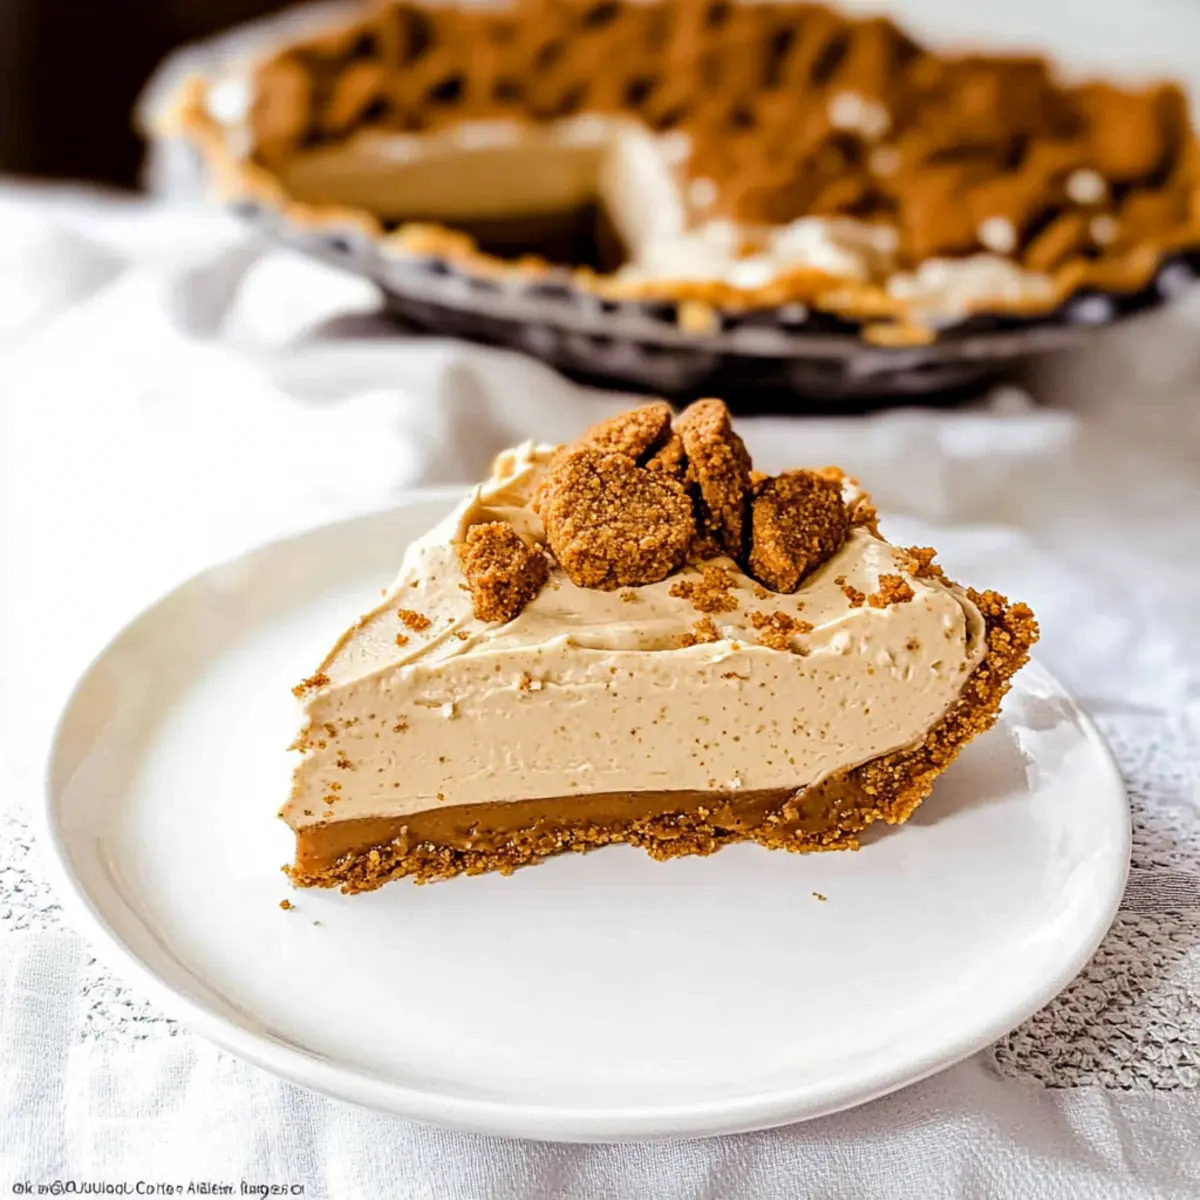
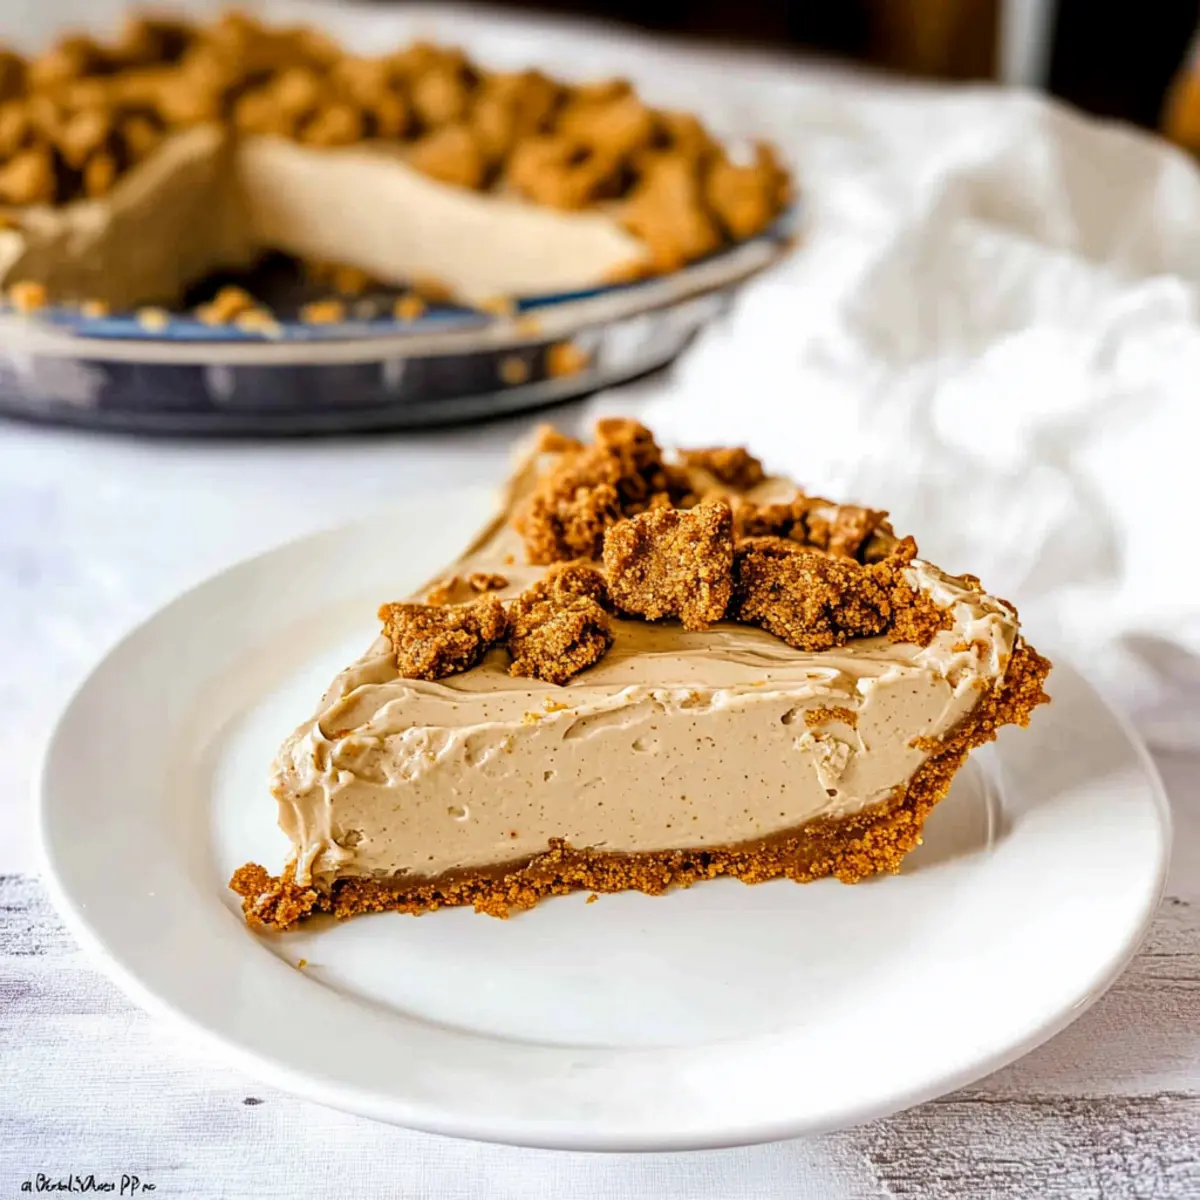
Spoon the creamy filling into your prepared Biscoff pie crust, ensuring an even layer across the entire surface. Use a spatula to smooth the top perfectly and create an enticing presentation before chilling. This step is essential for getting that ideal look for when you serve your pie.
Step 5: Chill the Pie
Cover the pie with plastic wrap and place it in the refrigerator for at least 3 hours, or longer if possible. Chilling not only allows the filling to firm up but also helps the flavors meld beautifully together, making your No Bake Biscoff Pie truly irresistible when you finally slice into it.
Step 6: Serve and Enjoy
Once chilled, it’s time to slice into your No Bake Biscoff Pie. For an extra delightful touch, consider topping each slice with whipped cream, chocolate shavings, or crushed Biscoff cookies. Each bite will be a heavenly experience that is perfect for sharing with family and friends.
No Bake Biscoff Pie Variations
Personalize your No Bake Biscoff Pie with these delightful twists and substitutions that will tantalize your taste buds!
- Graham Cracker Crust: Swap the Biscoff crust for a buttery graham cracker crust for a classic take.
- Dairy-Free: Use coconut cream and dairy-free cream cheese for a dreamy vegan option. It gives the pie a tropical twist!
- Nutty Addition: Stir in chopped nuts like pecans or walnuts into the filling for an added crunch. It elevates the texture brilliantly!
- Flavorful Swaps: Try using Nutella or speculoos spread instead of Biscoff cookie butter for a unique flavor profile. Each bite will be a new adventure!
- Chocolate Indulgence: Add melted chocolate into the filling for an irresistible chocolatey flair. Your chocolate-loving friends will thank you!
- Citrus Zest: Incorporate lemon or orange zest into the filling for a refreshing citrus note. It adds a vibrant twist that wakes up the senses.
- Spicy Kick: Mix in a pinch of cinnamon or a dash of cayenne pepper for those who enjoy a little heat with their sweetness. It’s an unexpected but delightful combination!
Explore exciting ideas that can transform your pie, much like those scrumptious delights in the Coconut Cream Pie or the classic Apple Butter Pie. Enjoy your culinary journey!
Tips for the Best No Bake Biscoff Pie
-
Prep Ahead: Make the pie a day in advance to enhance the flavor and achieve a firmer texture, allowing it to set beautifully.
-
Proper Mixing: Ensure your cream cheese is softened before mixing; otherwise, you’ll end up with lumps in your filling that can spoil the creamy texture of your No Bake Biscoff Pie.
-
Gentle Folding: When adding Cool Whip to the filling, fold gently to maintain the lightness. Avoid overmixing to keep the filling airy and delightful.
-
Chill Time: Allow the pie to chill for a minimum of 3 hours. Patience ensures the flavors meld together, resulting in an irresistible dessert.
-
Creative Toppings: Enhance your slices by topping them with whipped cream, chocolate shavings, or crushed Biscoff cookies for added texture and flavor.
Make Ahead Options
These No Bake Biscoff Pie are a fantastic option for meal prep, especially when you have a busy schedule! You can prepare the filling up to 24 hours in advance, ensuring time for all the flavors to meld beautifully. Simply mix the cream cheese, Biscoff cookie butter, and powdered sugar as usual, then fold in the Cool Whip, and store the mixture in an airtight container in the refrigerator. The crust can also be made ahead of time and kept tightly wrapped for up to 3 days. When you’re ready to serve, fill your crust with the chilled filling, smooth the top, and let it set for another hour in the fridge. This way, your No Bake Biscoff Pie will taste just as delicious as if made fresh, saving you time for gatherings and celebrations!
What to Serve with No Bake Biscoff Pie
When you’re ready to elevate your dessert experience, think about delightful pairings that complement its creamy decadence.
-
Fresh Berries: The tartness of strawberries or raspberries cuts through the richness, offering a refreshing contrast that’s visually appealing too.
-
Whipped Cream: A dollop of freshly whipped cream adds extra creaminess and lightness, making each slice feel even more indulgent.
-
Crushed Biscoff Cookies: Sprinkling crushed cookies on top provides an irresistible crunch and echoes the flavors of the pie, enhancing its cookie butter essence.
-
Chocolate Sauce: A drizzle of chocolate sauce introduces a sweet bitterness that creates a luxurious flavor union, perfect for chocolate lovers.
-
Vanilla Ice Cream: The creaminess of vanilla ice cream melds perfectly with the pie, and its cold temperature enhances the overall eating experience.
-
Espresso or Coffee: Serve a cup of espresso alongside for a cozy finish; the coffee’s bitterness beautifully balances the dessert’s sweetness.
With these pairings, you’ll create a full sensory experience that will keep everyone coming back for seconds!
How to Store and Freeze No Bake Biscoff Pie
Refrigerator: Store your No Bake Biscoff Pie in the fridge for up to 3-5 days, covering it with plastic wrap to keep it fresh and prevent odors from seeping in.
Freezer: If you want to keep it longer, you can freeze the pie for up to 2 months. Be sure to wrap it tightly in plastic wrap and then in aluminum foil for maximum freshness.
Thawing: When ready to enjoy, thaw the pie in the fridge for about 6-8 hours or overnight before slicing for easier serving and the best texture.
Reheating: Since this is a no bake dessert, there’s no need for reheating. Just serve chilled, and you’re good to go!
No Bake Biscoff Pie Recipe FAQs
What type of Biscoff cookies should I use for the crust?
You can use store-bought Biscoff cookie crumbs specifically made for pie crusts, or you can easily crush whole Biscoff cookies into fine crumbs at home using a food processor or a resealable plastic bag and a rolling pin. Either option will work wonderfully, but I recommend using the cookie crumbs for a more straightforward crumbling experience!
How should I store my No Bake Biscoff Pie?
Store your pie in the refrigerator, covered with plastic wrap, for up to 3-5 days. Keeping it well-sealed helps maintain its freshness and prevents any odors from affecting the pie’s flavor. If you plan to enjoy it longer, follow the freezing instructions below.
Can I freeze No Bake Biscoff Pie, and how?
Yes, you can freeze this pie for up to 2 months! To do so, wrap it tightly in plastic wrap followed by aluminum foil to protect it from freezer burn. When you’re ready to enjoy it, thaw the pie slowly in the refrigerator for about 6-8 hours or overnight before slicing for the best texture.
What if my filling is too runny?
If your filling appears too runny, it may be due to under-mixing or not enough time in the refrigerator. I recommend checking the cream cheese temperature; it must be softened, but not overly warm. If this happens, try chilling the pie longer to allow it to set properly. For an immediate fix, a sprinkling of powdered sugar can help thicken the filling, but be careful not to over-sweeten it!
Are there any allergy considerations for this recipe?
The ingredients include cream cheese, Cool Whip (which may contain dairy), and Biscoff cookies (which may have traces of nuts). If you have allergies, consider using dairy-free cream cheese and whipped toppings as substitutes. It’s always best to check labels and adjust based on your specific dietary needs to ensure a safe and delicious dessert!
Can I use different flavored cookie butters for variations?
Absolutely! Experimenting with different flavored cookie butters—like chocolate or almond—can result in delightful twists on this recipe. Adjust the amounts slightly based on sweetness levels if you switch to a more intensely flavored nut butter, and you’ll create a unique masterpiece every time!

Creamy No Bake Biscoff Pie That Will Wow Your Taste Buds
Ingredients
Equipment
Method
- In a large mixing bowl, use an electric mixer to beat together 8 ounces of softened cream cheese and 1 cup of Biscoff cookie butter on medium speed for 2-3 minutes until velvety and smooth.
- Gradually sift in 1 cup of powdered sugar while mixing on low speed, continuing to beat until fully incorporated.
- Gently fold in 1 cup of Cool Whip into the mixture using a spatula until well-combined.
- Spoon the creamy filling into your prepared Biscoff pie crust, smoothing the top before chilling.
- Cover the pie with plastic wrap and place it in the refrigerator for at least 3 hours.
- Once chilled, slice and serve, optionally topping each slice with whipped cream, chocolate shavings, or crushed Biscoff cookies.
Leave a Reply