
As the leaves start to change and Halloween creeps closer, I find myself daydreaming about all the sweet treats we can create. These Easy Halloween Cake Pops are just the ticket, blending delightful flavors like chocolate and pumpkin spice while bringing a touch of whimsy to your kitchen. Not only are these delicious cake pops easy to make, but they also cater to various dietary needs, including gluten-free and dairy-free options, ensuring everyone can enjoy the spooky fun. Get your family involved in this sweet adventure where everyone can contribute to crafting edible eyeballs and ghosts that will wow your guests. Are you ready to whip up these festive delights?
Why Are These Halloween Cake Pops Perfect?
Customizable options make these cake pops a hit for any taste—choose from chocolate, vanilla, or warm pumpkin spice flavors. Diet-friendly alternatives, such as gluten-free or dairy-free mixes, ensure everyone can indulge guilt-free. Quick and easy to prepare, they’re ideal for busy home cooks and budding chefs alike. Plus, kid-friendly fun means your little ones can help decorate these spooky treats, transforming baking into a memorable family activity. With their festive flair, these cake pops are sure to be the centerpiece at any Halloween gathering, making them a crowd-pleaser every time! Looking for more Halloween fun? Try our Halloween Vampire Bite for a spooky dessert twist!
Delicious Halloween Cake Pops Ingredients
For the Cake Base
• Cake Mix – Use chocolate, vanilla, or pumpkin spice for flavor; gluten-free options work wonderfully too.
• Eggs – 2-3 eggs based on package requirements act as the perfect binding agent.
• Water or Milk – Milk is recommended for a richer texture, but water works if you prefer.
For the Filling and Coating
• Frosting – Add chocolate or cream cheese frosting for moisture and sweetness, or opt for dairy-free varieties.
• Chocolate Melts – Choose high-quality dark, milk, or white chocolate for an irresistible coating.
For Decoration
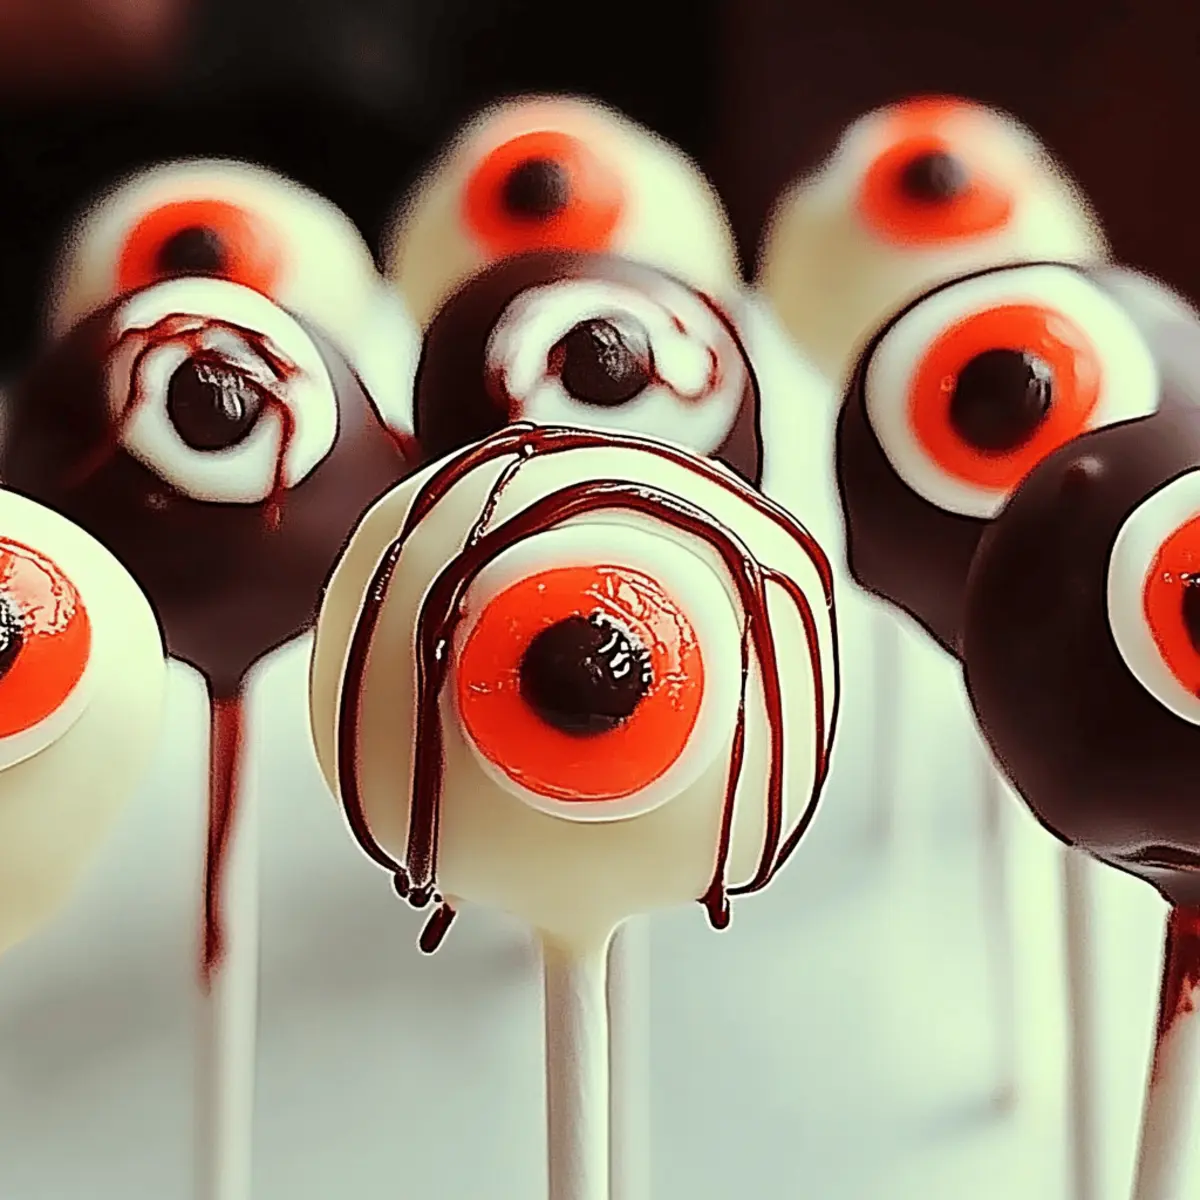
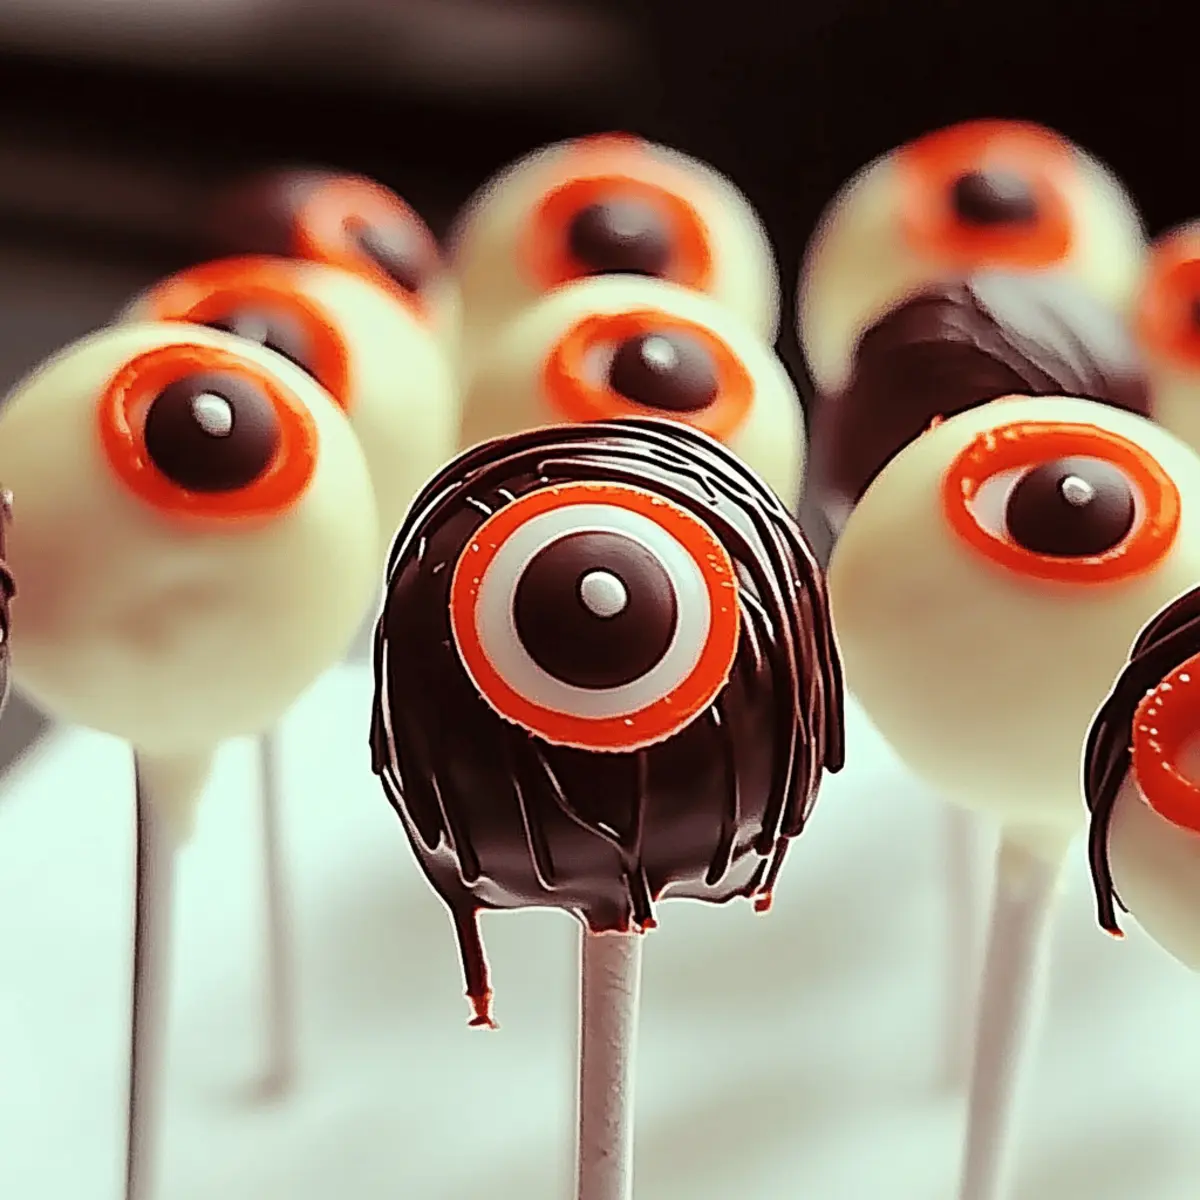
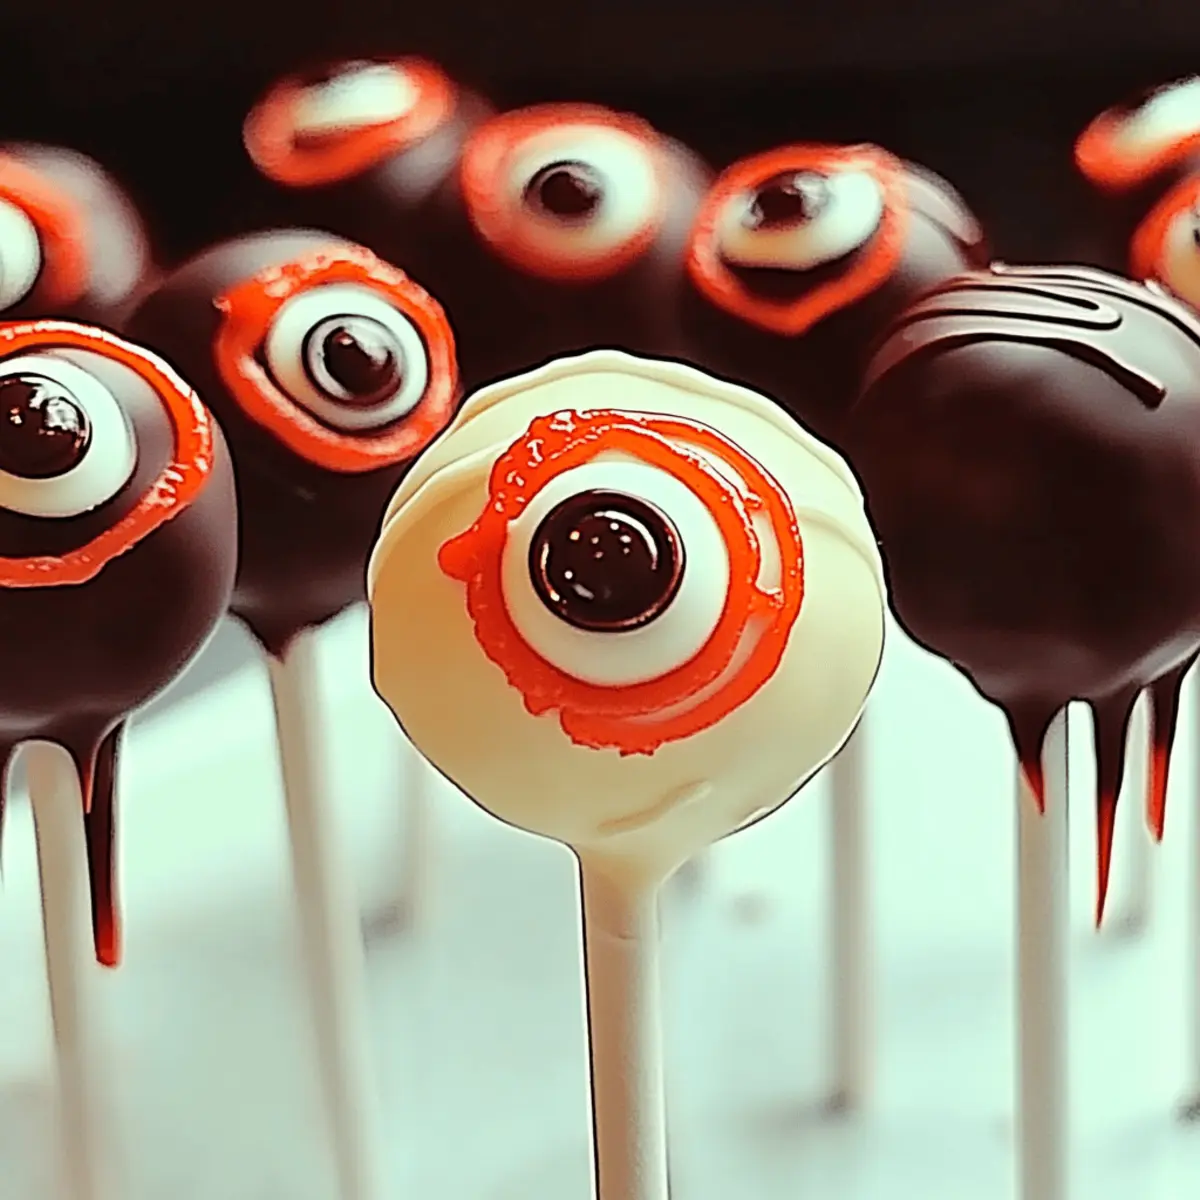
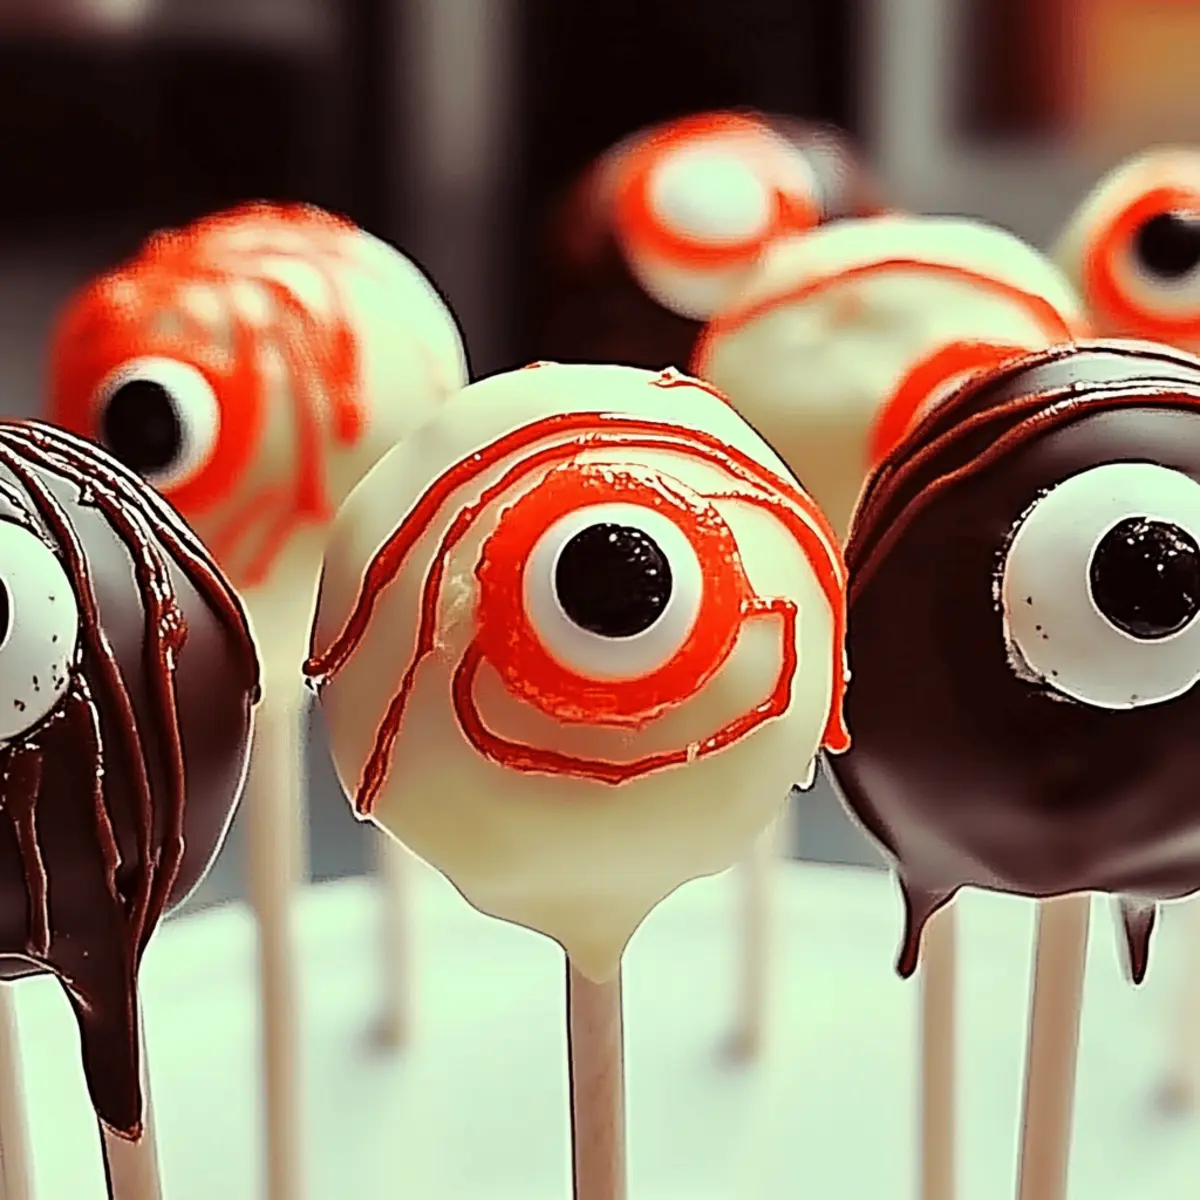
• Candy Eyes – These fun decorations will bring your cake pops to life with a spooky flair!
• Red Icing – Perfect for a creepy bloodshot effect that enhances the Halloween theme.
• Sprinkles or Edible Glitter – Use Halloween-themed colors to add an extra magical touch!
These ingredients will help you create delicious Halloween cake pops that will leave everyone enchanted!
Step‑by‑Step Instructions for Delicious Halloween Cake Pops
Step 1: Preheat the Oven
Begin by preheating your oven to 350°F (175°C). This step is crucial as it ensures the cake mix bakes evenly and thoroughly. Prepare a greased cake pan, making sure to cover all corners to prevent sticking. The goal is to have a warm oven ready, so the cake base will rise beautifully and bake to a golden perfection.
Step 2: Mix the Cake Batter
In a large mixing bowl, combine your chosen cake mix, eggs, and water or milk. Use a hand mixer or whisk to blend until smooth and lump-free, which takes about 2–3 minutes. You should see a rich, creamy batter. This delightful mixture is the foundation of your Delicious Halloween Cake Pops, so ensure everything is well incorporated for the best texture.
Step 3: Bake the Cake
Pour the cake batter into the prepared pan and place it in the preheated oven. Bake for 25–30 minutes or until a toothpick inserted in the center comes out clean. Watch closely for a light golden color on the edges. Once done, remove the cake from the oven and let it cool completely on a wire rack, allowing it to firm up for easier crumbling.
Step 4: Crumble the Cake
Once the cake has cooled, crumble it into fine crumbs using your hands in a large bowl. The texture should resemble sand. This is a vital step to ensure the cake mixes well with the frosting. Combine the crumbled cake with your preferred frosting, stirring until the mixture holds together firmly—test by rolling it into a ball shape.
Step 5: Shape the Cake Balls
Using your hands, roll the cake mixture into golf ball-sized spheres and place them on a lined baking sheet. Aim for uniform sizes to ensure even coating later on. The shaping process should feel fun and easy; this is where your cake pops start taking form, so embrace the creativity of your Delicious Halloween Cake Pops!
Step 6: Chill the Cake Balls
Refrigerate the shaped cake balls for at least 30 minutes. Chilling is essential as it helps the cake pops firm up, making the dipping process smoother. If you’re in a hurry, a quick 15-minute freeze can work too. Once chilled, they should be slightly firm to the touch, ready for their sweet chocolate coating.
Step 7: Melt the Chocolate
In a microwave-safe bowl, melt your chocolate melts according to the package instructions. Generally, heating in 30-second intervals, stirring in between, ensures a smooth and glossy consistency. This melted chocolate will be the delicious coating for your cake pops, so make sure it’s all melted without any lumps for that perfect finish.
Step 8: Dip the Cake Balls
Carefully dip each chilled cake ball into the melted chocolate, using a fork to fully coat it. Tap gently on the side of the bowl to allow excess chocolate to drip off. This step is key for an even, delicious layer that will shine. Make sure the chocolate is still wet when you proceed to the next step for decoration.
Step 9: Decorate the Cake Pops
While the chocolate coating is still wet, press candy eyes into the cake pops for a spooky effect. Use red icing to create bloodshot eyes or any fun designs you like. This decorating step transforms your cake pops into fun Halloween characters, making your Delicious Halloween Cake Pops truly festive and charming!
Step 10: Let Them Set
Set the decorated cake pops upright in styrofoam or a heavy-bottomed mug to harden completely. This allows the chocolate coating to set without smudging your careful decorations. Allow at least 30 minutes for them to achieve a firm texture and glossy finish. Once set, admire your spooktacular creations ready to delight friends and family!
How to Store and Freeze Delicious Halloween Cake Pops
Fridge: Store your cake pops in an airtight container for up to 1 week. Place parchment paper between layers to prevent sticking and keep your treats fresh.
Freezer: Individually wrap each cake pop in plastic wrap and store in a freezer-safe bag for up to 3 months. Thaw in the fridge before serving for optimal texture.
Room Temperature: If you plan to serve the cake pops within a day, they can be kept at room temperature in a cool, dry area. However, avoid direct sunlight to maintain their quality.
Reheating: If desired, you can gently warm the chocolate coating with a microwave for a few seconds before decorating again. This will help restore the glossy appearance of your delicious Halloween cake pops.
Delicious Halloween Cake Pops Variations
Get ready to unleash your creativity with these delightful twists on your Halloween Cake Pops! Customizing your treats can take them to a whole new level of fun and flavor.
- Gluten-Free: Use a gluten-free cake mix to ensure everyone can join in on the spooky fun.
- Dairy-Free: Swap out chocolate melts and frosting for dairy-free alternatives to cater to those with lactose sensitivities.
- Flavor Boosts: Add a teaspoon of flavored extracts, like almond or peppermint, to your batter for a surprise twist.
- Textural Twist: Mix in crushed Oreos or nuts into your cake mixture for an added crunch in every bite. The contrast of textures will elevate your pops delightfully.
- Seasonal Spices: Enhance the fall vibes by incorporating cinnamon or nutmeg into the mixture. Pair these with our Pumpkin Cake Moist for a truly comforting flavor explosion!
- Colorful Coatings: Try using vibrant colored chocolate melts in shades of orange or purple to make your cake pops even more festive.
- Boozy Addition: For a grown-up version, add a splash of flavored liqueurs to the frosting. This unexpected treat is sure to be a hit at your Halloween gatherings.
- Peanut Butter Swirl: Drizzle creamy peanut butter into the frosting for a nutty flavor that complements the sweetness beautifully.
These variations are here to inspire you and keep your Halloween festivities tantalizing and inclusive! Enjoy bringing your unique twist to the table while keeping your cakes popping with flavor and fun!
Expert Tips for Delicious Halloween Cake Pops
• Chill to Firm Up: Make sure to chill your cake balls for at least 30 minutes before coating. This prevents them from falling apart during the dipping process.
• Quality Coating: Use high-quality chocolate melts for a glossy finish and rich flavor. Avoid cheap options that can clump or not melt smoothly.
• Cool Before Crumble: Ensure your cake is completely cooled before crumbling. This is key to preventing a mixture that’s too moist, which can make rolling difficult.
• Decorate While Wet: Always add candy eyes and decorations while the chocolate coating is still wet. This helps them stick better and gives a more polished look to your delicious Halloween cake pops.
• Experiment with Flavors: Don’t hesitate to try different cake and frosting flavors! Mixing in pumpkin spice or almond extract can add an exciting twist to your spooky treats.
What to Serve with Easy Halloween Cake Pops?
Imagine the delightful crunch of treats and festive flavors swirling around your Halloween gathering, complementing your cake pops perfectly.
-
Spooky Fruit Platter: A mix of seasonal fruits like clementines and apples, this adds freshness and a rainbow of colors to balance the sweetness of the cake pops.
-
Witch’s Brew Punch: A fizzy, colorful punch with soda and candy eyeballs brings a fun drink that echoes the spirit of Halloween and keeps guests refreshed.
-
Ghostly Marshmallow Treats: These chewy, marshmallow ghost pops are a playful treat that beautifully matches the Halloween theme and adds another texture to your buffet.
-
Caramel Dipped Pretzels: The saltiness of pretzels paired with sweet caramel creates a delightful contrast that lingers on the palate, making a perfect crunchy companion.
-
Mummy Hot Dogs: Wrapped in crescent dough and baked to golden perfection, these savory bites are an interactive and playful way to enhance your spooky menu.
-
Pumpkin Spice Latte: This cozy, spiced drink pairs wonderfully with your cake pops, creating a delightful harmony of flavors that embraces the season.
-
Chocolate-Covered Strawberries: Rich and sweet, these treats offer a nice contrast to the flavors of your delicious Halloween cake pops while maintaining a festive presentation.
-
Gummy Worms: Placing these vibrant candies around your cake pops can heighten the Halloween aesthetic while offering chewy, tasty fun for all ages.
Each of these pairing ideas not only enhances the festive spirit but also creates a delightful spread that your friends and family will love!
Make Ahead Options
These Delicious Halloween Cake Pops are perfect for busy home cooks looking to save time! You can prepare the cake base up to 24 hours in advance; simply bake the cake, cool completely, and crumble it into fine crumbs. Mix the crumbs with frosting and shape them into balls, then chill in the refrigerator. Once you’re ready to decorate and serve, simply dip the chilled cake balls in melted chocolate, add your fun candy eyes and red icing details, and let them set. For optimal freshness, store the uncoated cake balls in an airtight container in the refrigerator for up to three days before finishing them. This way, they’ll be just as delicious and enjoyable when it’s time to celebrate!
Delicious Halloween Cake Pops Recipe FAQs
What type of cake mix works best for Halloween Cake Pops?
Absolutely! You can use chocolate, vanilla, or pumpkin spice cake mixes to align with your flavor preferences. For those needing dietary accommodations, gluten-free cake mixes work wonderfully too, ensuring everyone can enjoy a delicious treat!
How should I store my Halloween Cake Pops?
To keep your cake pops fresh, store them in an airtight container in the refrigerator for up to 1 week. I always recommend placing parchment paper between layers to prevent sticking. If you’re making them ahead of time, they can also be frozen.
Can I freeze Halloween Cake Pops?
Yes! To freeze your delicious Halloween cake pops, individually wrap each one in plastic wrap and place them in a freezer-safe bag. They can be stored for up to 3 months. When you’re ready to enjoy them, simply thaw them in the refrigerator for a few hours to bring them back to their delightful state.
What should I do if the cake pops are falling apart while coating?
If you find your cake pops falling apart, ensure they are well-chilled before dipping. Refrigerating them for at least 30 minutes helps them firm up. Additionally, make sure the cake mixture is properly combined with frosting—if it’s too dry, add a bit more frosting to help hold everything together.
Are there any allergy considerations for these cake pops?
Definitely! For those with dietary restrictions, you can use gluten-free cake mixes and substitute dairy-free chocolate melts and frosting to accommodate lactose intolerance or dairy allergies. Always check the labels of your ingredients to ensure they meet your specific needs.
Can I use different types of decorations on my cake pops?
The more the merrier! You can customize your cake pops with various decorations like sprinkles or edible glitter in Halloween-themed colors. Additionally, feel free to get creative with other toppings like crushed nuts or coconut for a fun textural twist!
Delicious Halloween Cake Pops That Are Spooktacularly Easy
Ingredients
Equipment
Method
- Preheat your oven to 350°F (175°C) and grease a cake pan.
- In a large mixing bowl, combine your cake mix, eggs, and water or milk.
- Pour the cake batter into the prepared pan and bake for 25–30 minutes.
- Once cooled, crumble the cake into fine crumbs in a large bowl.
- Mix the crumbled cake with your preferred frosting until it holds together.
- Roll the mixture into golf ball-sized spheres and place on a lined baking sheet.
- Refrigerate the cake balls for at least 30 minutes to firm up.
- Melt the chocolate melts in a microwave-safe bowl in 30-second intervals.
- Dip each chilled cake ball into the melted chocolate using a fork.
- Press candy eyes into the chocolate coating while still wet for decoration.
- Set the decorated cake pops upright in Styrofoam or a heavy-bottomed mug to harden.
Leave a Reply