
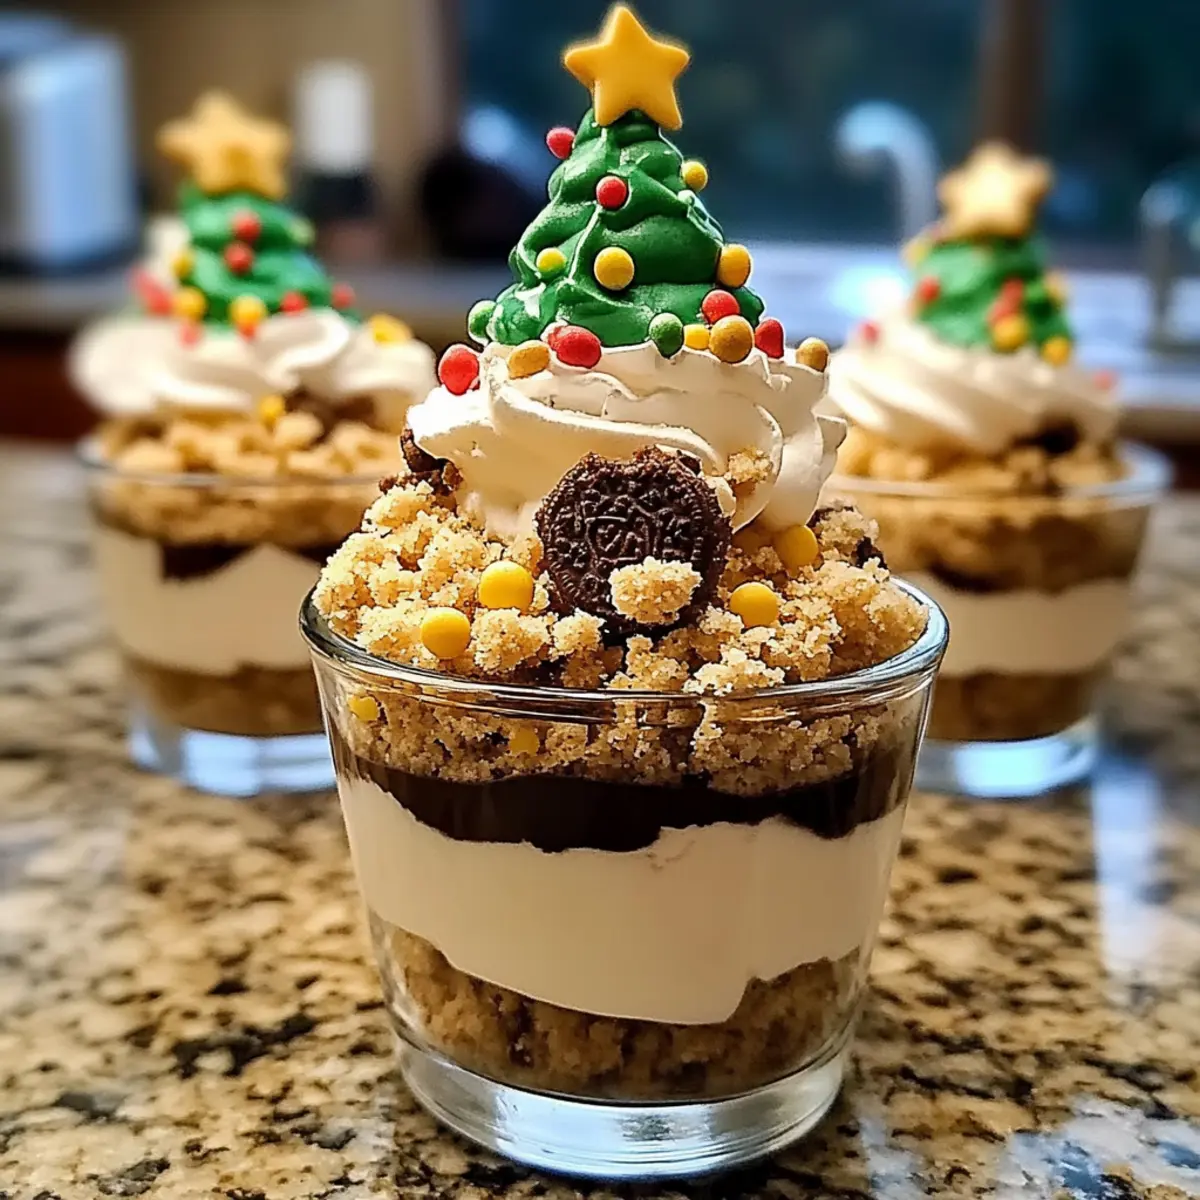
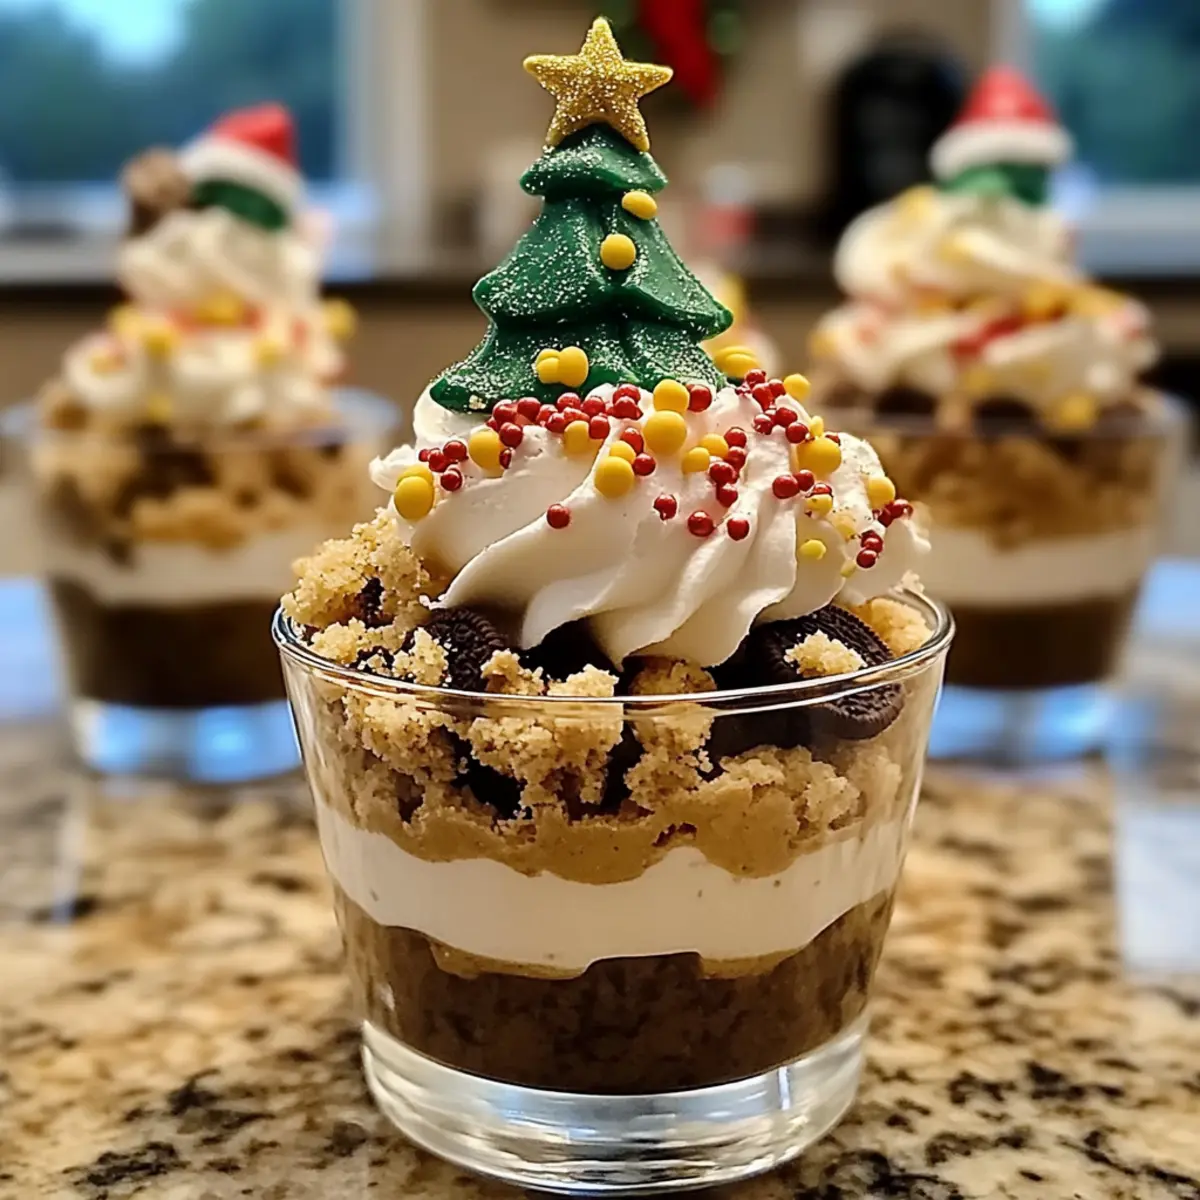
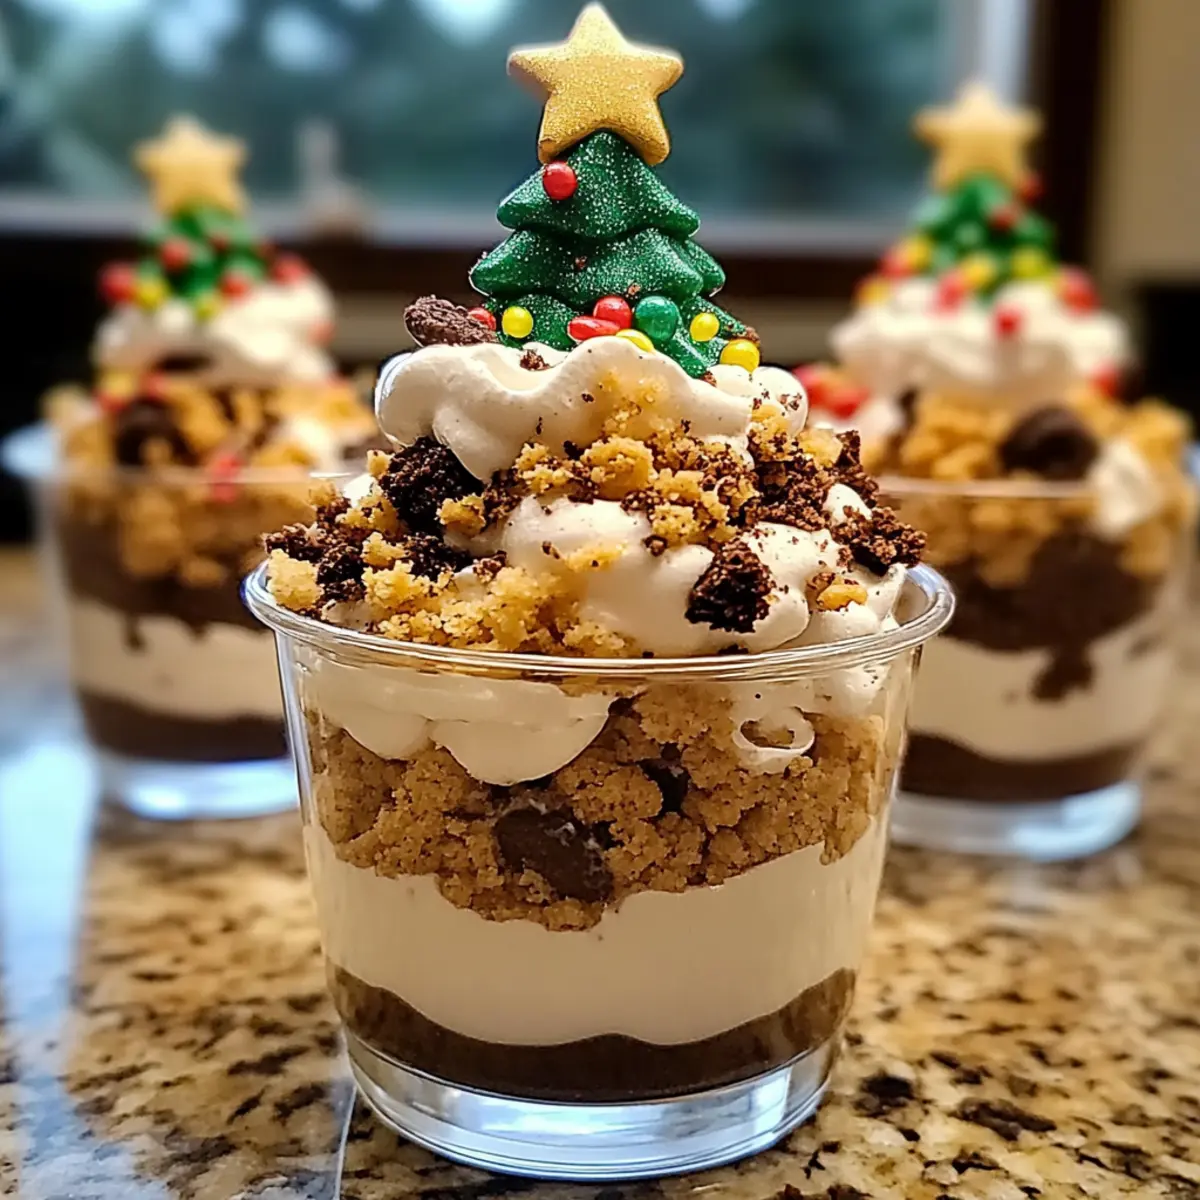
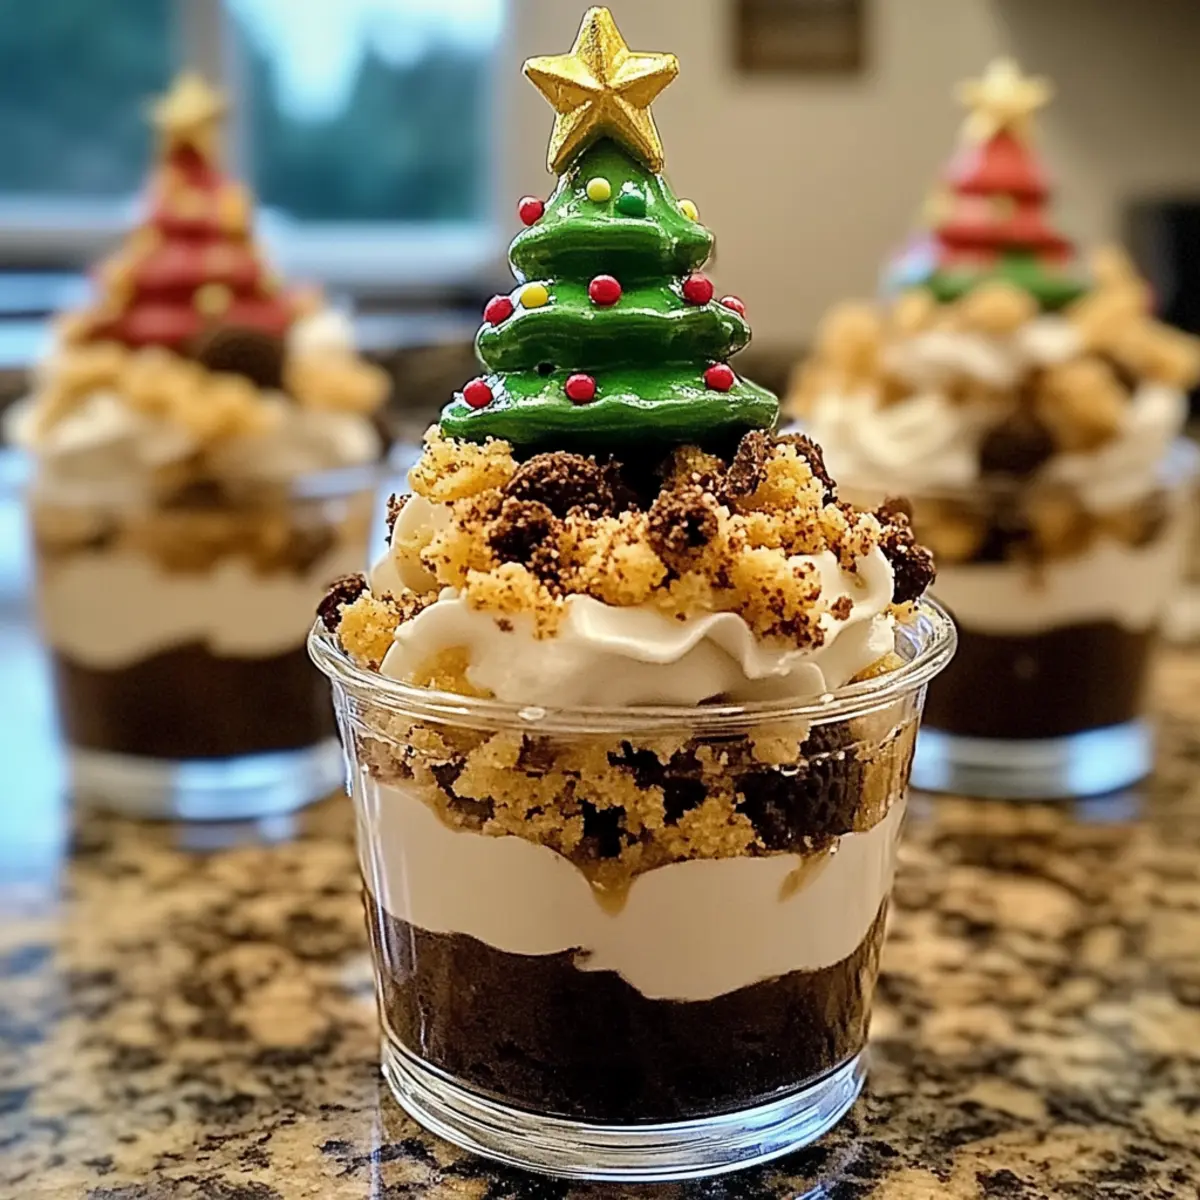
As the first snow gently settles outside, I can’t help but get swept up in the magic of the holiday season—and these No Bake Christmas Dirt Cups bring that joy right to my kitchen! Each delightful cup is a layered wonder, combining creamy vanilla pudding with the irresistible crunch of Golden Oreos, and topped with a whimsical Little Debbie Christmas tree cake. Not only are they quick and easy to whip up, but they’re also the perfect crowd-pleaser for festive gatherings, no oven required! Plus, the best part? You can customize them with different cookies and pudding flavors to make them uniquely yours. Curious about how to add a sprinkle of holiday cheer to your dessert table? Let’s dive in!
Why are Christmas Dirt Cups so delightful?
No Bake: Skip the oven! These fun treats come together in a breeze, perfect for busy holiday schedules.
Kid-Friendly: With their playful layers and familiar flavors, kids will love making and eating these.
Customizable: Play with flavors! Swap vanilla pudding for chocolate or try other cookie options for variety.
Festive Appeal: The whimsical holiday toppings make these cups a visual delight, perfect for impressing guests.
Time-Saving: Assemble these cups ahead of time, leaving you free to enjoy the festivities without stress.
Elevate your celebrations with these joyful No Bake Christmas Dirt Cups that bring smiles to all ages!
Christmas Dirt Cups Ingredients
For the Pudding Layer
• Instant Vanilla Pudding Mix – Provides creaminess and sweetness; a swap for chocolate pudding can add a thrilling twist.
• Milk – Acts as the liquid base for the pudding; try almond or oat milk for a dairy-free version.
• Cool Whip – Contributes a light, airy texture; you might replace it with homemade whipped cream for a fresher taste.
For the Cookie Crunch
• Golden Oreo Cookies – Offers the signature crunch and sweetness; feel free to use regular Oreos for a different flavor.
For the Fun Topping
• Little Debbie Christmas Tree Cakes – Adds an adorable decorative touch on each cup; any small festive cookie can also work beautifully.
• Christmas Sprinkles – Infuses a festive flair and visual appeal; swap seasonal sprinkles based on your theme or preference.
With these delightful ingredients, your Christmas Dirt Cups will be a beautiful addition to your holiday spread!
Step‑by‑Step Instructions for Christmas Dirt Cups
Step 1: Prepare the Pudding
In a medium mixing bowl, whisk together the instant vanilla pudding mix and 2 cups of cold milk for about 2 minutes, or until the mixture thickens. You’ll know it’s ready when it has a smooth, creamy consistency. Once done, cover the bowl with plastic wrap and refrigerate for 10 minutes to firm it up a bit more.
Step 2: Combine with Cool Whip
After chilling, gently fold in 1 cup of Cool Whip into the pudding mixture using a spatula. Be careful to fold it in slowly to keep the mixture light and fluffy. Once fully combined, return the bowl to the refrigerator and chill for an additional 20 minutes, allowing the flavors to meld beautifully.
Step 3: Crush Cookies
While the pudding cools, take your Golden Oreo cookies and crush them into fine crumbs. You can easily do this by pulsing them in a food processor or placing them in a zip bag and rolling over them with a rolling pin. Aim for a crumbly texture that will provide a delightful crunch in your Christmas Dirt Cups.
Step 4: Assemble Cups
Grab your clear dessert cups and begin layering the mixture for your Christmas Dirt Cups. Start by spooning a layer of the creamy pudding mixture into each cup, followed by a layer of the crushed cookies. Repeat this process, alternating layers until the cups are almost full, creating a visually appealing structure.
Step 5: Decorate
Once each cup is filled, top them off with any remaining pudding mixture, leveling it off for a neat appearance. Now for the festive touch! Sprinkle colorful Christmas sprinkles over the top and gently place a Little Debbie Christmas tree cake, or another small festive cookie, right on top of each cup for that whimsical finishing flair.
Step 6: Chill
Finally, cover each cup with plastic wrap and refrigerate for at least 30 minutes before serving. This chill time is crucial as it enhances the flavor and ensures each bite of your Christmas Dirt Cups is refreshingly cool. Before serving, ensure they are nicely set and the decorations are vibrant and inviting.
Variations & Substitutions for Christmas Dirt Cups
Feel inspired to put your own spin on these whimsical treats and make them uniquely yours!
-
Chocolate Pudding: Swap the vanilla pudding for rich chocolate pudding to deepen the flavor and delight chocolate lovers.
-
Minty Twist: Replace Golden Oreos with mint-flavored cookies for a refreshing wintery twist—it’s like a celebration of the season in every bite.
-
Dairy-Free Delight: Use almond or coconut milk and coconut whipped cream to create a dairy-free version that everyone can enjoy without compromising on taste.
-
Fruit Infusion: Add in layers of crushed strawberries or raspberries between the pudding and cookies for a fruit-forward balance of flavors. It brings a pop of freshness to each cup!
-
Gluten-Free Option: Opt for gluten-free cookies, ensuring everyone at your gathering can indulge in these delightful treats without worry.
-
Nutty Crunch: Sprinkle in crushed nuts like almonds or pecans between the layers for an extra layer of flavor and crunch. The contrast adds a delightful nutty undertone!
-
Spicy Kick: For those who enjoy heat, add a dash of cinnamon or even a pinch of cayenne pepper to the pudding mix for a playful surprise.
-
Festive Cookie Variations: If you don’t have Little Debbie Christmas tree cakes, use any seasonal cookie you adore; flavors like gingerbread or frosted sugar cookies would work perfectly.
Feel free to mix and match these ideas to create the ultimate bucket of joy with your No Bake Christmas Dirt Cups. Explore how these variations can quickly transform a familiar recipe into a delightful signature dish that warms hearts and fills bellies during the festive season!
What to Serve with No Bake Christmas Dirt Cups?
The holidays call for delightful pairings that elevate your dessert experience to new heights!
-
Festive Fruit Salad: A refreshing mix of seasonal fruits adds brightness and a burst of color, balancing out the sweetness of the dirt cups.
-
Chocolate Peppermint Bark: This rich and crunchy treat complements the creamy pudding, infusing a peppermint twist that sings of the holiday spirit.
-
Spiced Hot Chocolate: Indulge in the warmth of spiced hot chocolate, whose rich cocoa flavor harmonizes beautifully with the layers of creaminess.
-
Gingerbread Cookies: The spiciness of these classic cookies adds a warm contrast to the sweet cream and crunchy layers, perfect for dipping.
-
Pecan Pie Bars: Rich and nutty, these bars provide a satisfying texture contrast while echoing the festive flavors of the season.
-
Eggnog Milkshakes: A creamy, dreamy drink that pairs wonderfully with the No Bake Christmas Dirt Cups, enhancing your holiday gathering atmosphere.
-
Minty Chocolate Chip Ice Cream: Adding a scoop of this cool, mint-infused ice cream provides a refreshing finish that both kids and adults will adore.
By mixing and matching these pairings, your holiday gathering will be brimming with delicious flavors that compliment your Christmas Dirt Cups perfectly!
Make Ahead Options
These No Bake Christmas Dirt Cups are perfect for busy home cooks looking to save time during the holiday rush! You can prepare the pudding mixture up to 24 hours in advance, storing it in an airtight container in the refrigerator. Additionally, crush the Golden Oreos ahead of time and keep them in a separate container to maintain their crunchiness. When you’re ready to serve, simply layer the pudding and cookie mixture in your cups and add the festive decorations just before presenting them. This way, your Christmas Dirt Cups will be just as delicious and visually appealing as if they were made fresh!
Expert Tips for Christmas Dirt Cups
-
Layer Wisely: Carefully create distinct layers for visual appeal and a fun texture contrast. Avoid mixing layers too much to keep them defined.
-
Light Mixing: When folding Cool Whip into the pudding, do so gently to preserve that light, fluffy consistency—this will enhance the overall texture of your Christmas Dirt Cups.
-
Prep Ahead: These cups can be made up to 24 hours in advance. However, save the decorations for last to prevent them from getting soggy and unappealing.
-
Chill Time Importance: Allow the cups to chill for at least 30 minutes before serving. This step not only enhances the flavors but ensures a cool, refreshing dessert.
-
Keep it Pet-Safe: Be mindful not to share these delicious treats with pets, especially those containing chocolate elements that can be harmful to them.
Storage Tips for Christmas Dirt Cups
-
Fridge: Store leftover Christmas Dirt Cups in an airtight container for up to 5 to 7 days. Be sure to keep the decorations separate until you’re ready to serve for optimal freshness.
-
Make-Ahead: Prepare the pudding mixture up to 24 hours in advance, storing it in an airtight container. Assemble the cups closer to serving time for the best presentation.
-
Freezer: While it’s not recommended to freeze the assembled cups due to the texture changes in the Cool Whip, the pudding mixture can be frozen for up to a month. Thaw in the fridge before using.
-
Reheating: No need for reheating here! Just enjoy these festive delights chilled; they’re perfect for a refreshing dessert that everyone will love.
Christmas Dirt Cups Recipe FAQs
How do I select the best ingredients for Christmas Dirt Cups?
Absolutely! For the best results, choose high-quality instant vanilla pudding mix for creaminess, and fresh Golden Oreo cookies for crunch. Aim for cookies without dark spots, as they indicate staleness. Milk should be fresh and cold to ensure the pudding sets correctly. For toppings, pick vibrant, festive sprinkles that will visually delight your guests.
What’s the best way to store leftover Christmas Dirt Cups?
Very good question! Store leftover Christmas Dirt Cups in an airtight container in the refrigerator for up to 5 to 7 days. Just remember to keep the sprinkles and Little Debbie cakes separate until you’re ready to serve, as this will prevent them from getting soggy and losing their festive appearance.
Can I freeze the assembled Christmas Dirt Cups?
It’s generally not recommended to freeze the assembled cups due to changes in texture, especially with Cool Whip, which can become watery. However, you can freeze the pudding mixture for up to a month. To do this, place it in a freezer-safe container, and when ready to use, thaw it in the fridge overnight before assembling your cups.
What should I do if my pudding mixture doesn’t thicken properly?
If your pudding mixture isn’t thickening as expected, ensure that the milk is cold enough, as this is crucial for activation. If it’s still runny after whisking for 2 minutes, refrigerate it for 10 additional minutes to allow it to set further. If all else fails, a little extra pudding mix can be whisked in, but do it gradually to avoid clumping.
Are these Christmas Dirt Cups safe for my pets?
I often recommend keeping these cups away from pets. Certain ingredients, especially chocolate in regular Oreos and other added toppings, can be harmful to them. Always stick to pet-friendly treats if you want to share something festive with your four-legged friends!
Irresistible Christmas Dirt Cups for a Fun Holiday Treat
Ingredients
Equipment
Method
- In a medium mixing bowl, whisk together the instant vanilla pudding mix and 2 cups of cold milk for about 2 minutes, until thickened. Cover and refrigerate for 10 minutes.
- Gently fold in 1 cup of Cool Whip into the pudding mixture using a spatula. Chill for an additional 20 minutes.
- Crush the Golden Oreo cookies into fine crumbs using a food processor or rolling pin.
- Layer the pudding mixture and crushed cookies in clear dessert cups, alternating layers until nearly full.
- Top each cup with remaining pudding mixture, sprinkle with Christmas sprinkles and add a Little Debbie Christmas tree cake on top.
- Cover with plastic wrap and refrigerate for at least 30 minutes before serving.
Leave a Reply