
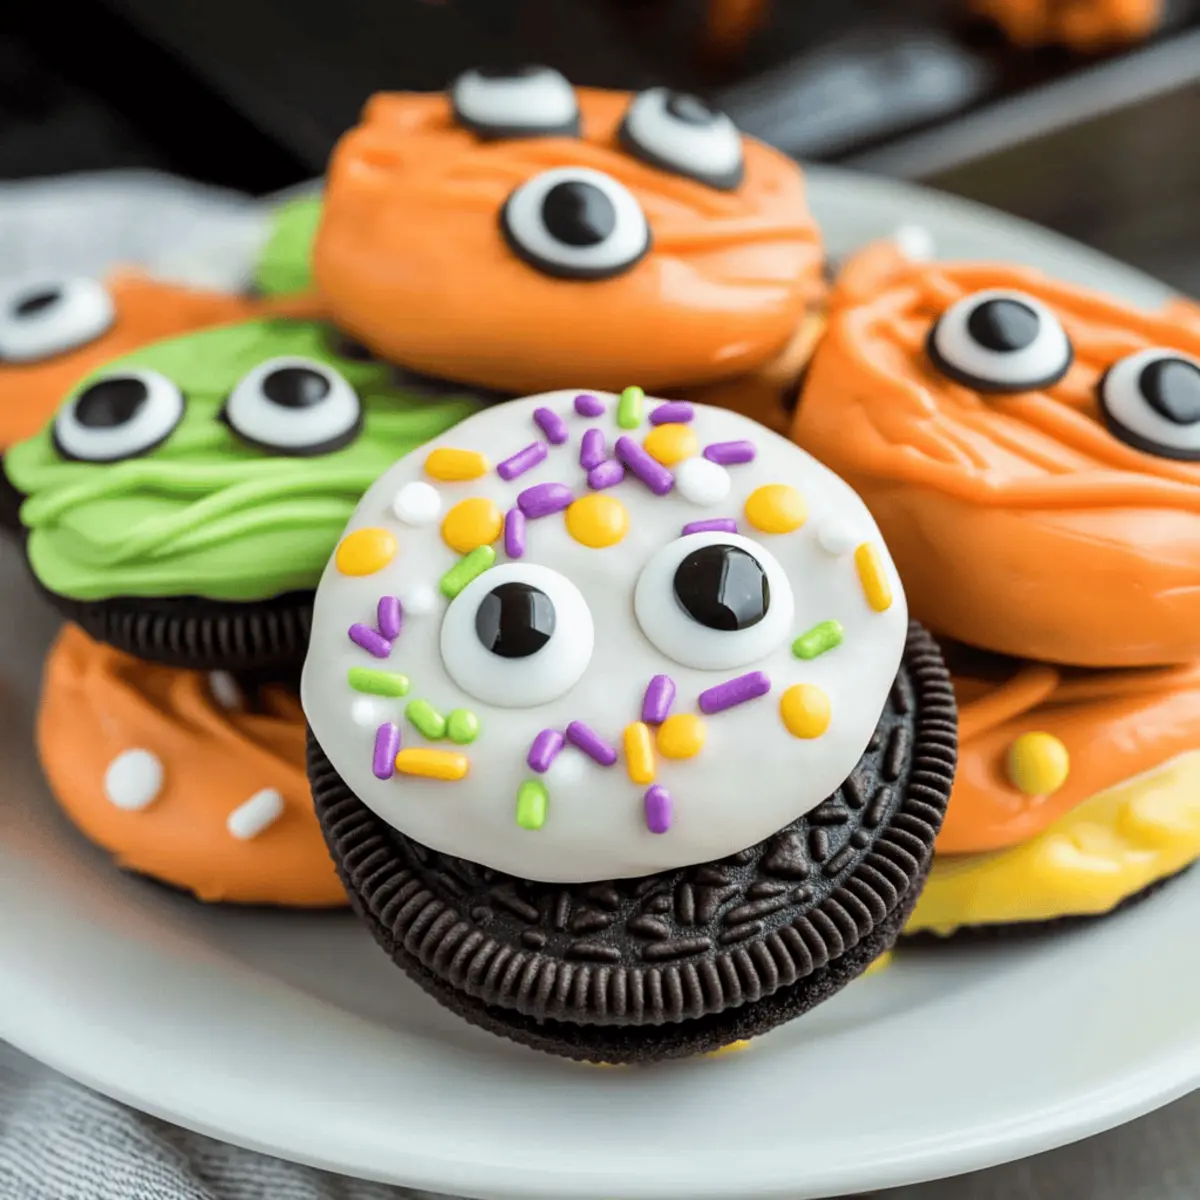
The crisp autumn air is filled with echoes of laughter as children don their favorite costumes, ready to trick or treat. It’s during this magical time that I find joy in whipping up delights like Easy Spooky Halloween Dipped Oreo Cookies, a charming and festive treat that’s sure to delight both kids and adults alike. What makes this recipe a go-to? It’s not only incredibly quick to prepare but also versatile enough for various dietary needs, allowing everyone to join in the Halloween fun. With a crunchy Oreo center and a colorful candy coating, these treats double as whimsical décor that will enchant your holiday gatherings. Ready to sprinkle some magic in your kitchen? Let’s dive into this easy recipe and turn ordinary moments into extraordinary Halloween memories!
Why Are These Cookies So Fun?
Easy to Make: With just a handful of ingredients, whipping up these Halloween treats is a breeze. Quick Prep Time: You can prepare them in under 30 minutes, making it perfect for last-minute festive snacking. Customizable: Add your personal touch with different-colored melts or fun sprinkles. Diet-Friendly Options: These cookies can easily cater to gluten-free and dairy-free diets, ensuring everyone can indulge. Crowd-Pleaser: Their playful appearance and delicious flavor make them a hit at parties or family gatherings—just like these delightful Chocolate Babka Decadent treats, they’ll disappear fast!
Chocolate Covered Halloween Oreos
• Get ready for festive fun with these treats that are easy for everyone to enjoy!
For the Cookies
- Halloween Oreos or Sandwich Cookies – These add a spooky twist to the classic treat; feel free to substitute regular Oreos for a different flavor.
- Chocolate Melting Wafers – Provides a creamy coating that makes every bite melt in your mouth; you can choose from various colors to suit your Halloween theme.
For the Colorful Coatings
- Orange Candy Melting Wafers – Adds a vibrant autumn hue to your cookies; or switch it up with white or chocolate wafers for a unique look.
- White Candy Melting Wafers – Perfect for a classic finish or to create ghostly designs; consider using other colors for an eye-catching effect.
- Purple Candy Melting Wafers – Enhances the spooky vibe of your treats; replace with any candy melt shade if desired.
For Decoration
- Sprinkles – These can jazz up your cookies with delightful textures and colors; ensure they’re gluten-free for everyone to enjoy.
- Candy Eyes – A fun touch that brings your Halloween cookies to life; add these for a whimsical decoration that kids adore.
With these ingredients, you’ll be well on your way to creating crowd-pleasing Chocolate Covered Halloween Oreos that everyone will love!
Step‑by‑Step Instructions for Chocolate Covered Halloween Oreos
Step 1: Prepare Baking Sheet
Start by lining a cookie sheet with wax paper or parchment paper to create a non-stick surface for your Chocolate Covered Halloween Oreos. This prevents any melted candy from sticking and makes it easy to lift the cookies once they’re set. Ensuring your work area is tidy will help you move smoothly to the next steps in this festive endeavor.
Step 2: Melt Candy Wafers
In microwave-safe bowls, evenly distribute the chocolate melting wafers, orange candy melts, white melting wafers, and purple candy wafers into separate bowls. Heat them in the microwave in 30-second increments, stirring in between until they are completely smooth and melted, generally taking about 1 minute total for each color. Visual cues to look for include a glossy texture that flows easily.
Step 3: Dip Oreos
Take an Oreo and gently dip it into one of the melted colors using a fork to fully immerse it, ensuring it is well-coated. Move swiftly to keep the coating warm and easy to work with. Lift the cookie out of the melted candy, allowing any excess coating to drip off before moving on to the next step to create beautifully dipped Chocolate Covered Halloween Oreos.
Step 4: Remove Excess
To achieve an even coating, tap the fork gently against the bowl’s edge while holding the Oreo above it. This will allow any extra melted candy to fall back into the bowl, leaving a smooth finish on your cookie. You can also use a spoon to help guide the excess chocolate off for a polished look as you prepare these festive treats.
Step 5: Decorate
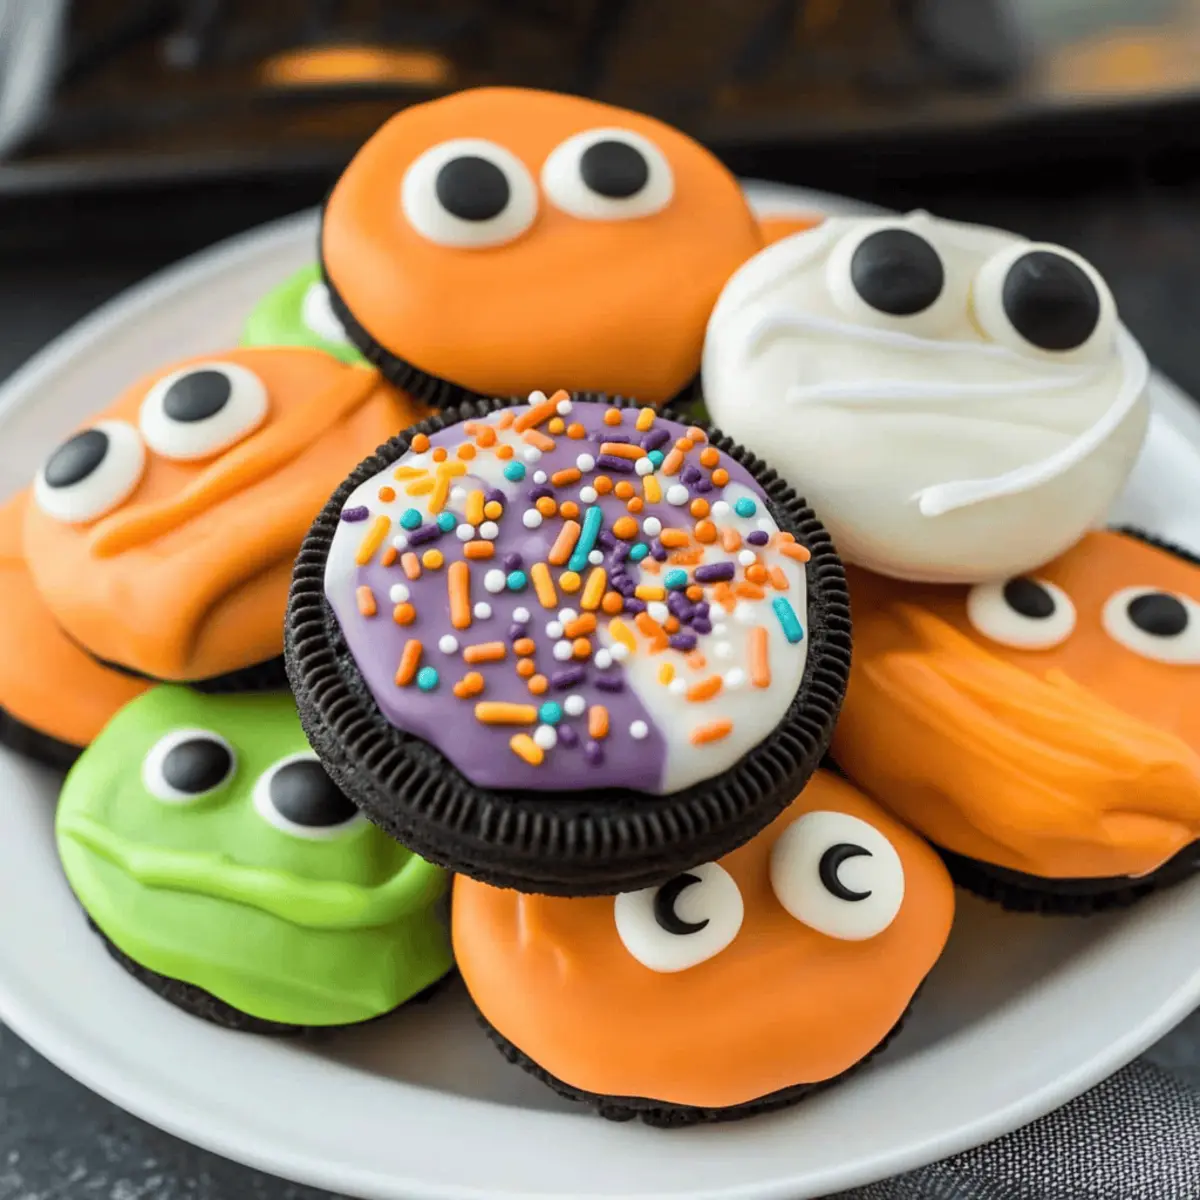
Place the dipped Oreo onto the lined cookie sheet promptly. While the melted candy is still soft, generously sprinkle with colorful sprinkles or attach candy eyes for a playful touch. This step allows for creativity, so have fun with the designs as you make these delightful Chocolate Covered Halloween Oreos perfect for any celebration.
Step 6: Set
Allow the decorated cookies to sit at room temperature for about 1 hour so that the candy coating hardens completely. If your kitchen is cool, this will speed up the setting process. You’ll know they’re ready when they feel firm to the touch and the surface is glossy, making them not only delicious but visually appealing as well.
Chocolate Covered Halloween Oreos Variations
Feel free to let your creativity shine as you customize these delightful treats with these exciting twists!
-
Seasonal Cookies: Swap Halloween Oreos for winter-themed cookie varieties to delight during the holidays.
Think about cozy flavors that embody the warmth of the season, adding personal touches to your festive treats. -
Flavorful Melts: Try flavored candy melts like raspberry or mint for an unexpected burst of flavor.
This twist adds an exciting element that will surprise your taste buds during Halloween festivities. -
Different Colors: Use any color of candy melts to suit various occasions beyond Halloween.
Imagine vibrant pink and red melts for Valentine’s Day, or pastel colors for spring celebrations! -
Nutty Add-Ins: Incorporate crushed nuts or slivered almonds into the sprinkles for a delightful crunch.
This added texture will make every bite an adventure, appealing to both kids and adults alike. -
Spiced Coating: Blend in cinnamon or pumpkin spice to the melted candy for a seasonal kick.
The warm spices will evoke classic autumn flavors, making your treats even cozier during chilly nights. -
Decorative Swirls: Drizzle contrasting melted candy over the dipped Oreos for a stunning visual effect.
Use a piping bag to create bold designs that will make your cookies the centerpiece of any gathering! -
Garnish with Fruit: Add candied orange peels or dried fruits on top for a natural sweetness and color.
This variation introduces a unique flavor profile, making your Halloween treats more sophisticated! -
Decorative Sprouts: Use edible glitter or shimmering dust to make your treats sparkle.
Everyone loves those magical touches that make treats feel extra special, especially at Halloween parties!
These variations let you create Chocolate Covered Halloween Oreos that suit every palate and mood, ensuring no one misses out on the spook-tacular fun! If you’re looking for something else sweet, try out these delightful Peanut Butter Chocolate treats or perhaps some whimsical Cheesy Halloween Breadstick bones that bring the perfect balance of savory and sweet!
How to Store and Freeze Chocolate Covered Halloween Oreos
Airtight Container: Store your Chocolate Covered Halloween Oreos in an airtight container at room temperature for up to 2 weeks. This keeps them fresh and prevents them from becoming stale.
Fridge: If you prefer them chilled, you can refrigerate the cookies for up to 1 week. Just make sure to keep them in a sealed container to maintain quality.
Freezer: For longer storage, freeze the cookies in a single layer, then transfer to a freezer-safe bag for up to 2 months. Allow them to thaw at room temperature before enjoying.
Reheating: There’s no need to reheat the cookies, but if they get a bit soft, place them in the fridge for a short while to firm up before serving.
Make Ahead Options
These Easy Spooky Halloween Dipped Oreo Cookies are perfect for busy home cooks who want to streamline their festivities! You can prepare and dip the cookies up to 24 hours in advance; simply let them cool completely before placing them in an airtight container in the refrigerator. On the day you plan to serve them, just bring them to room temperature and add any additional decorations, like sprinkles or candy eyes. To maintain that delicious crunch, avoid stacking the cookies in the container. With this prep method, you’ll enjoy delicious, spooktacular cookies that taste just as delightful as if they were made fresh!
Expert Tips for Chocolate Covered Halloween Oreos
-
Work in Batches: To avoid burnout, melt small quantities of candy melts—no more than 6-8 oz at a time. This keeps the chocolate smooth and manageable.
-
Dip Carefully: Immerse each Oreo thoroughly in the melted coating to ensure full coverage. A fork helps you control the dipping process effortlessly.
-
Remove Excess Wisely: After dipping, gently tap the fork against the bowl’s edge to shake off any extra coating, preventing a thick layer that may not set properly.
-
Get Creative with Decor: Once dipped, work quickly with sprinkles or candy eyes while the coating is still warm. This way, your decorations adhere better and truly pop!
-
Revive Thickened Coating: If your melted candy starts to thicken, stir in a teaspoon of vegetable oil and reheat in brief increments. Avoid adding water to prevent seizing.
-
Use the Right Color: When creating fun Halloween designs, consider using gel food coloring to tint your candy melts after melting. This gives your treats vibrancy without affecting the consistency.
Enjoy making these delightful Chocolate Covered Halloween Oreos, and let the festivities begin!
What to Serve with Easy Spooky Halloween Dipped Oreo Cookies
Enhance your Halloween gathering with delightful pairings that bring more joy to this festive time of year.
-
Creamy Pumpkin Soup: This warm, savory soup provides a wonderful contrast to the sweet cookies, warming the soul on crisp autumn nights.
-
Festive Fruit Platter: A colorful assortment of seasonal fruits like apples, pears, and grapes adds a refreshing, healthy touch to your Halloween spread.
-
Spooky Cupcakes: Adorned with spooky frosting, these treats mirror the whimsical nature of the cookies, creating a cohesive and fun dessert table.
-
Caramel Apple Dip: A sweet, gooey dip elevates the natural sweetness of apples, contrasting perfectly with the crunchy, chocolatey cookies.
-
Hot Chocolate Bar: Complete with marshmallows and whipped cream, this cozy drink provides a rich, decadent accompaniment to your sweet treats.
-
Halloween Punch: A fizzy, colorful punch can set a playful mood, inviting guests to sip and enjoy alongside their cookies.
-
Candy Corn Snack Mix: A playful blend of candy corn, nuts, and pretzels brings a crunchy and sweet component that ties in beautifully with the Halloween theme.
-
Ghostly Meringues: Light and airy, these little treats echo the cookies’ sweetness while adding an elegant flair to your Halloween dessert table.
Elevate your gathering with these delightful additions that create a memorable and fun experience for friends and family!
Easy Spooky Halloween Dipped Oreo Cookies Recipe FAQs
How do I choose the right Oreos for this recipe?
Absolutely! You can use Halloween-themed Oreos for added festiveness or stick with regular Oreos if you prefer. Just ensure that if you need a gluten-free option, you select a gluten-free sandwich cookie. Whether you go for the traditional or the themed cookies, both will taste delicious when dipped!
What’s the best way to store leftover cookies?
The more the merrier! Store your Chocolate Covered Halloween Oreos in an airtight container at room temperature for up to 2 weeks. This keeps them fresh and delicious. If you want to keep them for longer, you can refrigerate them for about 1 week, but ensure they’re sealed so they don’t absorb any odors.
Can I freeze the cookies? How should I do it?
Of course! To freeze your Chocolate Covered Halloween Oreos, place them in a single layer on a baking sheet and freeze until solid. Then, transfer the cookies to a freezer-safe bag or container for up to 2 months. To thaw, let them sit at room temperature for about 30 minutes before enjoying them again.
What should I do if my candy melts thicken too much?
Very! If your candy melts start to thicken while you’re working, stir in a teaspoon of vegetable oil and reheat in 10-second increments in the microwave. This should help restore a smoother consistency. Avoid adding water, as this will cause the chocolate to seize and become unusable.
Are there any allergies I should consider with this recipe?
Definitely! When preparing these cookies, be mindful of potential allergens. Ensure the Oreos and melting wafers you use are free from any traces of allergens such as nuts or gluten if you’re serving guests who may have severe allergies. Also, some sprinkles and candy decorations may contain common allergens, so always check labels to ensure safety for everyone!
Can I customize the decorations for different occasions?
Absolutely! You can use any themed decorations to suit different holidays or events. For example, swap out the colorful candy melts and sprinkles for festive colors for Christmas or pastel shades for Easter. Your imagination is the limit—get creative and have fun with the designs!
Chocolate Covered Halloween Oreos That Are Spooktacularly Fun
Ingredients
Equipment
Method
- Prepare a cookie sheet by lining it with wax paper or parchment paper.
- In separate microwave-safe bowls, distribute the chocolate melting wafers and colored candy melts for melting.
- Dip each Oreo into one of the melted colors using a fork and ensure it is well-coated.
- Remove excess coating by tapping the fork against the bowl's edge.
- Place the dipped Oreo onto the lined cookie sheet; decorate with sprinkles or candy eyes while the coating is still soft.
- Allow the decorated cookies to sit at room temperature for about 1 hour to harden.
Leave a Reply