
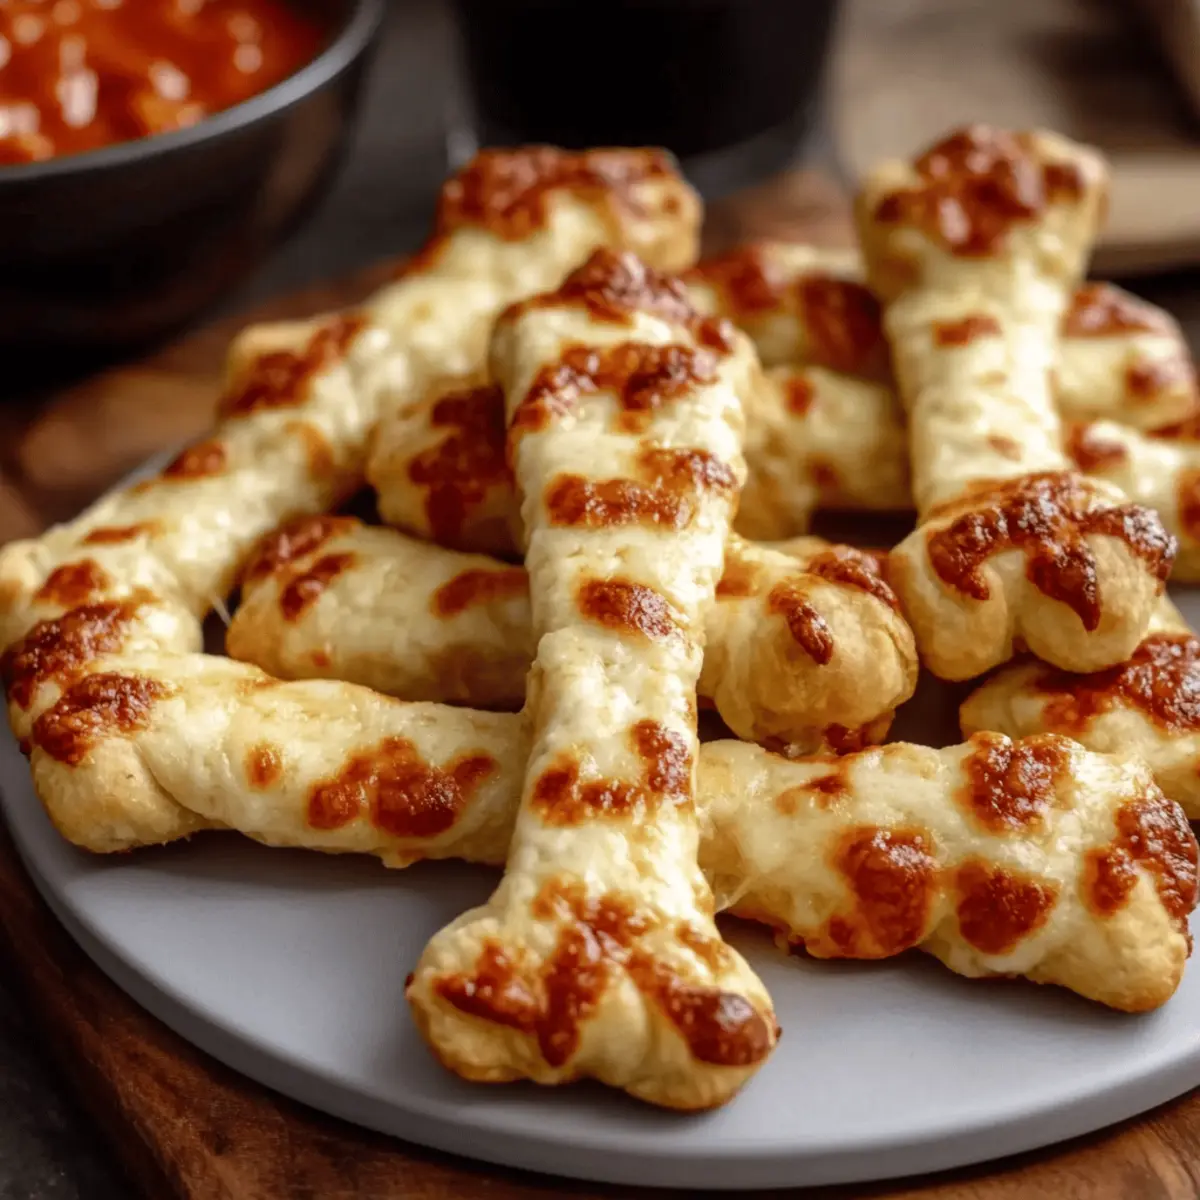
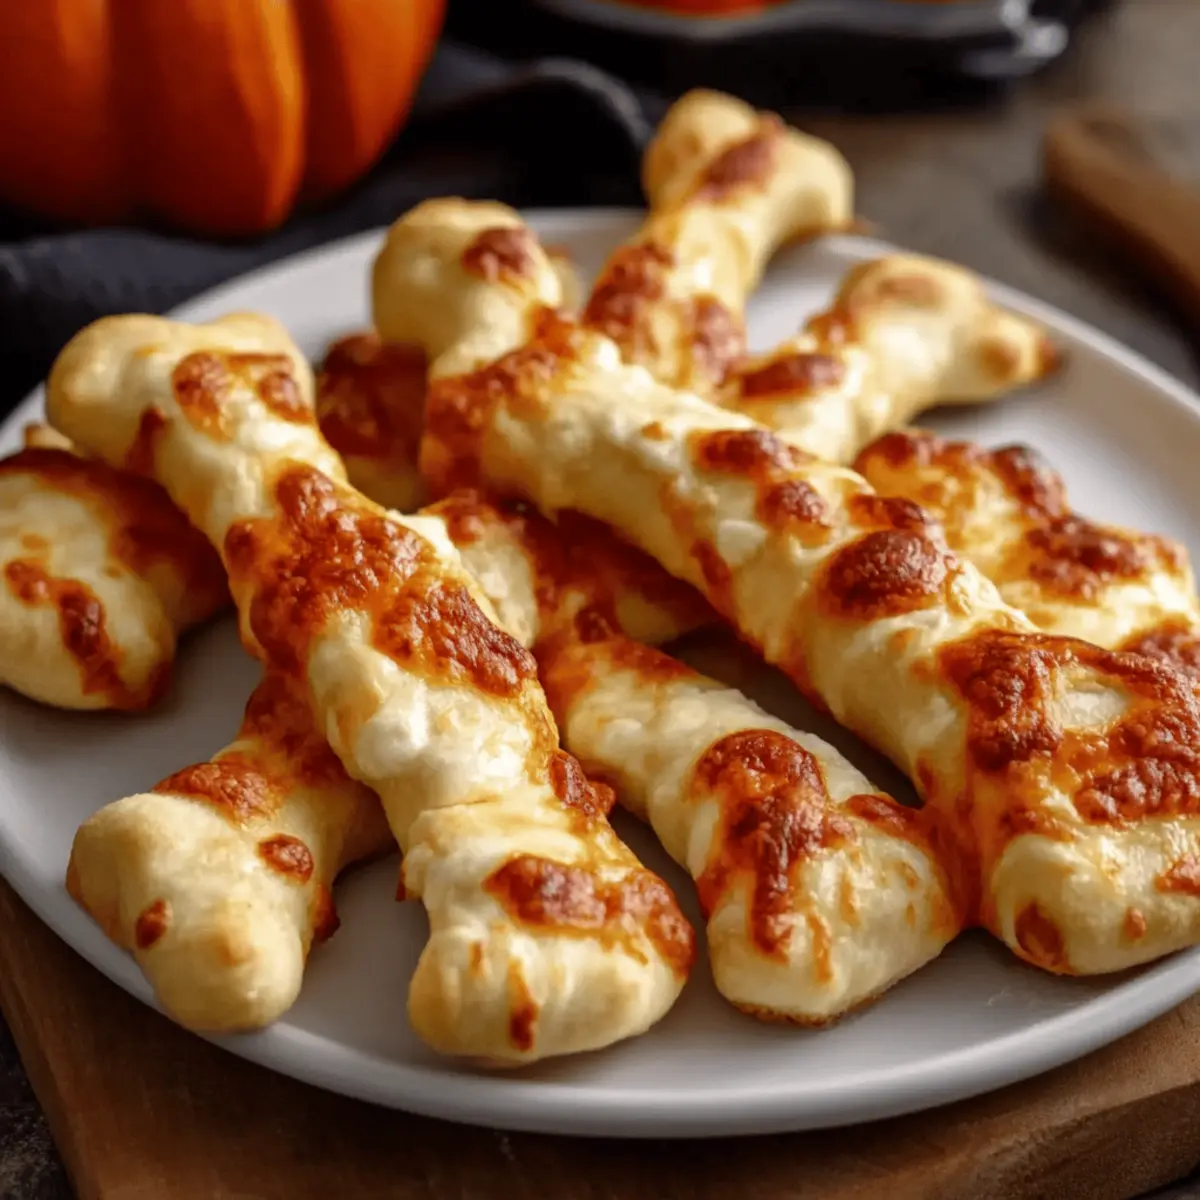
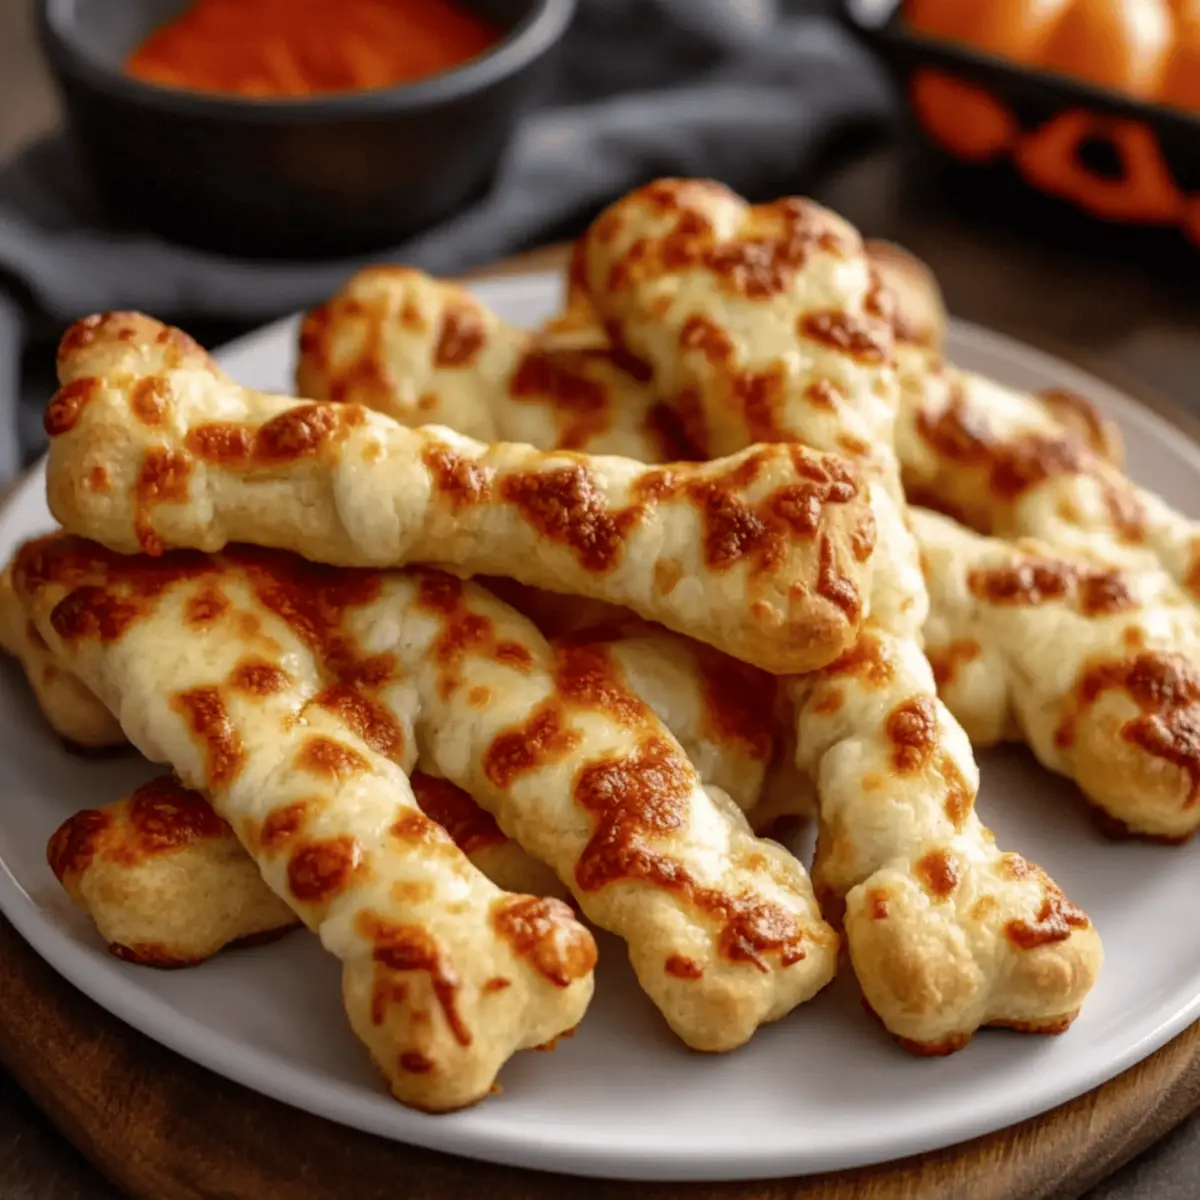
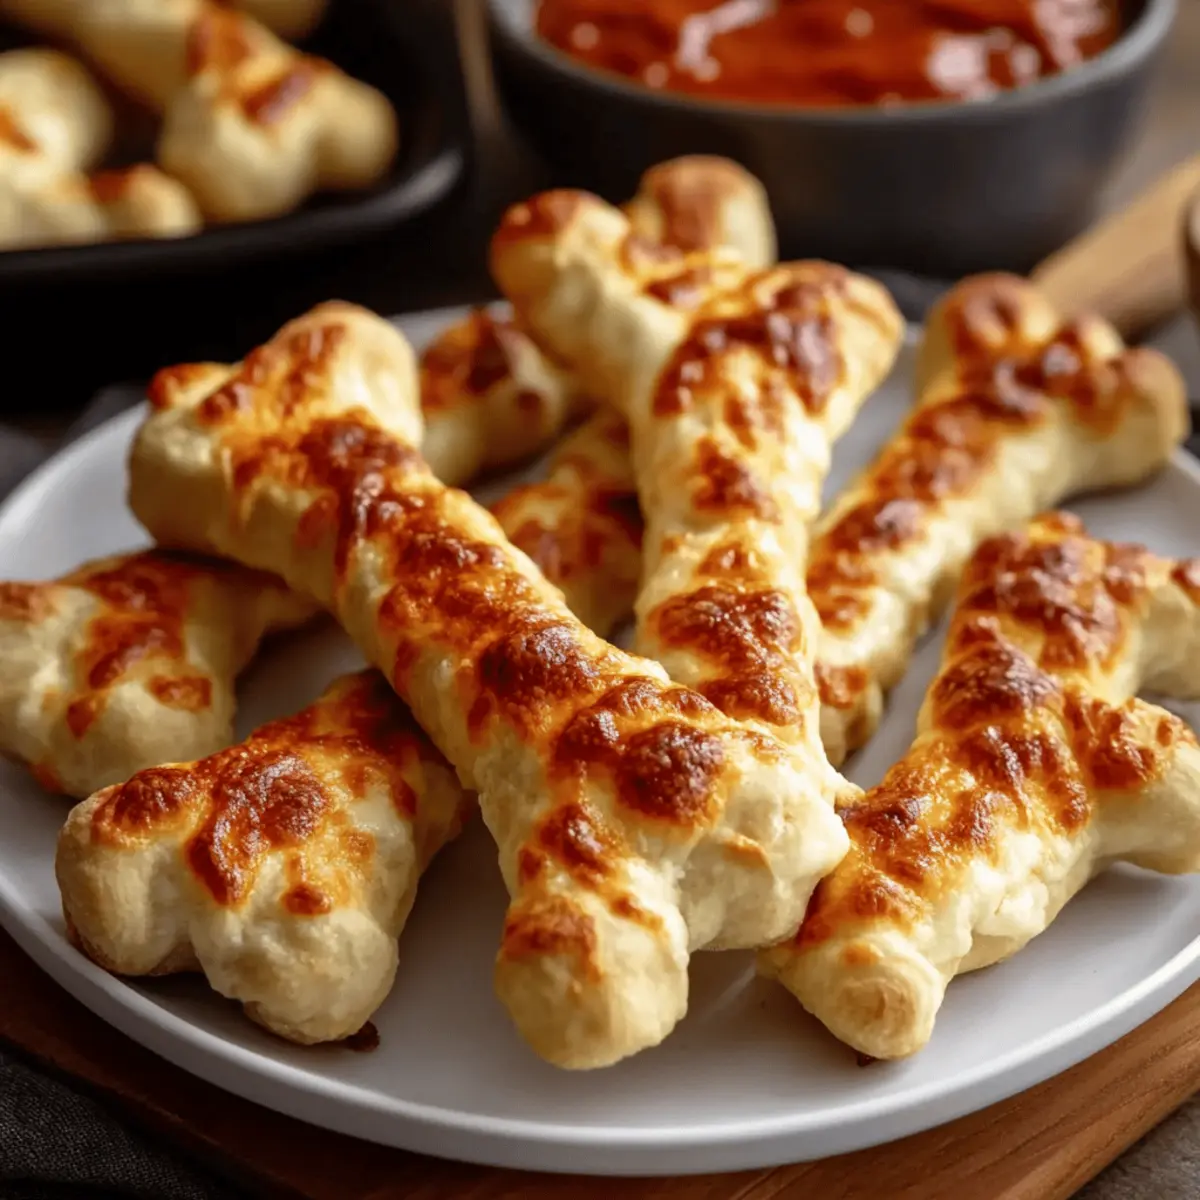
As I rolled out the dough, a sense of Halloween excitement filled the air. What could be spookier—and more delicious—than my Cheesy Halloween Breadstick Bones? Ideal for both kids and the young at heart, these delightfully eerie snacks are a perfect addition to any festive gathering. With just a few simple ingredients, like pizza dough and a blend of gooey mozzarella and sharp Parmesan, these breadsticks come together quickly for a hauntingly good treat. Not only are they incredibly fun to make, but they also double as a great crowd-pleaser that lets you customize cheese options to suit everyone’s taste. Whether you’re hosting a haunted soirée or just looking for a whimsical bite, you won’t want to miss out on these! What will you serve for dipping?
Why Are These Breadstick Bones a Must-Try?
Amazingly Fun: These Cheesy Halloween Breadstick Bones are not just snacks; they’re a spooky experience! Perfect for both kids and adults, they bring a festive flair to any gathering.
Endless Customization: Feel free to mix different cheese blends or experiment with dough types. Use your favorite toppings, making it a culinary adventure each time.
Quick & Easy: With minimal prep, these bite-sized treats can be ready in about 30 minutes, so you can whip them up even on busy days.
Crowd-Pleasing Flavor: The combination of gooey mozzarella and nutty Parmesan ensures a rich, savory delight that guests will rave about.
Great for Dipping: Pair them with marinara, ranch, or even pesto for an extra layer of flavor. These dips make each bite pop with taste is another fun idea to explore while you’re at it!
Cheesy Halloween Breadstick Bones Ingredients
• Get ready to create a spooktacular snack!
For the Dough
- All-Purpose Flour – Dust your work surface to prevent sticking; whole wheat flour can be a healthier alternative!
- Pizza Dough – The backbone of these breadstick bones; opt for store-bought for convenience or make homemade for that fresh touch.
For the Topping
- Unsalted Butter (2 tablespoons, melted) – Adds a rich flavor and contributes to a golden, crispy crust; margarine works too if needed.
- Grated Parmesan Cheese (½ cup) – Delivers a sharp, nutty taste; try Pecorino Romano for a different twist.
- Shredded Mozzarella Cheese (1 cup) – Provides that essential gooey texture; for a lighter option, consider using part-skim mozzarella.
For Dipping
- Marinara Sauce – Perfect for dipping, adding savory flavor and moisture; feel free to swap it with ranch or pesto for variety!
These Cheesy Halloween Breadstick Bones will be the highlight of your Halloween festivities!
Step‑by‑Step Instructions for Cheesy Halloween Breadstick Bones
Step 1: Preheat the Oven
Begin by preheating your oven to 375°F (190°C). While the oven warms, prepare two baking sheets by lining them with parchment paper. This will ensure your Cheesy Halloween Breadstick Bones bake evenly and don’t stick, providing a perfect foundation for your spooky snacks.
Step 2: Prepare the Dough
Next, take your pizza dough out and allow it to reach room temperature, which usually takes about 10-15 minutes. Meanwhile, dust a clean, flat work surface with all-purpose flour to prevent the dough from sticking. This step is crucial for easy shaping and handling as you create your delightful breadstick bones.
Step 3: Shape the Breadsticks
Once your dough is ready, divide it into 10 equal pieces. Roll each piece into an 8-inch long rope, making sure to keep the ends thicker for that classic bone shape. To enhance the appearance, snip the ends with kitchen scissors and slightly pull them apart, creating a spooky bone effect that will captivate your guests!
Step 4: Bake the Dough
Arrange the shaped dough sticks on the prepared baking sheets, making sure there’s some space between each to allow for puffing. Brush each stick generously with melted butter and sprinkle with grated Parmesan cheese. Bake in the preheated oven for about 15 minutes, or until they are puffed up and lightly golden.
Step 5: Add Cheese & Finish Baking
After your initial baking, remove the breadsticks from the oven. Sprinkle shredded mozzarella cheese generously over each one, creating a gooey layer of deliciousness. Return them to the oven and bake for an additional 5-7 minutes, or until the cheese is bubbly and beautifully golden.
Step 6: Cool & Serve
Once the Cheesy Halloween Breadstick Bones are out of the oven, allow them to cool slightly on the baking sheets. After about 5 minutes, transfer them to a serving platter to enjoy while warm. Serve with marinara sauce on the side for dipping, adding an extra layer of flavor to your eerie Halloween feast!
Make Ahead Options
These Cheesy Halloween Breadstick Bones are perfect for busy home cooks looking to save time! You can prepare the dough and shape the breadsticks up to 24 hours in advance. Simply follow the shaping instructions, place the shaped bones on the baking sheets, cover them tightly with plastic wrap, and refrigerate. This ensures they stay fresh and prevents drying out. When you’re ready to enjoy your spooky snacks, just preheat the oven and bake directly from the fridge. For best results, sprinkle on the cheese just before the final bake to maintain that gooey, melty texture. Enjoy delightful, homemade treats with minimal effort on the big day!
Cheesy Halloween Breadstick Bones Variations
Feel free to get creative and adapt this recipe to your taste preferences and dietary needs!
-
Cheese Blend: Swap mozzarella and Parmesan for a mix of cheddar and gouda for a different flavor kick. Experimenting with different cheeses can open up a world of cheesy bliss!
-
Dough Types: Use whole wheat pizza dough for a healthier twist, or try cauliflower crust for a low-carb option. Each type of dough will impart a unique texture and taste to your spooky snacks.
-
Extra Seasoning: Add garlic powder or Italian herbs to the melted butter before brushing it onto the breadsticks for an aromatic boost! This simple addition elevates the flavor profile, making your bones irresistible.
-
Spicy Kick: For those who love heat, incorporate crushed red pepper flakes into your cheese blend or sprinkle them on top before baking. It adds a delightful zing!
-
Dipping Sauces: Swap out the marinara sauce for spicy aioli or herby pesto to create a flavor explosion with every bite. Your breadstick bones can be a canvas for various flavors!
-
Shape Variations: Get creative with the shapes! Use cookie cutters to create different spooky figures like ghosts or pumpkins for an even more festive presentation. Your imagination is the limit!
-
Herbed Butter: Mix fresh herbs like rosemary or thyme into the melted butter for an herbaceous finish, appealing to those who enjoy a garden-fresh flavor.
-
Add Toppings: Sprinkling sesame seeds, poppy seeds, or everything bagel seasoning on top before baking adds a crunchy texture and elevates their visual appeal. It’s a simple yet delightful twist!
Feel inspired? Give these variations a try to make your Cheesy Halloween Breadstick Bones even more special. And if you’re looking for more cheesy inspirations, check out this delightful Cheesy Halloween Breadstick or indulge in the comforting goodness of Cheesy Texas Toast. The possibilities are endless!
Expert Tips for Cheesy Halloween Breadstick Bones
-
Room Temperature Dough: Ensure your pizza dough is at room temperature before shaping. This helps create smooth, easy-to-shape breadsticks without tearing.
-
Don’t Overload the Cheese: While cheese is delicious, adding too much can weigh down the breadsticks and spoil their bone shape. A light topping maintains their spooky appearance.
-
Perfect Baking Time: Keep an eye on the baking time during both phases. The first 15 minutes should create a golden base; the final 5-7 minutes will melt the mozzarella beautifully.
-
Let Them Cool: Allow the breadsticks to cool slightly after baking. This helps enhance the texture and makes them easier to handle while serving.
-
Storage Wisdom: For leftovers, store in an airtight container to retain freshness. Reheat in the oven for the best texture—microwaving can make them tough.
These tips will help ensure your Cheesy Halloween Breadstick Bones are a showstopper at any Halloween gathering!
Storage Tips for Cheesy Halloween Breadstick Bones
-
Room Temperature: Store cooled breadsticks in an airtight container for up to 1 day. Keep them in a cool, dry place away from direct sunlight to maintain freshness.
-
Fridge: For longer storage, you can keep the breadsticks in the refrigerator for up to 3 days. Make sure they are wrapped well to avoid drying out.
-
Freezer: To preserve them for even longer, individually wrap the breadsticks in foil and place them in a freezer bag. They can last up to 3 months in the freezer.
-
Reheating: When you’re ready to enjoy your Cheesy Halloween Breadstick Bones again, reheat them directly from frozen in the oven at 350°F (175°C) for about 15-20 minutes. This will keep them crispy and delicious!
What to Serve with Cheesy Halloween Breadstick Bones
Elevate your spooky snack experience with delightful pairings that complement these eerie treats beautifully.
-
Savory Marinara Sauce: A classic accompaniment that adds a rich, tangy flavor perfect for dipping into the cheesy breadsticks.
-
Garlicky Cheese Dip: Creamy and indulgent, this dip enhances the cheesy goodness of the breadsticks, making every bite irresistible.
-
Crispy Vegetable Platter: Fresh, crunchy veggies like bell peppers, carrots, and cucumbers provide a refreshing contrast to the rich flavors of the breadsticks.
-
Spooky Fruit Skewers: Combine seasonal fruits like grapes and oranges on skewers to add a sweet, festive element to your Halloween spread.
-
Pumpkin Soup: A warm, velvety soup with a hint of spice complements the cheesy texture, creating a cozy fall vibe.
-
Festive Drinks: Serve with sparkling apple cider or a spooky punch to keep the spirit of Halloween alive, delighting both kids and adults alike.
These imaginative pairings will turn your Cheesy Halloween Breadstick Bones into the star of your Halloween celebration!
Cheesy Halloween Breadstick Bones Recipe FAQs
What type of pizza dough should I use?
Absolutely! You can use store-bought pizza dough for convenience or opt for homemade if you want to add a personal touch. If you’re feeling adventurous, try whole wheat pizza dough for a healthier alternative.
How do I store leftover Cheesy Halloween Breadstick Bones?
For optimal freshness, store cooled breadsticks in an airtight container at room temperature for up to 1 day. If you plan to enjoy them later, place the container in the fridge, where they can stay good for up to 3 days.
Can I freeze Cheesy Halloween Breadstick Bones?
Yes, you can freeze them! Wrap each breadstick individually in foil and place them in a freezer bag. They can be frozen for up to 3 months. When you’re ready to enjoy them, simply reheat straight from frozen at 350°F (175°C) for around 15-20 minutes until heated through and crisp again.
What should I do if my breadsticks don’t hold their shape?
If your breadsticks are losing their shape while baking, make sure to keep the ends thicker when shaping, as this will help maintain their bone-like appearance. Also, avoid adding too much cheese on top, as it can weigh them down!
Are these breadsticks suitable for vegetarians?
Yes! The Cheesy Halloween Breadstick Bones are a vegetarian-friendly snack, making them perfect for all your Halloween guests. Just double-check any dips you choose to serve for dietary considerations!
Cheesy Halloween Breadstick Bones for Spooky Snack Fun
Ingredients
Equipment
Method
- Preheat your oven to 375°F (190°C) and line two baking sheets with parchment paper.
- Take the pizza dough out to reach room temperature, about 10-15 minutes, and dust a clean work surface with flour.
- Divide the dough into 10 equal pieces, rolling each into an 8-inch long rope, keeping the ends thicker for a bone shape.
- Arrange the shaped dough on the baking sheets, brush with melted butter, sprinkle with Parmesan, and bake for about 15 minutes until golden.
- Remove from the oven, sprinkle with mozzarella, and bake for an additional 5-7 minutes until the cheese is bubbly and golden.
- Allow to cool slightly before transferring to a serving platter. Serve with marinara sauce for dipping.
Leave a Reply