
There’s something magical about turning simple staples into a crowd-pleasing delight, and these Brown Butter Dulce de Leche Rice Krispie Treats do just that! Imagine the nutty aroma wafting through your kitchen as brown butter lifts this classic dessert to new heights. With a luscious layer of dulce de leche tucked between crispy Rice Krispies, you’ll find it hard to resist going back for seconds. What’s even better? This no-bake treat comes together in just 10 minutes, making it the perfect solution for unexpected guests or a quick indulgence when you need a pick-me-up. Plus, the versatility of using cinnamon sugar Rice Krispies gives you the option to play with flavors! Are you ready to create a dessert that will have everyone asking for the recipe?
Why Are These Treats So Irresistible?
Indulgent delight: Every bite is a perfect balance of nutty brown butter and rich dulce de leche, elevating this dessert to new levels of sweetness.
Quick and easy: With just 10 minutes of prep, you’ll have a satisfyingly crunchy treat ready for any occasion—perfect for your next potluck or family gathering!
No-bake option: Skip the oven and create this delicious treat without any fuss, making it an ideal choice for warm days.
Versatile flavor: Explore variations by using cinnamon sugar Rice Krispies or even adding mini chocolate chips for a unique twist.
Crowd favorite: Bring smiles to faces young and old; these treats are a guaranteed hit at parties, making them a must-try for anyone looking to impress!
Brown Butter Dulce de Leche Rice Krispie Treats Ingredients
For the Treats
• Unsalted Butter – adds richness and flavor; using unsalted gives you better control over the saltiness.
• Pure Vanilla Extract – enhances the overall flavor profile; it’s always best to opt for pure for a deeper taste.
• Mini Marshmallows – serves as the primary sweetener and binding agent; divided into two portions ensures a lovely layer effect.
• Rice Krispies Cereal – provides that classic crunchy texture; consider using cinnamon sugar Rice Krispies for an added twist of sweetness.
• Fine Sea Salt – balances the sweetness; it helps distribute flavor evenly throughout your treats.
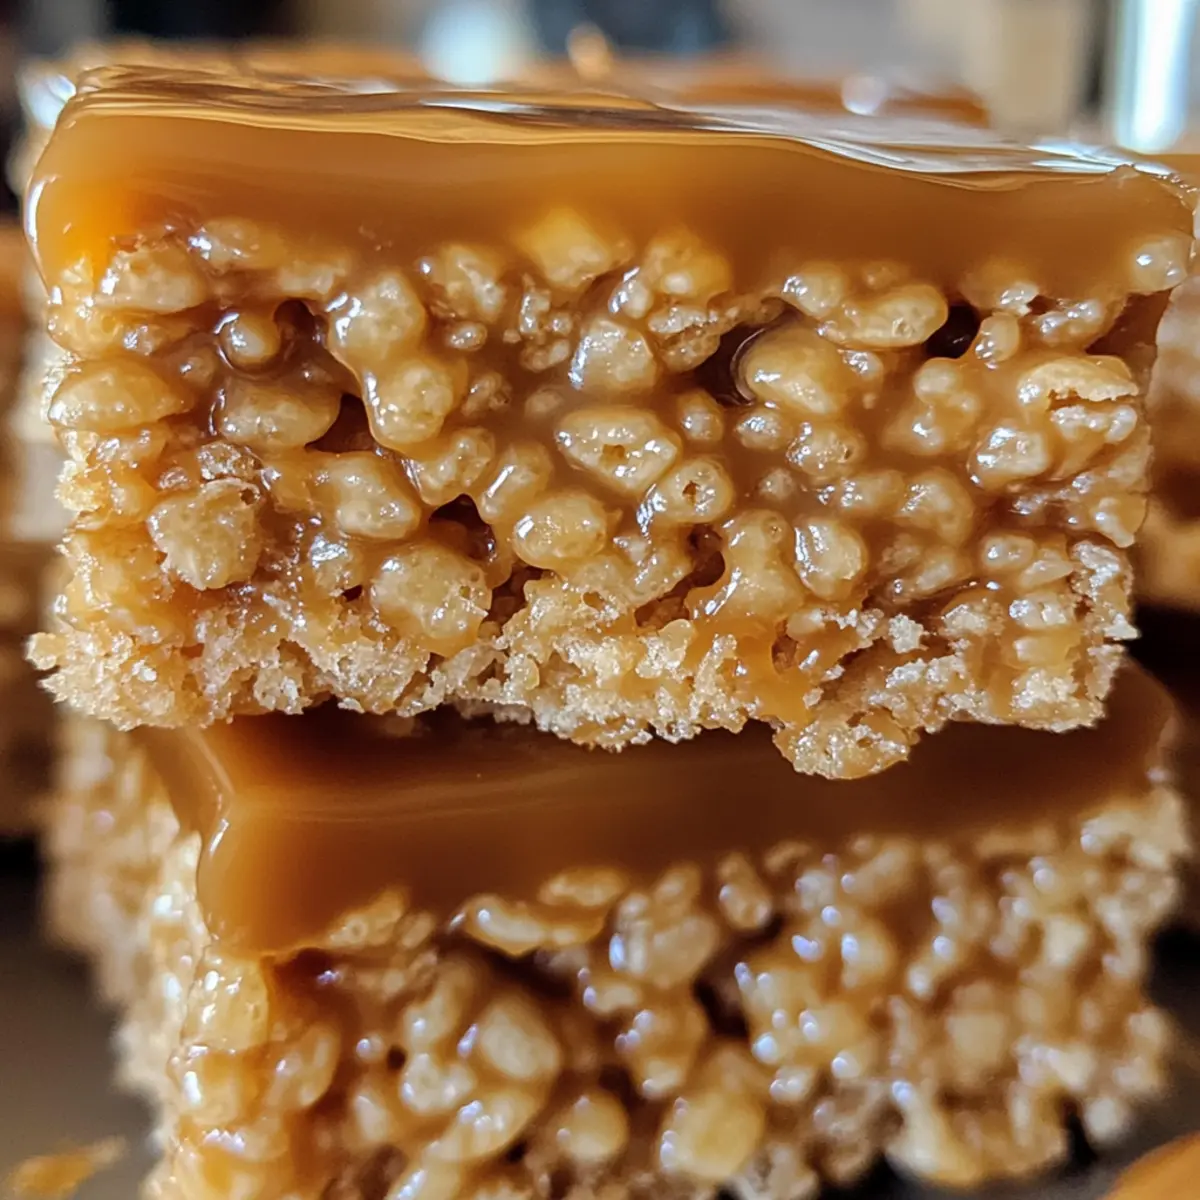
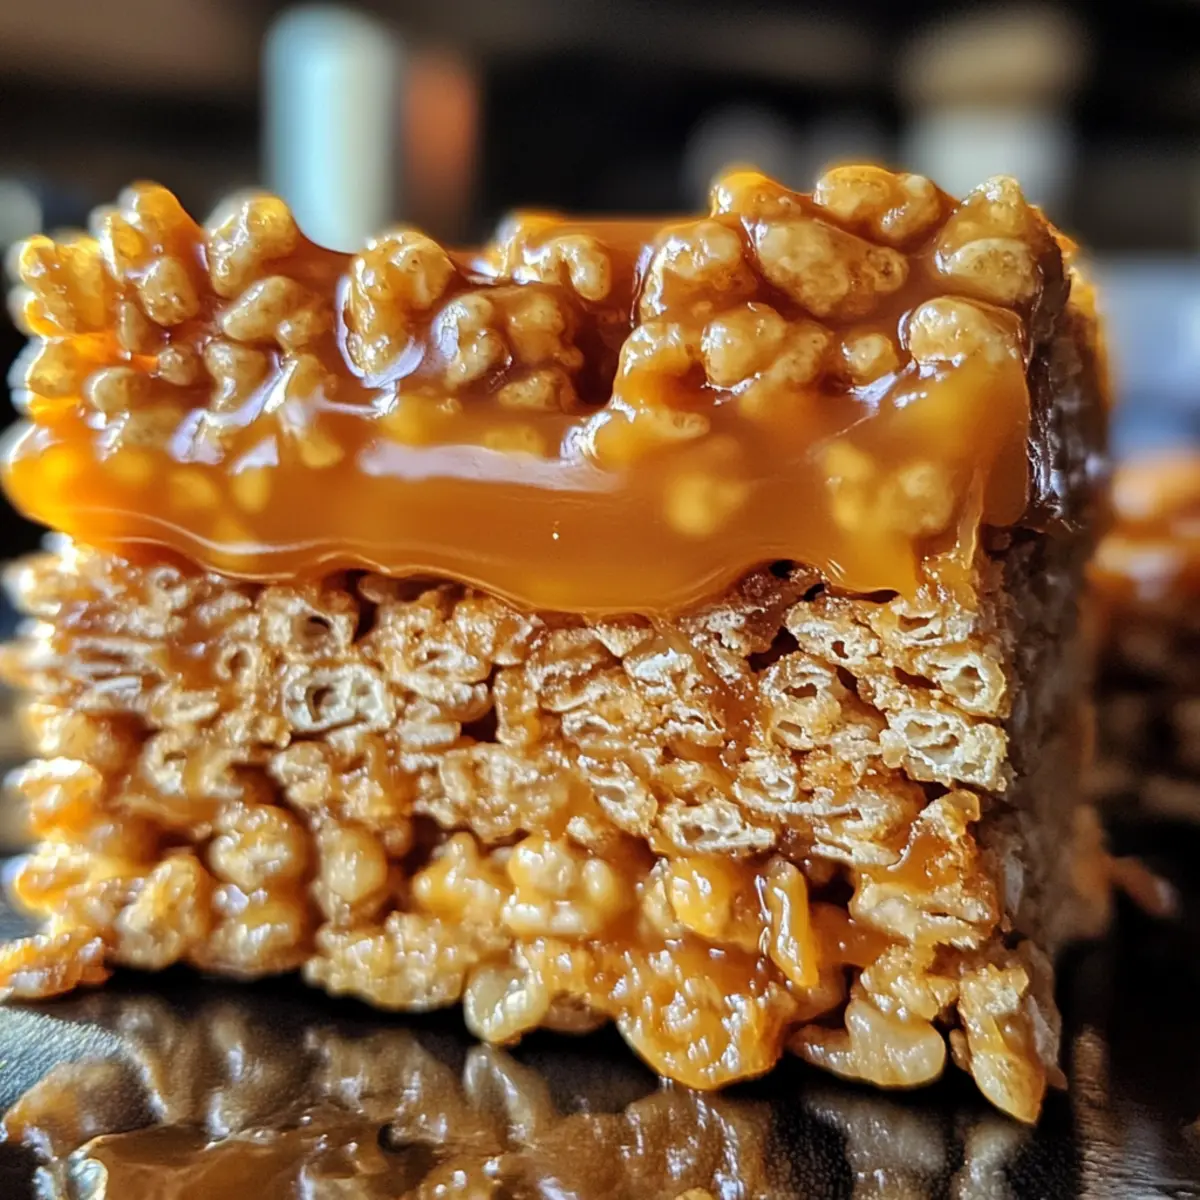
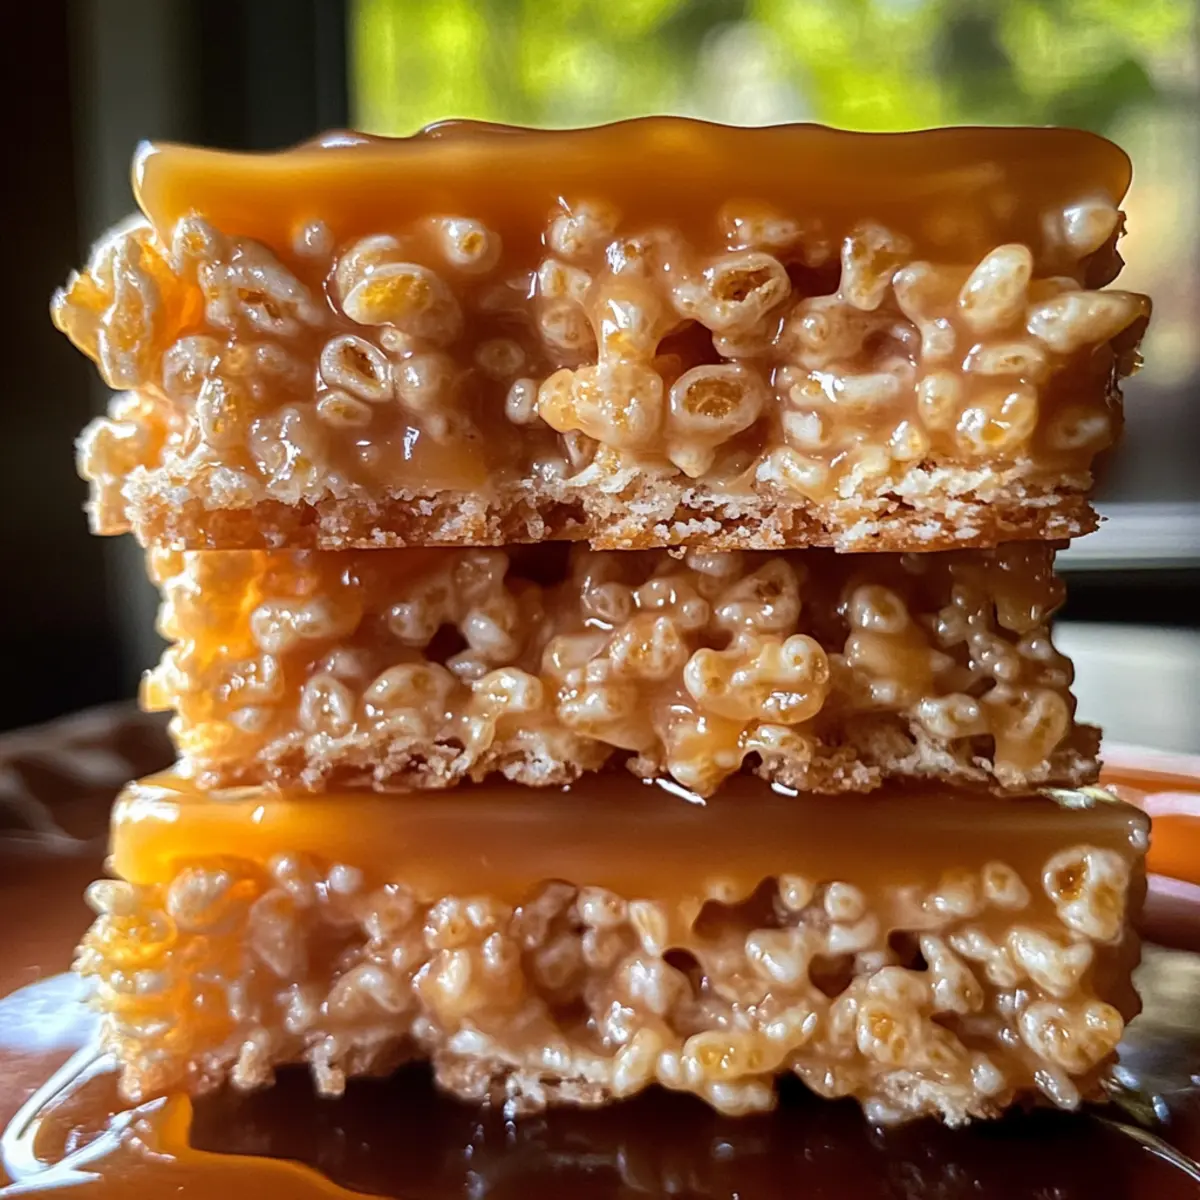
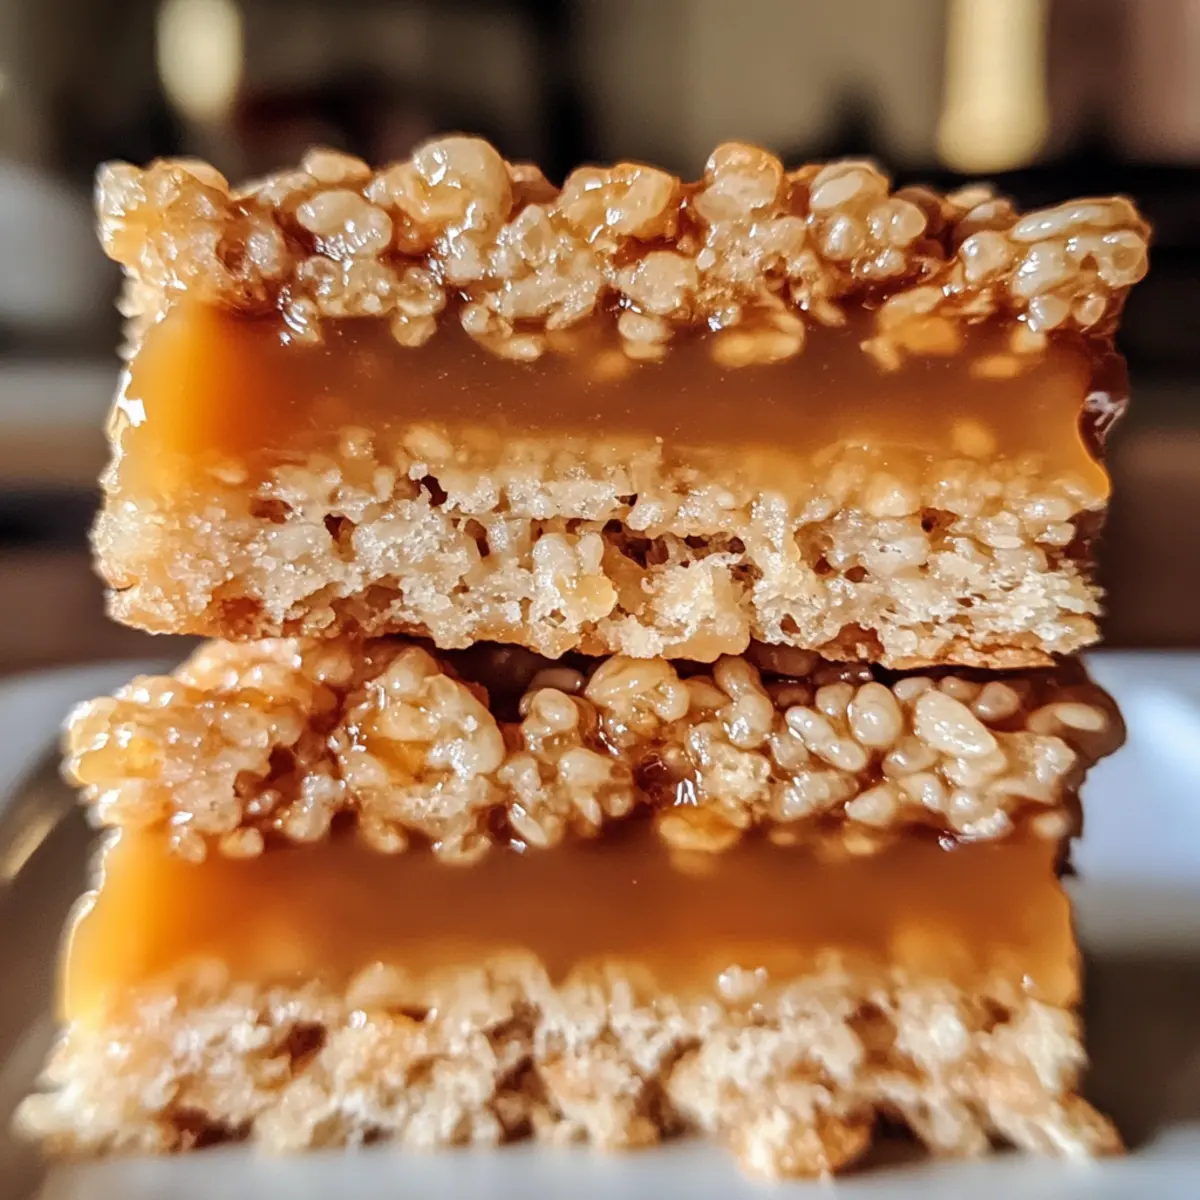
• Dulce de Leche – creates a creamy, caramel-like layer; for these Brown Butter Dulce de Leche Rice Krispie Treats, use half of a standard can (about 7 oz from a 14 oz can).
Step‑by‑Step Instructions for Brown Butter Dulce de Leche Rice Krispie Treats
Step 1: Prepare the Pan
Start by greasing a 9×9-inch baking pan with non-stick spray. For added security and easy removal, line the pan with parchment paper, then spray it again lightly. This step ensures that the finished Brown Butter Dulce de Leche Rice Krispie Treats will come out easily and maintain their shape when you cut them.
Step 2: Brown the Butter
In a large pot, melt ½ cup of unsalted butter over medium heat. Stir constantly, watching for the butter to foam and then turn a beautiful golden brown, which will take about 5-7 minutes. You’ll know it’s ready when you detect a nutty aroma and see browned flecks. Be careful not to let it burn, as this will affect the flavor of your treats.
Step 3: Melt the Marshmallows
Remove the pot from the heat and immediately add 8 cups of mini marshmallows and a pinch of fine sea salt to the browned butter. Stir the mixture vigorously until the marshmallows have completely melted and the mixture is smooth, which should take about 2-3 minutes. This gooey foundation will enhance the flavor of your Brown Butter Dulce de Leche Rice Krispie Treats.
Step 4: Add the Vanilla and Rice Krispies
Once the marshmallows are melted, mix in 1 teaspoon of pure vanilla extract. In a separate large bowl, combine the Rice Krispies cereal with the marshmallow mixture, ensuring every piece is evenly coated. Toss in the remaining marshmallows for added chewy pockets throughout the treats, mixing gently for about 1-2 minutes to distribute evenly.
Step 5: Form the First Layer
Press half of the Rice Krispies mixture into the prepared pan with your hands or a spatula, creating an even base layer. Make sure it’s compact but not overly pressed down, as this will help maintain the treat’s texture. This base will provide a solid foundation for your luscious dulce de leche layer in these Brown Butter Dulce de Leche Rice Krispie Treats.
Step 6: Spread the Dulce de Leche
Spread half of a standard can (approximately 7 oz) of dulce de leche evenly over the first layer of Rice Krispies. Gently use a spatula to ensure an even layer that reaches the edges, allowing that creamy, caramel-like flavor to seep into every bite. This step is where the magic of flavor truly begins to shine in your treats.
Step 7: Add the Top Layer
Spoon the remaining Rice Krispies mixture over the dulce de leche layer, pressing it down gently to create a compact top that holds the layers together. Use a buttered spoon or spatula to help flatten and distribute the mixture evenly. This will seal in the delicious dulce de leche layer and finish off your Brown Butter Dulce de Leche Rice Krispie Treats.
Step 8: Let Them Set
Allow the assembled treats to cool at room temperature until set, which typically takes about 30 minutes. Once cooled and firm, slice them into squares. This waiting period is essential for achieving the perfect chewy texture and ensuring that your indulgent treat holds together beautifully for sharing and enjoying!
Brown Butter Dulce de Leche Rice Krispie Treats Variations
Embrace your creativity as you craft these delightful treats by customizing them to suit your taste and dietary needs!
- Cinnamon Sugar Rice Krispies: Use cinnamon sugar flavored Rice Krispies for an extra layer of spice and sweetness, making each bite delightful.
- Nutty Twist: Add chopped nuts like pecans or walnuts for added crunch and depth. The nutty flavors pair beautifully with the caramel.
- Chocolate Chips: Fold in mini chocolate chips before layering for a surprising burst of chocolate goodness that complements the dulce de leche perfectly.
- Pumpkin Spice Version: For a seasonal twist, incorporate pumpkin spice into the marshmallow mixture. The warm flavors evoke cozy memories of autumn.
- Dairy-Free Option: Substitute coconut oil for the butter and use dairy-free chocolate chips and marshmallows. You’ll create an indulgence that everyone can enjoy.
- Fruit Fun: Layer in slices of fresh banana or strawberries between the Rice Krispies and dulce de leche for a fruity flavor contrast that’ll brighten your treats.
- Spicy Kick: Add a hint of cayenne pepper to the melted marshmallows for a surprising kick against the sweetness—it’s a uniquely thrilling combination!
Feel inspired? You might also enjoy these Brown Butter Marshmallow Cookies or treat yourself with some Peanut Butter Chocolate Frito Munch for more delicious options!
What to Serve with Brown Butter Dulce de Leche Rice Krispie Treats
To create the perfect occasion around your delightful dessert, consider these mouth-watering pairings that enhance the experience.
-
Vanilla Ice Cream: A scoop of creamy vanilla ice cream complements the gooeyness of the treats while offering a refreshing contrast.
-
Fresh Fruit Salad: Juicy berries and citrus add a light, refreshing touch that cuts through the sweetness of the treats. Try mixing strawberries, blueberries, and a hint of mint for a vibrant contrast.
-
Chocolate Dipped Strawberries: Indulge in the classic pairing of sweet chocolate and ripe strawberries for a decadent finish that beautifully complements your treats.
-
Caramel Sauce: Drizzling a bit of extra caramel around the plate amplifies the dulce de leche flavors, creating an indulgent, gooey experience.
-
Hot Chocolate or Coffee: A warm beverage like rich hot chocolate or a steaming cup of coffee provides a cozy contrast that balances the dessert’s sweetness, making it even more comforting.
-
Cinnamon Sugar Tortilla Chips: These crunchy chips offer a delightful texture and a hint of cinnamon that harmonizes beautifully with the nutty flavors of the Rice Krispie treats.
-
Milkshakes: Creamy milkshakes—especially vanilla or caramel flavored—add a fun and nostalgic twist that pairs wonderfully with the treats.
-
Nut & Fruit Granola Bars: Healthy granola bars provide a chewy, wholesome texture and nutty flavor that contrasts nicely with the soft and gooey layers of the Rice Krispie treat.
-
S’mores Dip: Melted chocolate and marshmallows in a warm s’mores dip create a wonderfully gooey experience that resonates with the flavors of your dessert while adding a fun interactive element to your meal.
Expert Tips for Brown Butter Dulce de Leche Rice Krispie Treats
-
Perfectly Browned Butter: Ensure you watch closely as the butter melts. Remove it from heat as soon as it turns golden brown to avoid burning, which can spoil your flavor.
-
Gentle Pressing: When forming layers, use a buttered spatula or spoon. This prevents sticking and helps maintain a light texture in your Brown Butter Dulce de Leche Rice Krispie Treats.
-
Cooling Time: Allow sufficient cooling time—about 30 minutes—before cutting. This ensures your treats hold their shape and deliver that delightful chewy texture.
-
Double the Recipe: If you’re making these treats for a big gathering, feel free to double the recipe and use a 9×13 inch pan for easy scaling and sharing.
-
Flavor Variations: Don’t hesitate to experiment! Use cinnamon sugar Rice Krispies or add chocolate chips for a creative twist that will impress your guests.
Storage Tips for Brown Butter Dulce de Leche Rice Krispie Treats
Room Temperature: Store the treats in an airtight container at room temperature for up to 4-5 days to maintain their deliciously chewy and crunchy texture.
Fridge: You can refrigerate the Brown Butter Dulce de Leche Rice Krispie Treats for up to a week in an airtight container, which can help enhance their creamy flavors.
Freezer: For longer storage, freeze the treats for up to 6 weeks. Wrap them tightly in plastic wrap and place them in a freezer-safe container to prevent freezer burn.
Reheating: If you prefer them warm, simply microwave individual squares for about 10-15 seconds to revive that gooey texture before serving.
Make Ahead Options
These Brown Butter Dulce de Leche Rice Krispie Treats are perfect for busy home cooks who want to save time during the week! You can prepare the Rice Krispies mixture up to 24 hours in advance; simply store it in an airtight container at room temperature. Brown the butter and melt the marshmallows ahead of time, then cool the mixture before combining it with the Rice Krispies. This prep ensures maximum freshness and flavor. When you’re ready to finish, just layer the dulce de leche and compact the top mixture, then allow the treats to set at room temperature for about 30 minutes. They’ll be just as delicious as if freshly made, helping you impress guests with minimal effort!
Brown Butter Dulce de Leche Rice Krispie Treats Recipe FAQs
What type of butter should I use for the best flavor?
Absolutely, I recommend using unsalted butter for the Brown Butter Dulce de Leche Rice Krispie Treats. This gives you better control over the salt levels in your dessert, allowing the natural sweetness of the dulce de leche and marshmallows to shine through without being overpowered by salt.
How should I store my Rice Krispie treats?
Store your Brown Butter Dulce de Leche Rice Krispie Treats in an airtight container at room temperature for up to 4-5 days. This will keep them chewy and maintain that delightful crunch. If you want them to last even longer, you can refrigerate them for up to a week for a slight flavor enhancement, or freeze them for up to 6 weeks.
Can I freeze Brown Butter Dulce de Leche Rice Krispie Treats?
Yes, you can freeze these treats! Wrap them tightly in plastic wrap and place them in a freezer-safe container to prevent freezer burn. They can stay fresh for up to 6 weeks. When you’re ready to enjoy, just thaw them at room temperature or microwave individual squares for 10-15 seconds to get that gooey texture back.
What should I do if my Rice Krispie treats are too sticky?
If your mixture is too sticky while pressing it into the pan, don’t worry! This can happen if the marshmallows aren’t melted enough or if too much marshmallow mixture is used. To fix it, lightly butter your hands or use a spatula to press the mixture down, ensuring you’re not overly compacting it, which helps maintain a light, crunchy texture.
Can I use different types of Rice Krispies?
Very! You can absolutely use cinnamon sugar Rice Krispies for added flavor in your Brown Butter Dulce de Leche Rice Krispie Treats. If that’s not available, classic Rice Krispies work just as well. Feel free to get creative! You can even throw in mini chocolate chips or chopped nuts for an extra kick of flavor and texture.
Brown Butter Dulce de Leche Rice Krispie Treats to Savor
Ingredients
Equipment
Method
- Grease a 9x9-inch baking pan with non-stick spray and line with parchment paper.
- Melt ½ cup of unsalted butter over medium heat until golden brown and nutty.
- Remove from heat and add 8 cups of mini marshmallows and a pinch of sea salt, stirring until smooth.
- Mix in 1 teaspoon of pure vanilla extract and combine with Rice Krispies cereal in a separate bowl.
- Press half of the Rice Krispies mixture into the prepared pan to form the base layer.
- Spread 7 oz of dulce de leche evenly over the Rice Krispies layer.
- Add the remaining Rice Krispies mixture on top and press down gently.
- Cool at room temperature for about 30 minutes before slicing.
Leave a Reply