
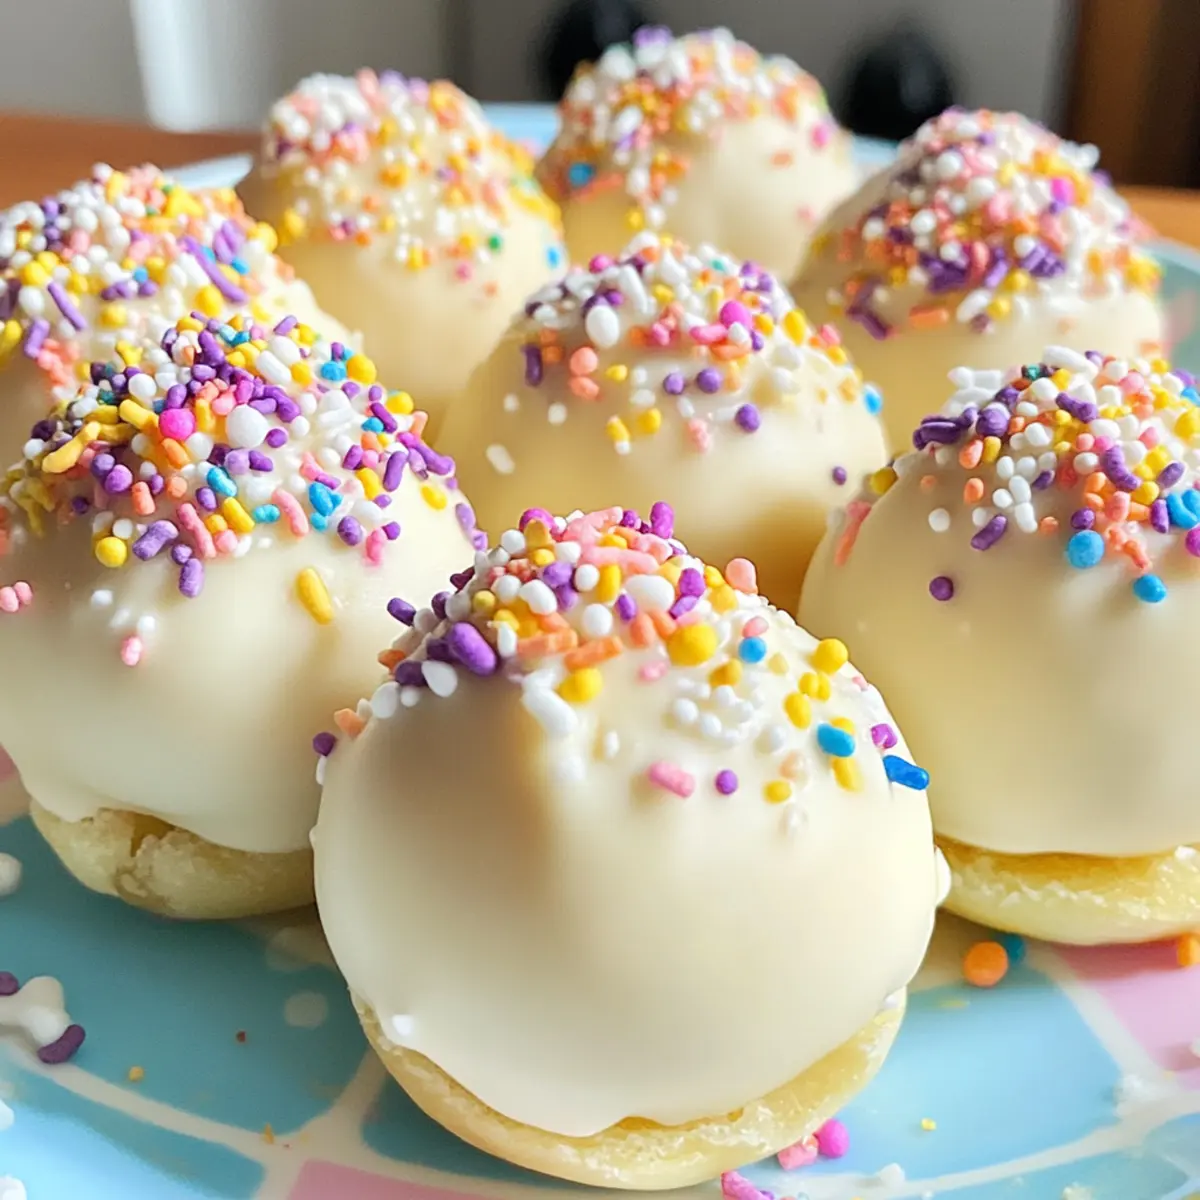
With a rich blend of nostalgia and festivity, these Banana Pudding Easter Truffles bring a delightful twist to your spring celebrations. Made with creamy banana pudding, crunchy vanilla wafers, and draped in a luscious chocolate shell, these no-bake treats are perfect for sharing at Easter gatherings. What I love most about this recipe is its quick prep time—perfect for eager bakers and busy parents alike. Plus, with their pastel colors and fun toppings, these truffles add a cheerful touch to any dessert table. Whether you’re looking to impress guests or simply satisfy your sweet tooth, these truffles are sure to be a hit. Curious to find out how to create these adorable bites? Let’s dive into the recipe!

Why Are Banana Pudding Easter Truffles So Irresistible?
Delightful Taste: These truffles combine creamy banana pudding with crunchy vanilla wafers, creating a perfect bite of nostalgia.
Easy No-Bake Recipe: No baking is required, making them a hassle-free option for busy families or last-minute dessert needs.
Festive Appeal: With their cheerful pastel colors and fun toppings, they instantly elevate your Easter celebrations.
Customizable Options: Try variations like Chocolate Banana Truffles or Coconut Banana Truffles to suit different tastes within your crowd!
Kid-Friendly Fun: Perfect for getting the little ones involved in the kitchen, these truffles are a treat everyone will love.
Quick Prep Time: Ready in just a few simple steps, making them a go-to for any gathering or personal indulgence!
Banana Pudding Easter Truffles Ingredients
Here are all the ingredients you’ll need for creating these charming treats!
For the Truffle Mixture
- Crushed Vanilla Wafers – Provides structure and crunch; feel free to substitute graham cracker crumbs for a unique twist.
- Cream Cheese (softened) – Adds creaminess and richness to the filling; mascarpone cheese can offer a lighter texture if preferred.
- Banana Pudding Mix (dry) – Imparts the classic banana flavor to the truffles; using a high-quality brand ensures the best taste.
- Milk – Helps bind the mixture to achieve the right consistency; almond or oat milk can be used for a dairy-free version.
- Vanilla Extract – Enhances flavor depth; for the best quality, opt for pure vanilla extract.
For the Chocolate Coating
- White Chocolate Chips or Candy Melts – Forms the outer coating for sweetness and a beautiful finish; try milk or dark chocolate for a different flavor profile.
- Food Coloring (pastel colors) – Used for customizing the chocolate coating to fit the festive theme.
For Optional Toppings
- Crushed Vanilla Wafers – Adds texture and extra crunch when sprinkled on top.
- Easter Sprinkles – Perfect for a festive touch to your truffles!
These Banana Pudding Easter Truffles not only bring joy but also a blend of flavors that make them a must-have for your Easter gatherings!
Step‑by‑Step Instructions for Banana Pudding Easter Truffles
Step 1: Make the Truffle Mixture
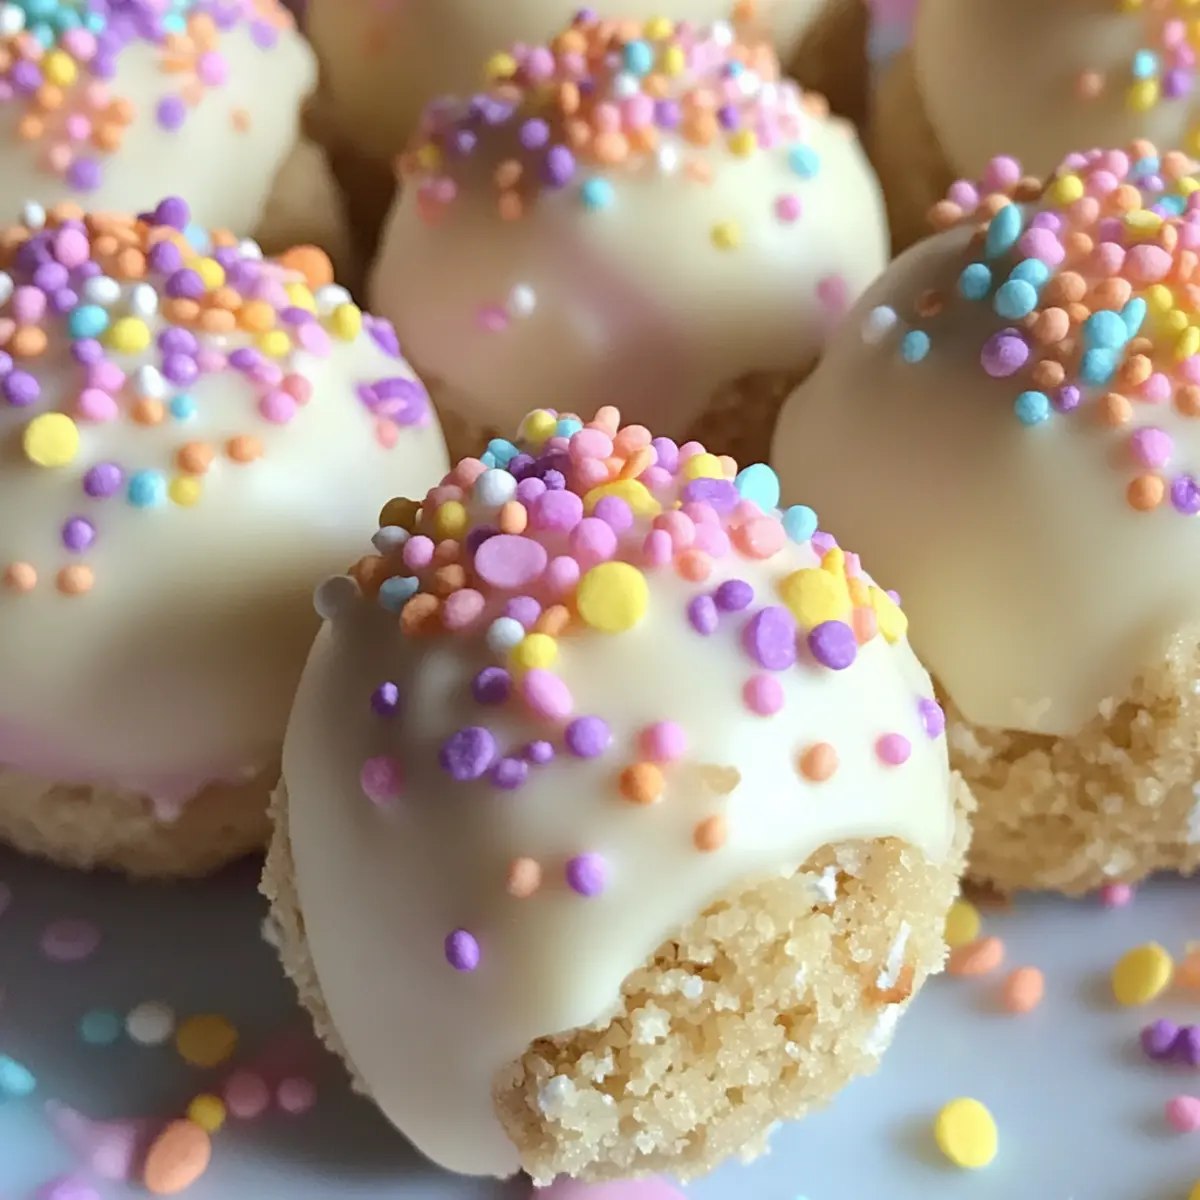
In a large bowl, combine crushed vanilla wafers, softened cream cheese, dry banana pudding mix, milk, and vanilla extract. Use a spatula to mix until a smooth, dough-like consistency forms, with all ingredients well incorporated. This will take about 2-3 minutes. The mixture should be creamy and easy to roll into balls, capturing that delightful flavor of banana pudding.
Step 2: Shape the Truffles
Using a tablespoon, scoop out portions of the mixture and roll them into smooth balls about 1 inch in diameter. Place each truffle onto a parchment-lined baking sheet, ensuring enough space between each ball. Once all truffles are formed, chill them in the refrigerator for 30-45 minutes until firm. This step is crucial for ensuring perfect shapes when you coat them later.
Step 3: Melt the Chocolate
While the truffles are chilling, prepare the chocolate coating. In a microwave-safe bowl, add white chocolate chips or candy melts. Heat in the microwave in 30-second intervals, stirring between each interval until the chocolate is fully melted and smooth, which should take about 1-2 minutes. Ensuring a gentle melting process will prevent the chocolate from seizing.
Step 4: Coat the Truffles
Once the truffles are firm, remove them from the refrigerator. Dip each chilled truffle into the melted chocolate using a fork, allowing excess chocolate to drip off. Make sure each truffle is evenly coated for a beautiful finish. Return the coated truffles to the parchment-lined baking sheet, ready for decoration.
Step 5: Decorate the Truffles
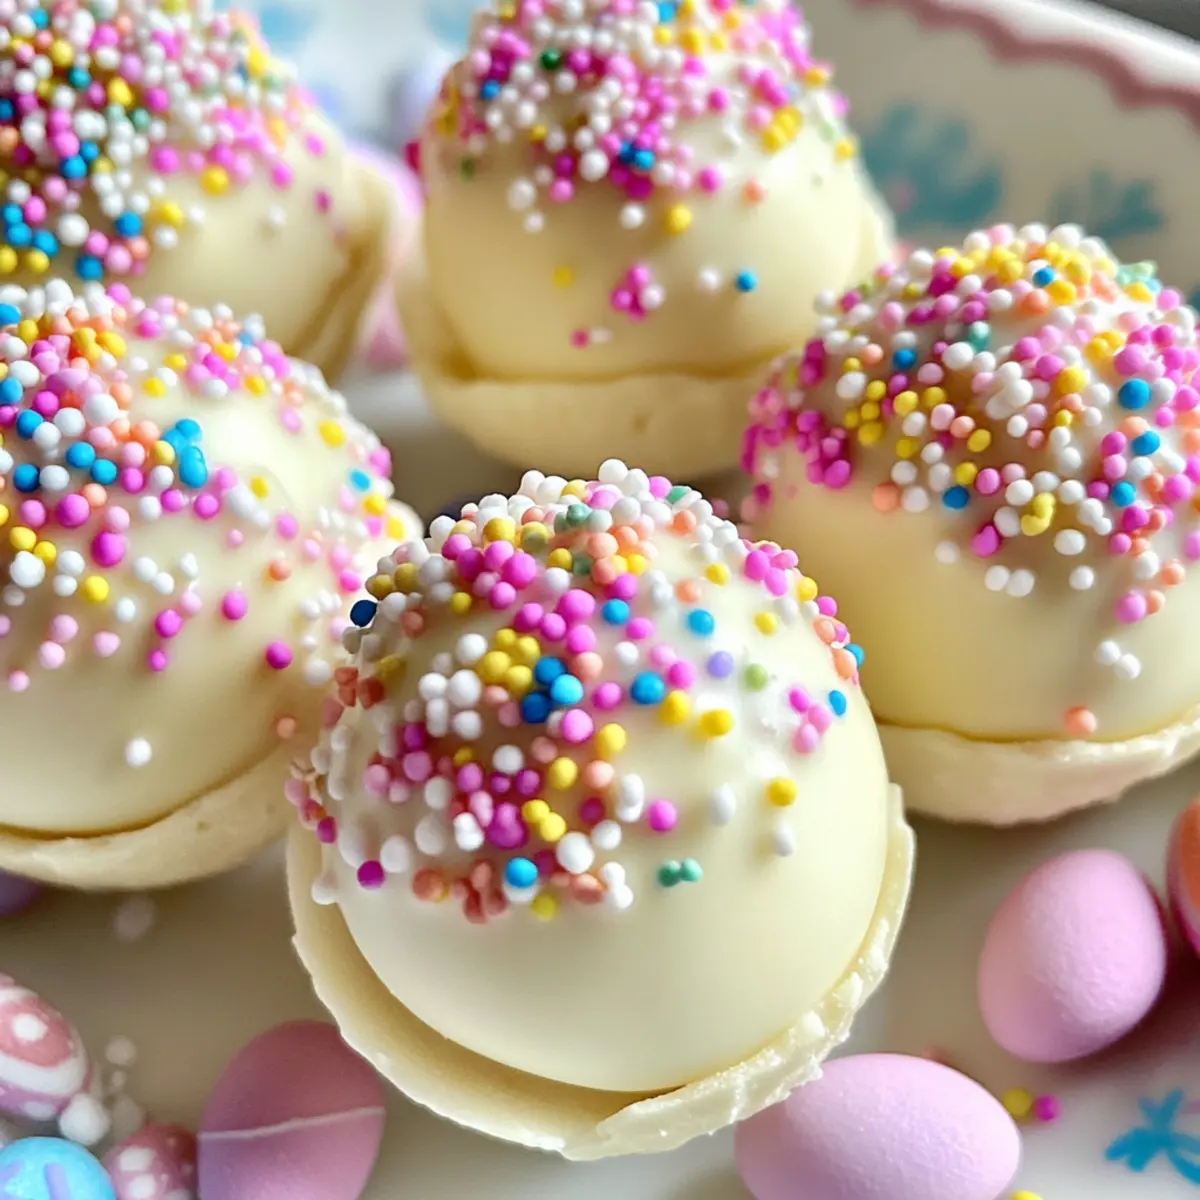
Before the chocolate sets, sprinkle each truffle with crushed vanilla wafers or colorful Easter sprinkles for that festive touch. This step is all about creativity—feel free to mix and match toppings to match your celebration theme. The decorations add both crunch and a charming appearance to your Banana Pudding Easter Truffles.
Step 6: Let Them Set
Allow the decorated truffles to cool at room temperature or refrigerate them for 15-20 minutes to fully set the chocolate. You’ll know they’re ready when the chocolate coating feels firm to the touch. This cooling time also helps meld the flavors together, enhancing the overall taste of the truffles.
Step 7: Serve and Enjoy
Once set, present the truffles in decorative bowls or gift boxes, perfect for Easter celebrations. Their delightful appearance will surely impress your guests, making them ideal for sharing. Store any leftovers airtight in the fridge for up to 5 days, although these tasty Banana Pudding Easter Truffles are likely to disappear quickly!
Storage Tips for Banana Pudding Easter Truffles
Fridge: Store your Banana Pudding Easter Truffles in an airtight container in the refrigerator for up to 5 days to maintain freshness and flavor.
Freezer: For longer storage, freeze the truffles in a single layer on a baking sheet, then transfer to an airtight container or freezer bag for up to 2 months.
Thawing: To enjoy frozen truffles, simply move them to the fridge and let them thaw overnight before serving for the best texture and taste.
Reheating: There’s no need to reheat these treats; enjoy them chilled or at room temperature for the perfect creamy and crunchy experience!
Make Ahead Options
These Banana Pudding Easter Truffles are a fantastic choice for meal prep, allowing you to save time and focus on the festivities. You can prepare the truffle mixture up to 24 hours in advance; just combine the crushed vanilla wafers, cream cheese, banana pudding mix, milk, and vanilla extract, then store it in an airtight container in the refrigerator. When you’re ready to serve, simply roll the mixture into balls, chill briefly, coat with melted chocolate, and decorate with your favorite toppings. By prepping ahead, you ensure these treats are just as delicious and fresh, making your Easter gathering a breeze!
What to Serve with Banana Pudding Easter Truffles
Elevate your dessert table with delightful sides that perfectly complement the sweet, creamy flavor of truffles.
- Fresh Fruit Salad: A vibrant mix of berries and citrus adds a refreshing, zesty contrast to the rich truffles.
- Chocolate Dipped Strawberries: The contrast of dark chocolate and juicy strawberries highlights the creamy banana essence beautifully.
- Mini Cheesecake Bites: Creamy and tart, these bites provide an exciting textural element that pairs wonderfully with your truffles.
- Coffee or Espresso: A cup of rich coffee balances the sweetness and enhances the dessert experience, creating a cozy atmosphere.
- Lemon Sorbet: The tartness of lemon sorbet acts as a palate cleanser, refreshing your taste buds after each indulgent truffle.
- Carrot Cake Muffins: Their spiced sweetness harmonizes with the flavors of banana pudding, giving a festive nod to Easter celebrations.
With these pairings, your Banana Pudding Easter Truffles will shine even brighter at your spring gatherings!
Banana Pudding Easter Truffles Variations
Feel free to unleash your creativity and make these truffles your own with delightful twists!
-
Dairy-Free: Use almond or oat milk and coconut cream in the mixture for a delicious dairy-free option.
-
Crunchy Coconut: Roll the truffles in shredded coconut after coating them in chocolate to add a tropical flair. It brings a lovely chewiness to the mix!
-
Nutty Twist: Incorporate 2 tablespoons of peanut butter into the filling for a creamy, nut-infused flavor that peanut butter lovers will adore.
-
Minty Freshness: Add a drop of mint extract to your melted chocolate for an invigorating twist that complements the banana flavor beautifully.
-
Chocolate Lovers: Swap white chocolate for rich dark or milk chocolate to create a deeper, more decadent flavor profile. This variation offers a different experience altogether!
-
Caramel Drizzle: For a luxurious finish, drizzle melted caramel over the coated truffles before they set. This creates a mouthwatering sweet surprise.
-
Fruit Fusion: Mix in mini chocolate chips or chopped dried fruits, like cranberries or cherries, to the truffle mixture for extra texture and a burst of flavor.
-
Layered Delight: Serve these truffles in a trifle dish with layers of graham cracker crumbs, banana slices, and whipped cream for a beautiful dessert presentation! If you love layered flavors, also consider making Healthy Pumpkin Truffles for a seasonal treat.
Don’t forget, each variation adds your personal touch to these delightful Banana Pudding Easter Truffles, ensuring they are both cherished and memorable at your gatherings!
Expert Tips for Banana Pudding Easter Truffles
• Use Room Temperature Ingredients: Ensure your cream cheese is at room temperature for easier mixing, which helps achieve a smoother truffle filling.
• Chill Properly: Don’t skip chilling the truffles before coating; this step is crucial for keeping their shape during the chocolate dip.
• Melt Chocolate Carefully: Avoid overheating white chocolate as it can seize. Melt in short intervals and stir until smooth for perfect coating.
• Experiment with Flavors: Don’t hesitate to customize your Banana Pudding Easter Truffles with different toppings or flavorings—like adding peanut butter or coconut!
• Store Correctly: Keep your truffles stored in an airtight container in the fridge for up to 5 days, but these treats are so delicious, they might not last that long!
Banana Pudding Easter Truffles Recipe FAQs
What type of vanilla wafers should I use for the truffles?
Choosing the right vanilla wafers is essential for the texture of your Banana Pudding Easter Truffles! I recommend using the classic Nilla Wafers. If you’re looking for a different flavor profile, graham cracker crumbs can be a delightful substitute that adds a hint of sweetness and a unique twist to the flavor.
How should I store my Banana Pudding Easter Truffles?
To keep your truffles fresh, store them in an airtight container in the refrigerator for up to 5 days. Make sure to layer them carefully with parchment paper if you’re stacking them, so they don’t stick together. If you have extras, freezing is an excellent option—simply freeze them in a single layer on a baking sheet first, then transfer to a freezer bag for up to 2 months.
Can I freeze Banana Pudding Easter Truffles? How?
Absolutely! Freezing is a great way to enjoy your truffles later. Start by placing the truffles on a parchment-lined baking sheet in a single layer. Freeze them for about 1-2 hours until firm. Once frozen, you can transfer them to an airtight container or freezer bag. They can be stored this way for up to 2 months. When you’re ready to indulge, simply thaw them in the fridge overnight for optimum texture and flavor!
What should I do if my chocolate coating is too thick?
If you find that your chocolate coating is too thick, it can make the dipping process quite challenging. No worries! You can fix this by adding a little vegetable oil or coconut oil to the melted chocolate—about 1 teaspoon at a time—until you reach your desired consistency. Make sure to stir well until fully incorporated. This will help the chocolate glide smoothly over your truffles.
Are there any dietary considerations for Banana Pudding Easter Truffles?
Yes! If you have dietary restrictions, there are various substitutions you can make. For a dairy-free option, use almond or oat milk and consider substituting cream cheese with a dairy-free alternative. If you’re concerned about allergens, keep in mind that the recipe contains dairy. Always double-check your ingredients, especially if serving to children or guests with allergies.
Can I customize the toppings for my truffles?
Very! Get creative with your toppings! Aside from crushed vanilla wafers and Easter sprinkles, you can roll your truffles in toasted coconut, crushed nuts, or even drizzle some melted chocolate on top for an extra indulgent touch. Explore various combinations to match your celebration’s theme or to cater to different taste preferences!
Banana Pudding Easter Truffles: A Sweet No-Bake Treat Adventure
Ingredients
Equipment
Method
- In a large bowl, combine crushed vanilla wafers, softened cream cheese, dry banana pudding mix, milk, and vanilla extract. Mix until a smooth, dough-like consistency forms.
- Using a tablespoon, scoop out portions of the mixture and roll them into smooth balls about 1 inch in diameter. Place on a parchment-lined baking sheet and chill for 30-45 minutes.
- In a microwave-safe bowl, add white chocolate chips or candy melts. Heat in 30-second intervals until melted and smooth.
- Dip each chilled truffle into the melted chocolate, allowing excess chocolate to drip off. Return to the parchment-lined baking sheet.
- Before the chocolate sets, sprinkle each truffle with crushed vanilla wafers or colorful Easter sprinkles.
- Allow the decorated truffles to cool at room temperature or refrigerate for 15-20 minutes until chocolate is firm.
- Once set, present the truffles in decorative bowls or gift boxes and store any leftovers in the fridge for up to 5 days.
Leave a Reply