
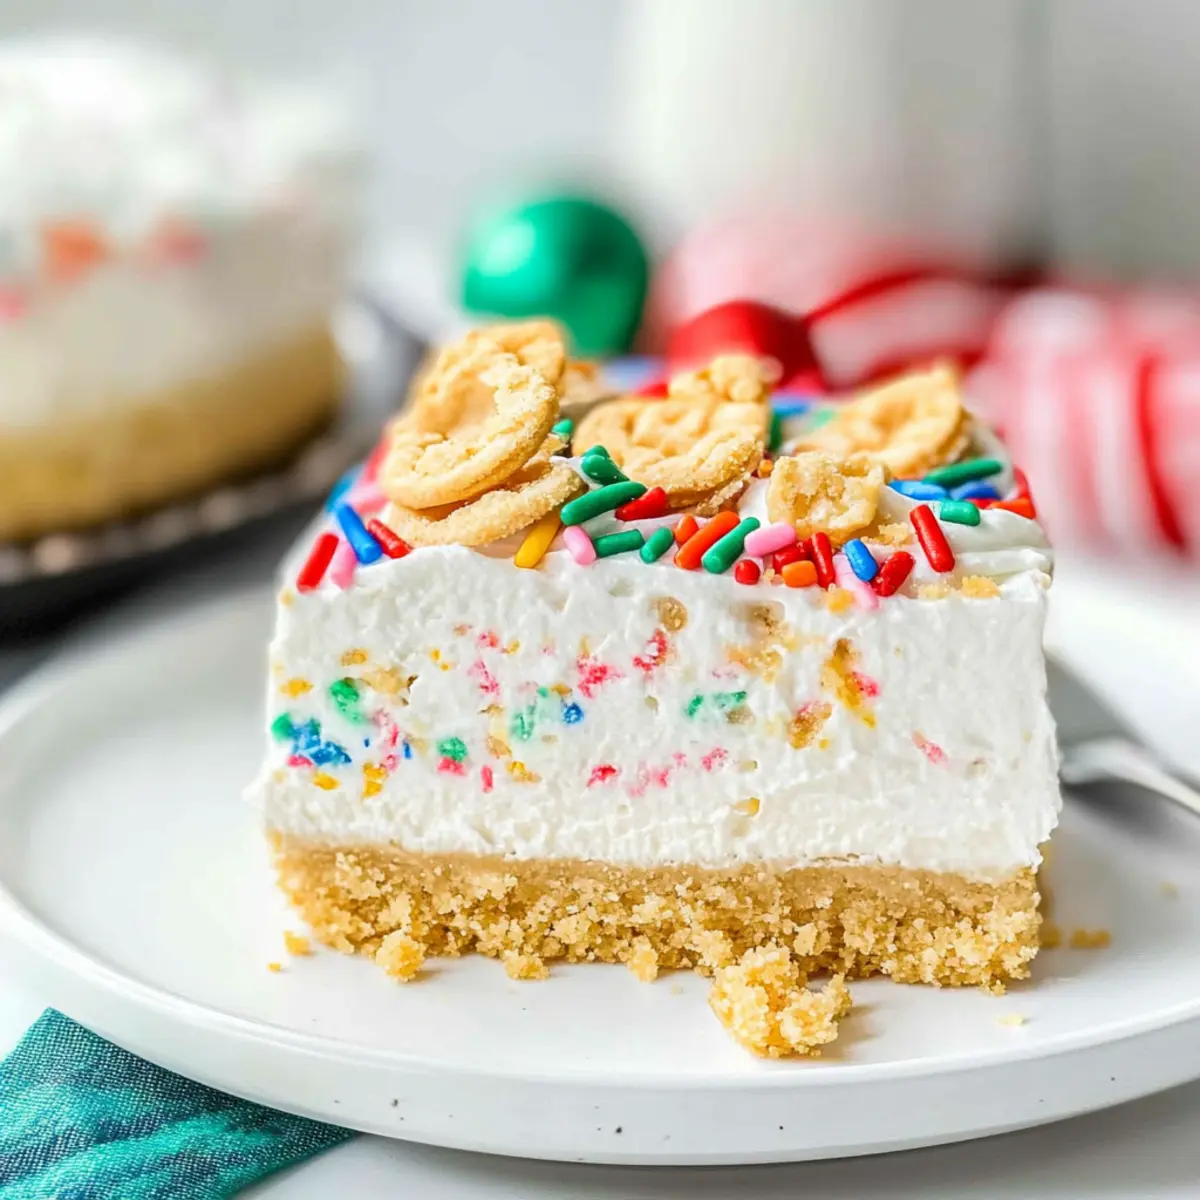
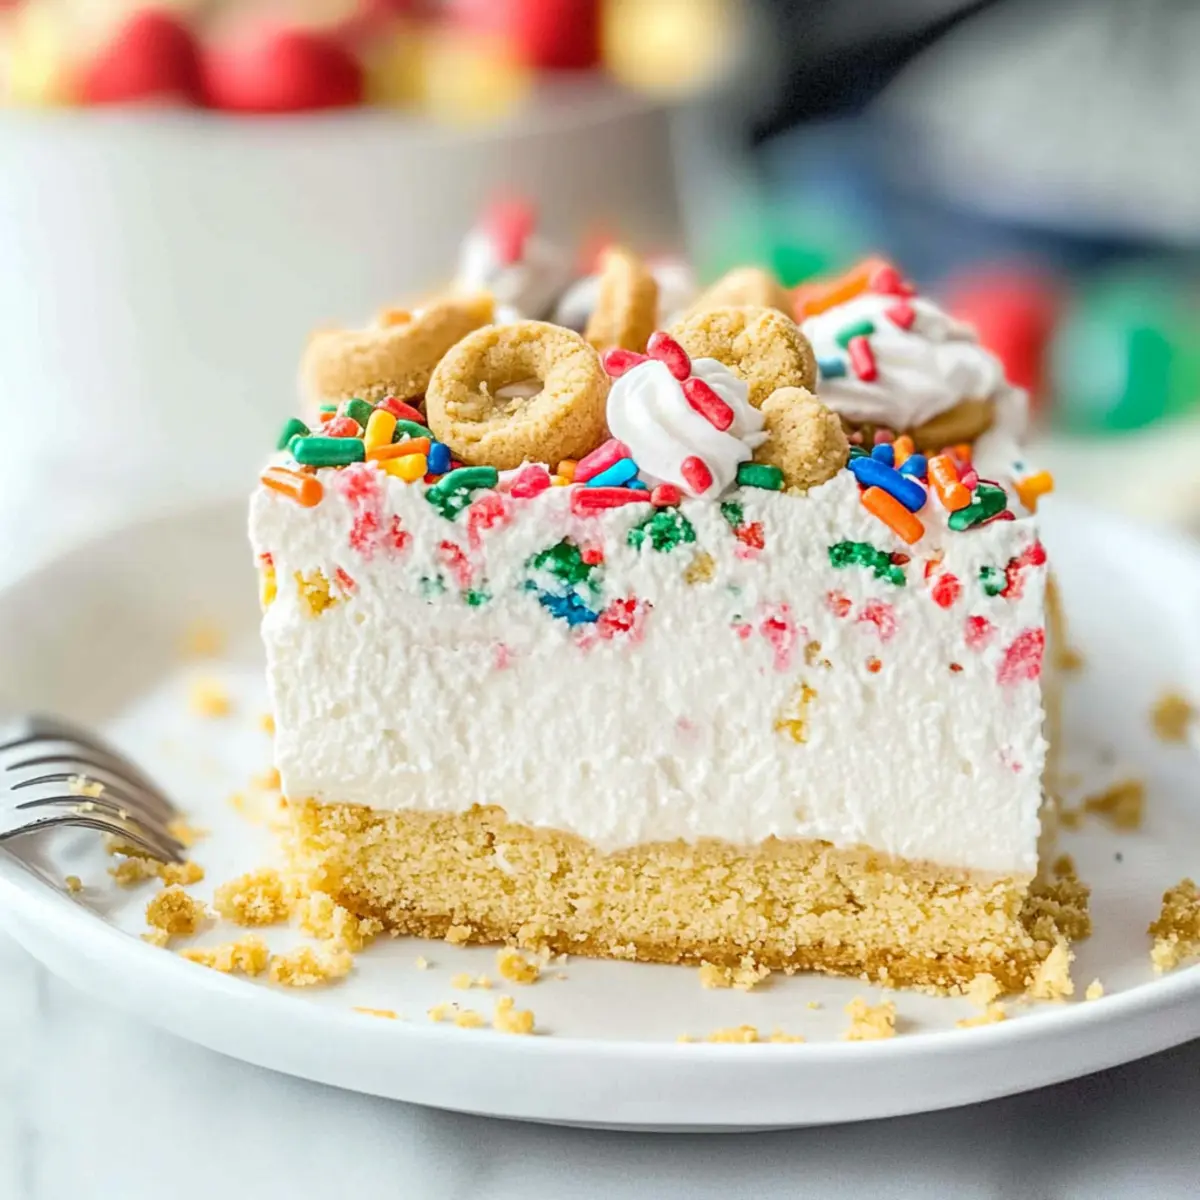
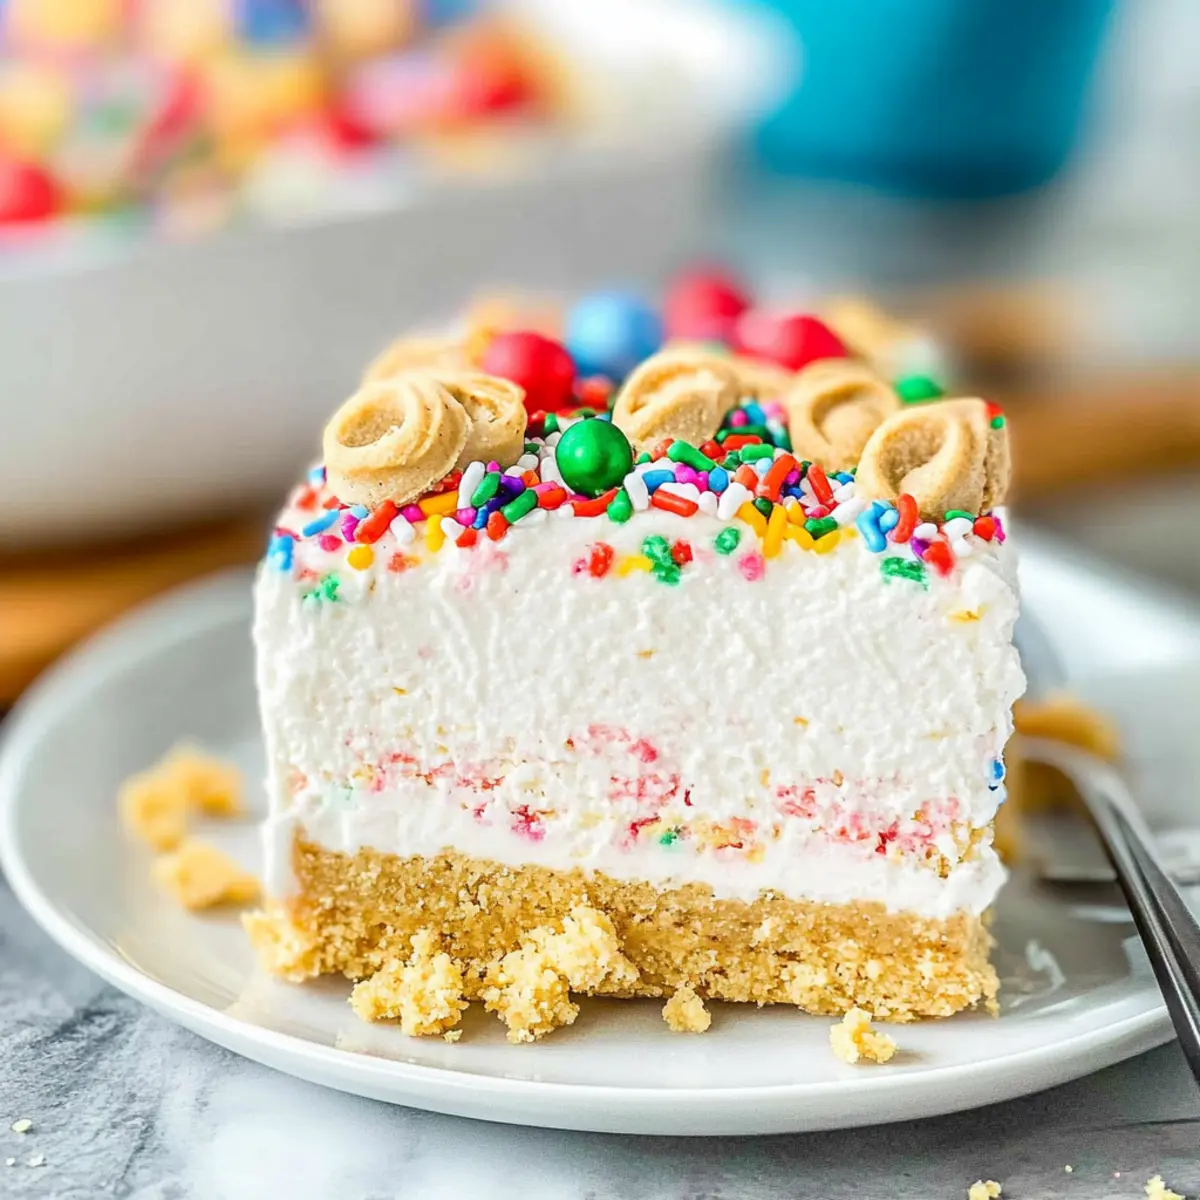
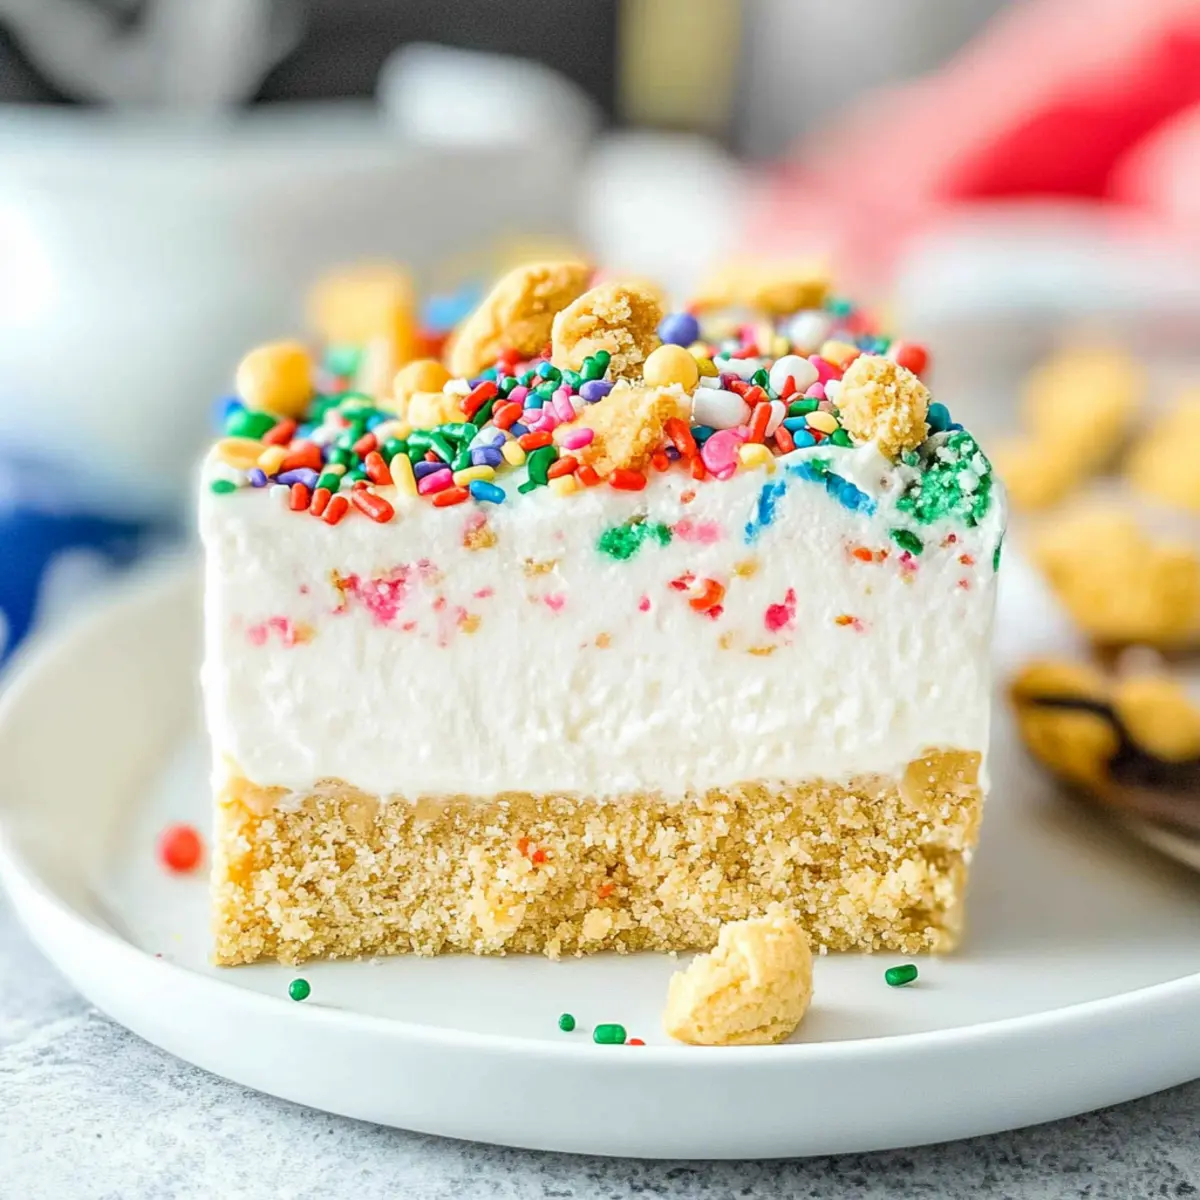
As I stood in my kitchen, surrounded by the festive aroma of holiday spices, I couldn’t help but think about the magic of simple, no-bake desserts during this joyous time of year. That’s when the idea for my No Bake Christmas Cookie Lush struck—a delightful layered treat that combines creamy cheesecake and rich pudding over a buttery cookie crust. This stunning dessert is not only a showstopper at any holiday gathering, but it also makes life easier with its effortless preparation. Perfect for potlucks or family feasts, this recipe promises to dazzle your guests while sparing you from the stress of baking. Are you ready to whip up a dessert that will leave everyone asking for seconds? Let’s dive in!
Why is No Bake Christmas Cookie Lush a Must-Try?
Festive and Fun: This dessert won’t just satisfy cravings; it adds a vibrant splash of holiday cheer to your table with colorful sprinkles and layers.
Easy and Quick: No baking means you can whip this up in no time! This recipe saves valuable minutes for holiday prep, making it perfect for busy celebrations.
Rich and Creamy: The combination of cheesecake and pudding layers creates an irresistible indulgence, captivating both kids and adults alike.
Versatile and Customizable: Want to get creative? Try variations like adding fresh fruit or swapping cookies, allowing you to make it truly your own. It pairs beautifully with other treats like Hot Chocolate Cookies or Maraschino Cherry Cookies.
Crowd-Pleaser: Trust me, guests will be fighting for the last piece, making it a sure standout at any potluck or festive gathering!
No Bake Christmas Cookie Lush Ingredients
• Get ready to create a delightful No Bake Christmas Cookie Lush that’s a feast for the eyes and taste buds!
For the Crust
- Vanilla Oreo Cookies – Create a deliciously crunchy base and a perfect topping; use high-quality cookies for the best flavor.
- Butter – Adds richness and binds the cookie crumbs; melted butter ensures even mixing.
For the Cream Cheese Layer
- Cream Cheese – This rich ingredient provides a creamy texture; opt for full-fat for the best results.
- Powdered Sugar – Sweetens without adding grittiness; helps balance the tangy cream cheese.
- Holiday Sprinkles – Adds a fun and festive touch; choose vibrant colors to enhance visual appeal.
- Whipped Topping – Brings a lightness to the layer; the tub variety is convenient but homemade whipped cream works too.
For the Pudding Layer
- Cheesecake Instant Pudding Mix – Bursts with creamy flavor in the pudding layer; you can substitute with vanilla or white chocolate pudding mix if desired.
- Cold Milk – Essential for prepping instant pudding; whole milk delivers a richer taste.
For the Topping
- Whipped Topping (remaining) – Use for the final layer, providing a lighter finish.
- Extra Crushed Cookies – Sprinkle on top for added crunch; the cookie topping completes the dessert’s festive look.
- Extra Holiday Sprinkles – Just a bit more for that holiday sparkle to make it pop!
With these simple ingredients, your No Bake Christmas Cookie Lush will be a festive standout worthy of any celebration!
Step‑by‑Step Instructions for No Bake Christmas Cookie Lush
Step 1: Prepare the Baking Dish
Begin by lightly greasing a 9×13-inch baking dish or lining it with parchment paper for easy removal. This ensures your No Bake Christmas Cookie Lush will be easy to serve and cut. Set it aside while you work on the crust, making sure to have all your ingredients ready to go.
Step 2: Crush Cookies
Take 36 vanilla Oreo cookies and crush them into fine crumbs. You can pulse them in a food processor for about 30 seconds, or place them in a zip-top bag and use a rolling pin to crush them finely. The goal is to achieve even crumbs that will form a lovely base for your lush dessert.
Step 3: Make the Crust
In a mixing bowl, combine the crushed cookies with melted butter and half a tablespoon of festive holiday sprinkles. Stir until the mixture resembles wet sand. Press this mixture firmly into the bottom of your prepared baking dish, ensuring it’s evenly distributed. This crust will form a delightful, buttery foundation for your No Bake Christmas Cookie Lush.
Step 4: Cream Cheese Layer
In a separate bowl, beat together softened cream cheese, peppermint extract, and powdered sugar using an electric mixer on medium speed until smooth and creamy, about 2-3 minutes. Gently fold in one container of whipped topping and half a tablespoon of sprinkles, creating a light and fluffy mixture. Spread this cream cheese layer evenly over your crust, smoothing it into an even layer.
Step 5: Prepare Pudding Mix
In another bowl, combine the cheesecake instant pudding mix with cold milk. Whisk vigorously for about 2-3 minutes, or until the mixture thickens. You’ll know it’s ready when it has a pudding-like consistency. Add in half a tablespoon of sprinkles to enhance the festive feel before spreading it evenly on top of the cream cheese layer.
Step 6: Layer Pudding
Pour the prepared pudding mixture over the cream cheese layer, using a spatula to spread it into an even layer. The contrasting colors and textures will start to create a beautiful No Bake Christmas Cookie Lush. Make sure to smooth it out gently to avoid disrupting the cream cheese layer underneath.
Step 7: Top Layer
Now, take the remaining whipped topping and spread it evenly over the pudding layer, creating a smooth, white surface. Next, crush the remaining Oreo cookies and sprinkle them generously on top, along with extra holiday sprinkles for that festive touch. This will not only add crunch but also a vibrant look to your dessert.
Step 8: Chill
Finally, refrigerate your No Bake Christmas Cookie Lush for at least 4 hours, or overnight for the best results. This chilling time allows the layers to set properly and enhances the flavors. If you prefer firmer slices, you can also freeze it for about 1-2 hours before serving, then let it thaw for an hour at room temperature.
What to Serve with No Bake Christmas Cookie Lush
Indulging in a creamy No Bake Christmas Cookie Lush invites a delightful medley of flavors and textures to your holiday table. Let’s enhance your dessert experience with complementary dishes that harmonize beautifully.
- Rich Hot Chocolate: A warm cup of rich hot chocolate provides a comforting contrast to the creamy layers, perfect for cozy gatherings.
- Festive Fruit Salad: Fresh fruits like pomegranates and citrus add a burst of brightness, balancing the sweetness of the lush with vibrant, tangy notes.
- Spiced Gingerbread Cookies: These spiced delights offer a chewy texture and robust flavors that beautifully echo holiday spices present in your dessert.
- Peppermint Bark: This crunchy and minty treat brings additional layers of festivity, making every bite feel like a holiday celebration.
- Crispy Candy Canes: Use them as a garnish on top of the lush! Their crunch and peppermint flavor elevate the dessert, giving it a fun seasonal twist.
- Vanilla Ice Cream: A scoop of creamy vanilla ice cream perfectly melds with the cookie lush, creating a deliciously rich experience.
- Warm Apple Crisp: The warmth and spice of a baked apple crisp add a homely touch, contrasting beautifully with the cold layers of your lush.
Each pairing has its unique charm, ensuring your No Bake Christmas Cookie Lush remains the star while adding delightful options for everyone to enjoy!
Make Ahead Options
These No Bake Christmas Cookie Lush are perfect for busy home cooks looking to save time during the holiday rush! You can prepare the cookie crust and cream cheese layers up to 24 hours in advance. Simply crush the cookies and mix them with melted butter, then press into your dish; make sure to cover it tightly with plastic wrap to keep it fresh. You can also make the pudding layer a day ahead; just whisk the pudding mix with cold milk and refrigerate until thickened. When you’re ready to serve, layer the prepared pudding over the cream cheese and top with whipped topping and sprinkles just before enjoying. This way, you’ll have a decadent treat that’s equally fresh and delightful without the last-minute stress!
Expert Tips for No Bake Christmas Cookie Lush
-
Softened Cream Cheese: Ensure your cream cheese is softened before mixing for a smooth and creamy texture. Cut it into smaller pieces or let it sit at room temperature for 30 minutes.
-
Chill Time Matters: Chilling the dessert is key! Refrigerate for at least 4 hours for the best flavor and sliceability; consider freezing it briefly for cleaner cuts.
-
Layering Techniques: Spread each layer gently to avoid mixing them together. Use an offset spatula for an even finish, creating a beautiful presentation for your No Bake Christmas Cookie Lush.
-
Customizable Sprinkles: Let your creativity shine by using themed sprinkles that fit the occasion! Consider matching colors to your holiday décor for an extra festive touch.
-
Storage Secrets: Store any leftovers in an airtight container in the fridge for up to 4 days or freeze for longer storage. Just be sure to thaw before serving for optimal taste!
No Bake Christmas Cookie Lush Variations
Feel free to get creative with your No Bake Christmas Cookie Lush and make it uniquely yours with these fun twists!
-
Cookie Swap: Substitute vanilla Oreos with any favorite sandwich cookie style to change up the flavor profile. Think chocolate or even gingerbread for a holiday feel!
-
Berry Burst: Add fresh fruit preserves or berries between the cream cheese and pudding layers for a fruity surprise that complements the creamy layers beautifully. Your taste buds will thank you for the extra freshness!
-
Sugar-Free Version: For a lower-calorie option, swap in sugar-free pudding mix. Just be aware that it may alter the texture a bit, but the flavors will still shine through.
-
Flavor Infusion: Incorporate different extracts, like almond or hazelnut, into the cream cheese layer to add a delightful twist and depth of flavor. It’s a small change that makes a big difference!
-
Texture Tweak: Replace half the whipped topping with homemade whipped cream for an airier texture. The contrast between the fluffy topping and creamy layers will make your dessert even more delightful.
-
Chocolate Layer: For a chocolate lover’s version, mix in cocoa powder or melted chocolate with your cream cheese layer. This adds a rich, decadent touch that beautifully pairs with the other flavors.
-
Seasonal Spice: Mix a dash of pumpkin spice or cinnamon into the cream cheese layer for a warm, cozy undertone that’s perfect for the holidays. It transforms your lush into an aromatic dream!
-
Tropical Twist: Add crushed pineapple or coconut to the cream cheese layer for a tropical vibe. The burst of flavor offers a refreshing contrast to the rich layers and makes each bite a mini escape!
As you explore these variations, consider pairing your No Bake Christmas Cookie Lush with treats like Hot Chocolate Cookies or Cosmic Brownie Cookies to create an unforgettable dessert spread!
Storage Tips for No Bake Christmas Cookie Lush
-
Refrigerator: Keep your No Bake Christmas Cookie Lush in an airtight container for up to 4 days. This helps maintain its creamy texture and flavor.
-
Freezer: For longer storage, tightly cover and freeze for up to a month. Remember to thaw it in the refrigerator before serving for the best taste.
-
Serving Suggestions: If you freeze any portions, allow them to sit at room temperature for about 1 hour before slicing, which makes for easier serving.
-
Leftovers: Store any leftover slices in an airtight container, ensuring they’re kept fresh and delicious for your next indulgent moment!
No Bake Christmas Cookie Lush Recipe FAQs
How do I choose the best cookies for the crust?
Absolutely! For the best flavor and texture, choose high-quality vanilla Oreo cookies. They provide a deliciously crunchy base. If you’re feeling adventurous, you can substitute them with graham crackers or any vanilla-flavored sandwich cookie for a different twist.
How should I store leftovers?
Very well! Store your No Bake Christmas Cookie Lush in an airtight container in the refrigerator for up to 4 days. This keeps the layers creamy and fresh. If you need to keep it longer, you can tightly cover it and freeze for up to 1 month. Just remember to thaw it in the refrigerator before serving; this helps maintain the delightful texture.
Can I freeze the No Bake Christmas Cookie Lush?
Of course! To freeze, tightly wrap the dessert in plastic wrap and then in aluminum foil to prevent freezer burn. It can be stored in the freezer for up to a month. When you’re ready to enjoy it, transfer it to the refrigerator to thaw for at least a few hours or overnight; this way, it will slice much easier!
What if my cream cheese doesn’t blend smoothly?
No worries! If you notice your cream cheese is lumpy, it might not have been softened enough. To ensure a perfect blend, cut the cream cheese into smaller chunks and let it sit at room temperature for about 30 minutes before mixing. If it still doesn’t blend well, you can microwave it in short bursts (10-15 seconds) until just softened, but be careful not to melt it!
Can my pets have any of these ingredients?
Definitely something to consider! While cream cheese is generally safe in small amounts for dogs, you should avoid letting them have any sweetened or flavored items, including frosting or sprinkles. Always check for any specific allergies your pets may have and consult your veterinarian for recommendations.
Are there any dietary adjustments for allergies?
Absolutely! If you’re looking for gluten-free options, choose gluten-free sandwich cookies like gluten-free Oreos. For those with dairy allergies, try using dairy-free cream cheese and whipped cream alternatives. There are also sugar-free pudding mixes available for a lower-sugar option, but do take note that the taste and texture may vary a bit. Enjoy your baking adventure!
No Bake Christmas Cookie Lush That Will Wow Your Guests
Ingredients
Equipment
Method
- Lightly grease a 9x13-inch baking dish or line it with parchment paper.
- Crush the vanilla Oreo cookies into fine crumbs.
- Combine crushed cookies with melted butter and sprinkles, then press into the bottom of the baking dish.
- Beat cream cheese, powdered sugar, and sprinkles until creamy. Fold in whipped topping, then spread over the crust.
- Mix pudding with milk until thick, then fold in sprinkles and spread over cream cheese layer.
- Spread remaining whipped topping over pudding layer and top with crushed cookies and additional sprinkles.
- Refrigerate for at least 4 hours before serving.
Leave a Reply