
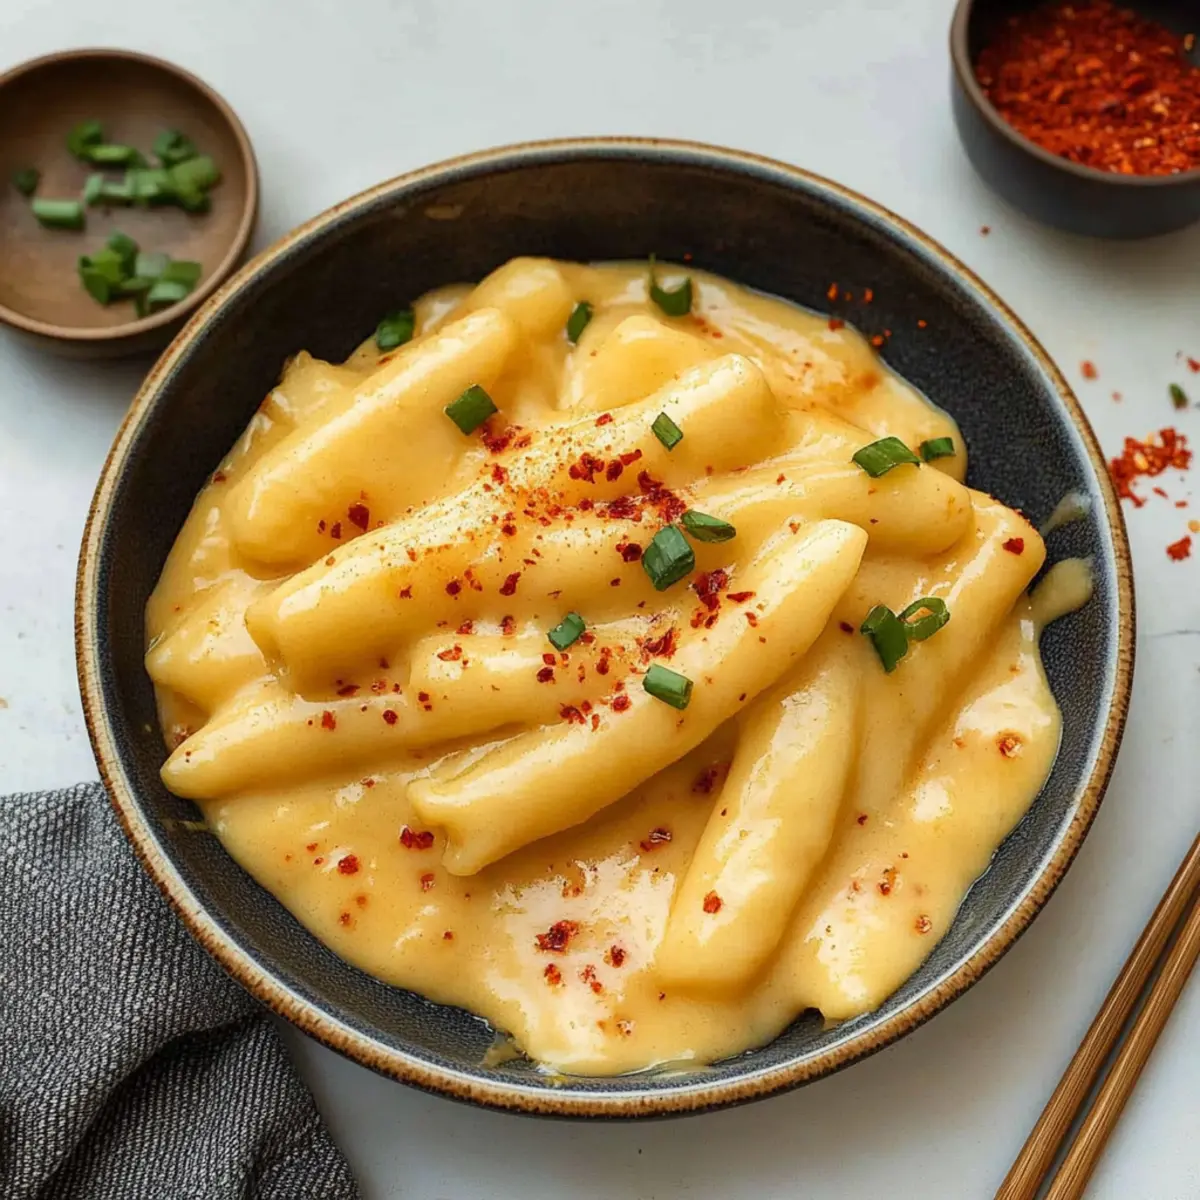
The aroma of sizzling rice cakes mingled with savory spices takes me back to bustling Korean street markets, where every corner boasts a tantalizing treat. Today, I’m thrilled to share my take on Vegan Cheese Tteokbokki—chewy rice cakes drenched in a creamy, plant-based cheese sauce that’s irresistibly comforting. This dish is not only a quick meal to whip up after a long day, but also a delightful crowd-pleaser that will convert even the most skeptical diners into tteokbokki fans. With the perfect balance of spicy and cheesy goodness, this Vegan Cheese Tteokbokki brings a warm, nostalgic feeling to any table, making it a wonderful addition to your homemade food repertoire. Curious to see how this comforting delight comes together? Let’s dive into the recipe!
Why is Vegan Cheese Tteokbokki a must-try?
Comforting and Satisfying: This dish offers the best of both worlds—a creamy cheese sauce that envelops chewy rice cakes, perfect for those cozy nights in.
Quick to Prepare: You can whip up this delight in no time, making it an ideal choice for busy weeknights or spontaneous gatherings.
Vegan Twist: Unlike traditional tteokbokki, this recipe embraces a plant-based approach, catering to those who love comfort food without compromising their dietary choices.
Crowd-Pleaser: Whether you’re serving friends or family, the rich flavors and unique textures will leave everyone wanting more—much like my Jalapeno Pimento Cheese or Oreo Cheesecake Cookie!
Customizable: Feel free to add your favorite veggies or adjust the spiciness to match your palate, ensuring each serving is uniquely yours.
With all these delightful attributes, Vegan Cheese Tteokbokki is sure to become a staple in your cooking repertoire!
Vegan Cheese Tteokbokki Ingredients
• Here’s everything you need for this cheesy goodness!
For the Cheesy Sauce
- Korean Rice Cakes – The chewy base that defines tteokbokki; look for garaetteok for authenticity.
- Potato – Adds creaminess to the sauce; sweet potatoes can bring a hint of sweetness if you prefer!
- Carrot – Introduces natural sweetness and vibrant color; swap for another veggie if you’re out.
- Cashew Milk – The liquid base adding creaminess; any plant-based milk works as a great alternative.
- Vegetable Broth – Elevates the sauce flavor; opt for low-sodium broth for a healthier choice!
- Nutritional Yeast – Infuses a cheesy umami flavor; omit for a more subtle taste, but it’s worth the try!
- Miso Paste – Deepens umami richness; soy sauce can work in a pinch for a different flavor.
- Tapioca Starch – Gives the sauce an irresistible stretchy texture; don’t skip this crucial ingredient!
For the Spices
- Garlic Powder – Delivers a classic savory essence to the sauce; adjust to taste for garlic lovers!
- Onion Powder – Complements the garlic and enhances flavor depth; a must-have in this mix!
- Salt & Pepper – Essential seasonings that round out the sauce; season to your preferences.
- Korean Red Pepper Flakes – Adds heat and a pop of color; tweak to your liking for spice levels!
With these Vegan Cheese Tteokbokki ingredients, you’re just a whisk away from a comforting dish that will bring smiles to your table!
Step‑by‑Step Instructions for Vegan Cheese Tteokbokki
Step 1: Prepare Rice Cakes
Start by cooking the Korean rice cakes in a pot of boiling water for about 10 minutes, or until they become tender and chewy. Drain the water and set the rice cakes aside. They should be soft enough to easily bite into but not mushy—this texture is essential for the Vegan Cheese Tteokbokki.
Step 2: Blend Cheese Sauce
In a blender, combine the cooked potato, carrot, cashew milk, vegetable broth, nutritional yeast, miso paste, and spices including garlic powder, onion powder, salt, pepper, and Korean red pepper flakes. Blend the mixture on high for about 1-2 minutes until smooth and creamy, ensuring there are no lumps. This will form the delicious cheese sauce that envelops our rice cakes.
Step 3: Thicken the Sauce
Pour the blended cheese sauce into a medium saucepan over medium heat. Stir continuously for about 5-7 minutes as it heats, allowing the sauce to thicken and develop a stretchy texture. You’ll know it’s ready once it clings slightly to a spoon, turning creamy and irresistible for your Vegan Cheese Tteokbokki.
Step 4: Mix Together
Once the sauce has thickened to the perfect consistency, gently fold in the drained rice cakes. Stir well for about 2 minutes until every piece is thoroughly coated with the creamy cheese sauce. This is where the magic happens—watch as the rice cakes absorb the flavors, creating a delightful harmony.
Step 5: Serve
Transfer the Vegan Cheese Tteokbokki to a serving dish while still hot. For an extra kick, sprinkle additional Korean red pepper flakes on top if desired. Enjoy your comforting dish warm, and relish the delightful combination of flavors and textures that make this a perfect meal for any occasion!
Vegan Cheese Tteokbokki Variations & Substitutions
Feel free to personalize this delightful dish with these fun twists and swaps!
- Gluten-Free: Use gluten-free rice cakes or zucchini noodles to make this dish accessible without sacrificing flavor.
- Extra Protein: Add sautéed tofu or tempeh for a protein boost; they’ll soak up the sauce beautifully!
- Spicy Kick: Increase Korean red pepper flakes to amp up the heat; or add fresh sliced chili for a fresh punch.
- Bold Flavors: Experiment with miso types, like red or white, for unique umami variations in your cheese sauce.
- Creamy Indulgence: Swap in coconut cream instead of cashew milk for a richer flavor, adding a hint of tropical sweetness!
- Roasted Veggies: Mix in roasted bell peppers or broccoli; they’ll add depth and texture while making each bite even more satisfying.
- Cheese Lovers: For an added cheesy flavor, stir in some vegan cream cheese before serving—luxuriously delicious!
- Tasty Add-ins: Garnish with sliced green onions or toasted sesame seeds for crunch and a fresh finish, enhancing your dish’s vibrant presentation!
With these variations, you can enjoy Vegan Cheese Tteokbokki time and again, discovering new favorites in every decadent bite.
Expert Tips for Vegan Cheese Tteokbokki
-
Perfect Texture: Ensure the rice cakes are cooked just right—tender but not mushy. This is crucial for an enjoyable Vegan Cheese Tteokbokki experience.
-
Smooth Sauce: Blend thoroughly! Aim for a velvety cheese sauce without lumps; an even consistency enhances the overall dish.
-
Adjust Liquids: If the sauce is too thick during cooking, simply add a splash more cashew milk or vegetable broth to achieve your desired consistency.
-
Watch the Heat: Stir continuously while thickening the sauce to avoid burning; this keeps the flavor intact and the texture creamy.
-
Season to Taste: Always taste and adjust the seasonings—especially the spices. Everyone has different preferences!
-
Add Veggies: Feel free to mix in additional vegetables like bell peppers or spinach for an extra nutrient boost in your Vegan Cheese Tteokbokki.
Make Ahead Options
These Vegan Cheese Tteokbokki are perfect for busy weeknights and meal prep enthusiasts! You can prepare the cheese sauce up to 24 hours in advance by blending together the cooked potato, carrot, cashew milk, vegetable broth, nutritional yeast, miso paste, and spices. Store it in an airtight container in the refrigerator to maintain its creamy texture. The Korean rice cakes can be cooked ahead as well; simply refrigerate them for up to 3 days. When you’re ready to enjoy your Vegan Cheese Tteokbokki, reheat the cheese sauce on the stove over medium heat, add the rice cakes, and mix until heated through. This way, you’ll have a delicious, comforting meal ready in no time!
What to Serve with Vegan Cheese Tteokbokki?
To elevate your Vegan Cheese Tteokbokki experience, consider these delightful pairings that balance flavors and textures.
- Kimchi: A spicy, fermented side that adds crunch and tang, perfectly contrasting the creamy sauce of the tteokbokki.
- Pickled Vegetables: Bright and tangy, these provide a refreshing bite that complements the rich and cheesy flavors.
- Crispy Tempura Veggies: Light, airy tempura vegetables create a delightful crunch in each bite, adding texture to your meal.
- Steamed Broccoli: Tender broccoli florets add a nutritious green contrast, enhancing your plate’s overall beauty and flavor profile.
- Savory Lettuce Wraps: Wrap your tteokbokki in fresh lettuce leaves for a crunchy texture, balanced with the creaminess of the dish.
- Chilled Soju or Sake: These beverages bring a refreshing vibe, cleansing the palate between bites and enhancing your dining experience.
- Sugar Dusting: For a sweet finish, serve with a light dusting of powdered sugar on fresh fruits like strawberries or mangoes for a playful dessert twist.
Let your taste buds journey through this Korean-inspired feast, combining savory and sweet elements to create a memorable meal!
How to Store and Freeze Vegan Cheese Tteokbokki
-
Fridge: Store leftovers in an airtight container for up to 3 days. Make sure to cool it to room temperature before sealing to avoid condensation.
-
Freezer: For longer storage, freeze the cheese tteokbokki in a freezer-safe container for up to 2 months. Thaw overnight in the fridge before reheating.
-
Reheating: To reheat, warm on the stovetop over low heat, adding a splash of broth or plant-based milk to loosen the sauce, stirring occasionally until heated through.
-
Meal Prep: If planning to make ahead, consider storing the sauce and rice cakes separately to preserve texture; combine just before serving.

Vegan Cheese Tteokbokki Recipe FAQs
What kind of Korean rice cakes should I use?
You’ll want to look for garaetteok, which are cylindrical and white in color, as they provide the perfect chewy texture for Vegan Cheese Tteokbokki. If you can’t find garaetteok, any similar rice cakes can work as a substitute, though the texture may vary slightly.
How should I store my leftovers?
Store any leftover Vegan Cheese Tteokbokki in an airtight container in the fridge for up to 3 days. For best results, allow the tteokbokki to cool to room temperature before sealing it to prevent condensation, which can make it soggy.
Can I freeze Vegan Cheese Tteokbokki?
Absolutely! To freeze, place the tteokbokki in a freezer-safe container, ensuring it’s well sealed. It can be frozen for up to 2 months. I recommend thawing it overnight in the fridge before reheating for the best texture.
What if my cheese sauce is too thick?
If the sauce becomes too thick while cooking, simply add a splash more cashew milk or vegetable broth until you reach your desired consistency. Stir continuously to ensure an even texture. If you find lumps in your sauce, blend it again before reheating.
Are there any dietary considerations for this recipe?
This recipe is vegan and gluten-free, making it suitable for those with dietary restrictions. However, be sure to check the labels of your ingredients, especially the rice cakes, broth, and any substitutes used, to ensure all components align with your dietary needs!
How can I adjust the spice level in my Vegan Cheese Tteokbokki?
To adjust the spiciness, simply increase or decrease the amount of Korean red pepper flakes you add to the cheese sauce. If you prefer a milder flavor, start with a small pinch and gradually add more until it meets your taste preferences. Enjoy customizing it to your liking!
Vegan Cheese Tteokbokki: Creamy Comfort in Every Bite
Ingredients
Equipment
Method
- Cook the Korean rice cakes in boiling water for about 10 minutes until tender, then drain.
- Blend the cooked potato, carrot, cashew milk, vegetable broth, nutritional yeast, miso paste, and spices until smooth.
- Heat the blended sauce in a saucepan over medium heat, stirring for 5-7 minutes until thickened.
- Fold the drained rice cakes into the sauce and stir well to coat evenly.
- Serve hot, optionally adding more Korean red pepper flakes on top.
Leave a Reply