
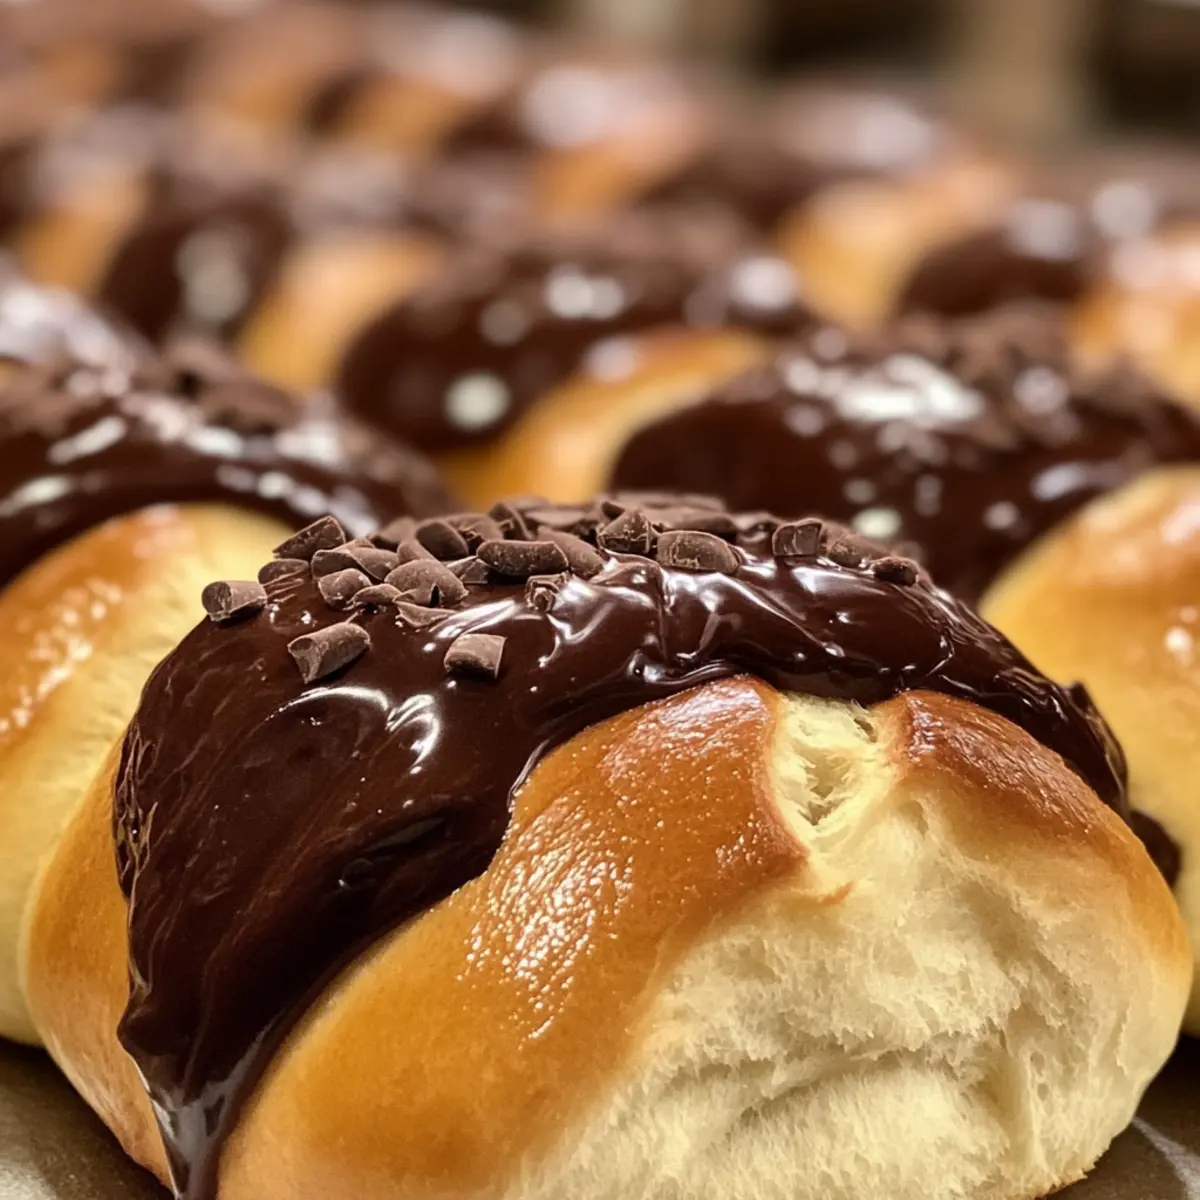
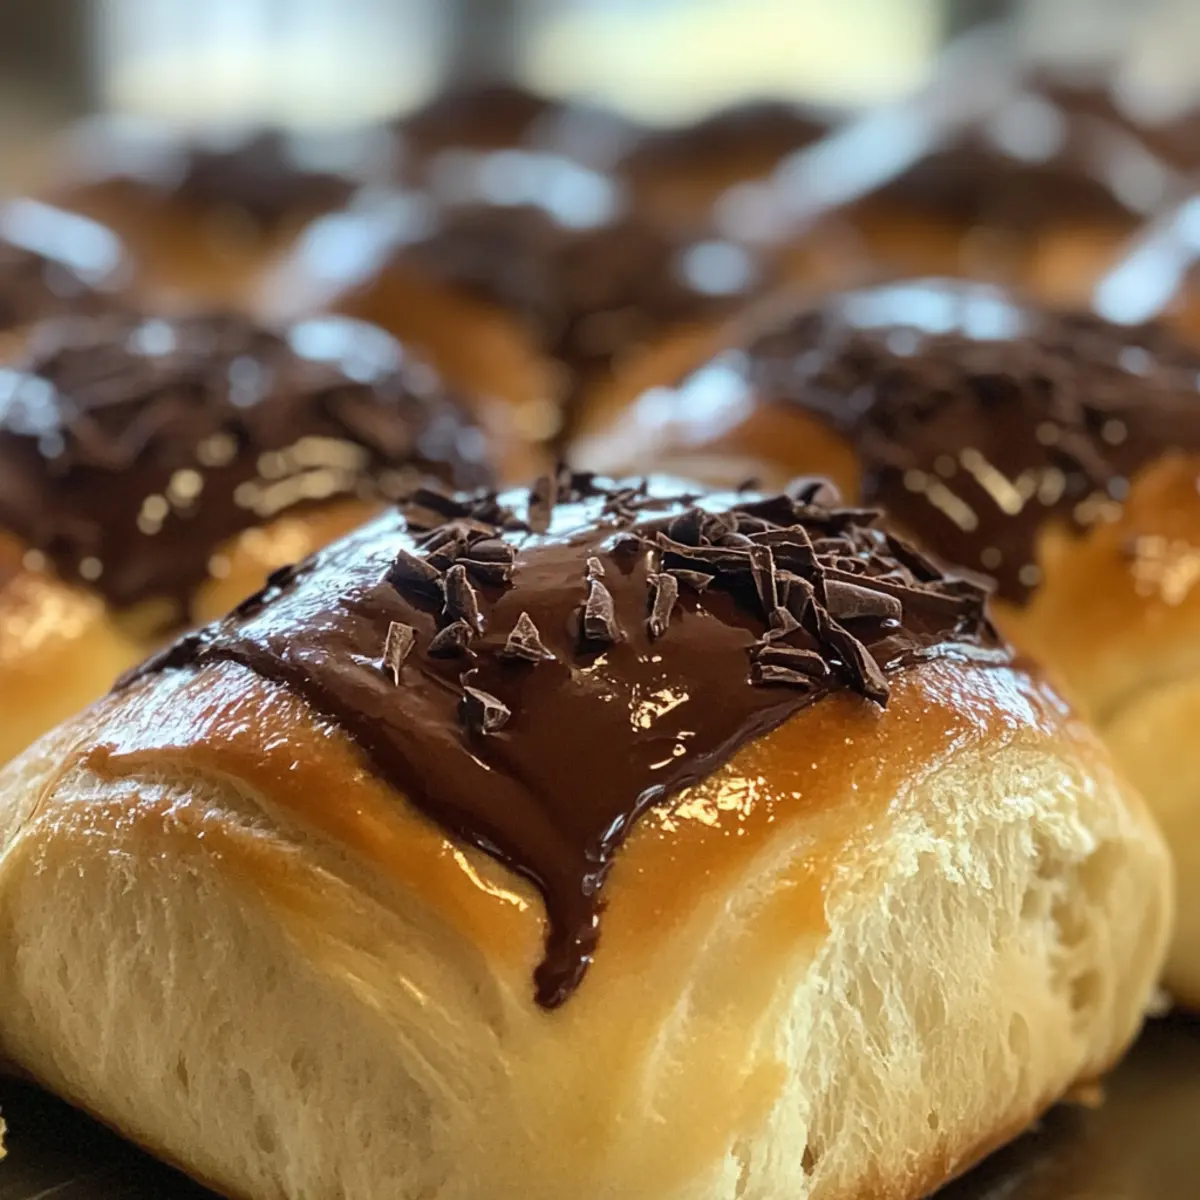
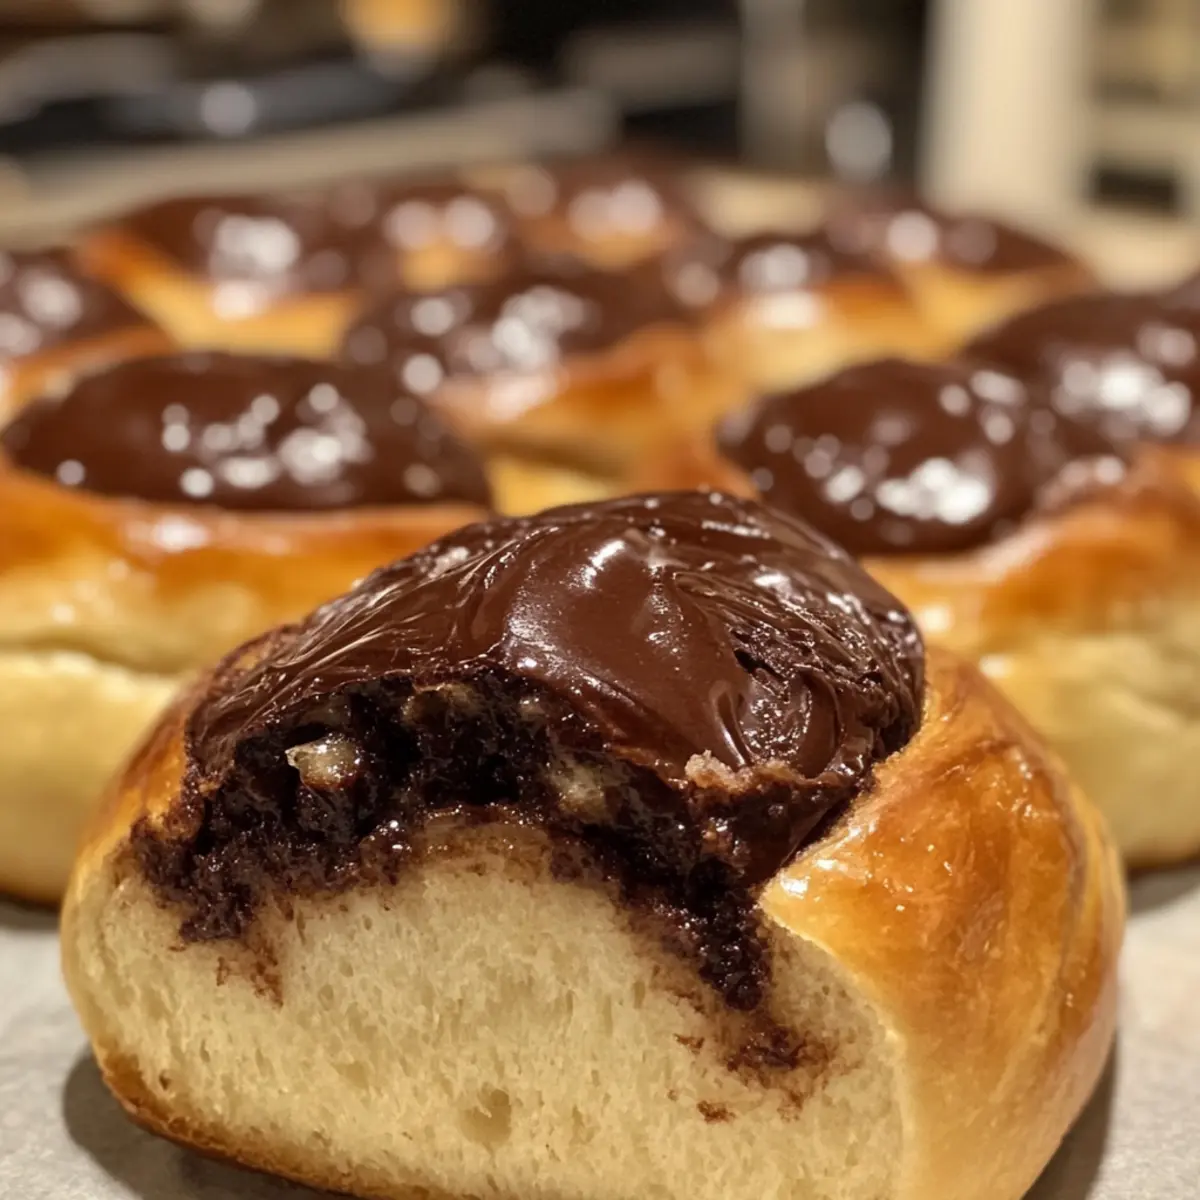
The moment I stepped into my kitchen, a wave of nostalgia swept over me, evoking memories of bustling Swiss bakeries and the sweet scent of fresh pastries. It’s time to delve into the comforting world of Schoggiweggli, those beloved Swiss chocolate buns that have warmed hearts for generations. These delightful treats feature soft, fluffy dough that embraces rich dark chocolate, making them a perfect indulgence for breakfast or a cozy snack. With simple ingredients and a straightforward process, you’ll find the joy of baking becomes a cherished routine. Plus, their versatility allows you to shape them any way you like, ensuring each batch is a fun surprise for your family. Ready to create these irresistible Swiss Chocolate Buns that everyone will adore? Let’s get started!

Why Are Swiss Chocolate Buns Irresistible?
Warm, Comforting Aroma: The moment these Schoggiweggli emerge from the oven, your kitchen will be filled with a heavenly scent that evokes the essence of Switzerland’s finest bakeries.
Soft & Fluffy Texture: With a soft, airy interior and a lightly crisp crust, each bite transports you to a cozy café, making them ideal for breakfast or a delightful snack.
Rich Chocolate Indulgence: The generous chunks of melted dark chocolate nestled within the dough create an irresistible burst of sweetness that chocolate lovers will adore.
Easy to Make: Even if you’re a beginner baker, this straightforward recipe allows you to master the technique with minimal effort—perfect for a cozy weekend project!
Versatile & Fun: Experiment with shapes and decorations—the playful possibilities make baking these buns a joyful family activity, allowing everyone to join in on the fun!
Great for Sharing: Perfect for entertaining, these buns will impress your guests and add a homemade touch to any gathering—consider serving them alongside a cup of your favorite coffee or hot chocolate.
Swiss Chocolate Buns Ingredients
Discover the key components to making these delightful Swiss Chocolate Buns!
For the Dough
- Active Dry Yeast – Helps the dough rise; ensure it’s fresh for the fluffiest buns.
- Lukewarm Milk – Activates the yeast; ideal temperature is 105-115°F, nut milk can be substituted for a dairy-free option.
- All-Purpose Flour – Provides structure; gluten-free flour blends can be used but will require adjustments.
- Granulated Sugar – Adds sweetness and enhances browning; palm sugar offers a less refined alternative.
- Salt – Balances sweetness and boosts the overall flavor profile.
- Large Egg – Binds the dough and adds richness; aquafaba can replace it for a vegan version.
- Unsalted Butter – Adds moisture and flavor; for a dairy-free option, coconut oil works well.
- Vanilla Extract – Infuses an aromatic depth; feel free to substitute with pure almond extract for a twist.
For the Filling
- Bittersweet or Dark Chocolate – The star ingredient that gives rich flavor; use roughly chopped chocolate for melting pockets, or choose milk chocolate for a sweeter alternative.
For the Glaze
- Egg Wash (Egg Yolk & Milk) – Provides a beautiful golden finish; a plant-based milk with turmeric can be used for a vegan wash.
Now that you have the essentials, get ready to create these cozy Swiss Chocolate Buns that will melt in your mouth!
Step‑by‑Step Instructions for Authentic Schoggiweggli: Swiss Chocolate Buns
Step 1: Activate the Yeast
In a small bowl, combine the active dry yeast with lukewarm milk (105-115°F) and stir gently. Let the mixture sit for about 10 minutes until it becomes frothy and bubbly, indicating that the yeast is activated. This essential step is key for creating the fluffy texture of your Swiss Chocolate Buns.
Step 2: Make the Dough
In a large mixing bowl, whisk together the all-purpose flour, granulated sugar, and salt. Once the dry ingredients are well combined, add the frothy yeast mixture, a large egg, softened unsalted butter, and vanilla extract. Mix until a dough begins to form, then knead on a lightly floured surface for about 8-10 minutes until smooth and elastic. Gently fold in chopped chocolate pieces for delicious melty bites.
Step 3: First Rise
Place the kneaded dough into a lightly greased bowl, covering it with a clean kitchen towel or plastic wrap. Allow the dough to rise in a warm, draft-free area for 1 to 2 hours, or until it has doubled in size. This step is crucial for creating soft Swiss Chocolate Buns with a fluffy interior.
Step 4: Shape the Buns
After the dough has risen, gently punch it down to release the air. Divide the dough into 8 equal pieces and roll each piece into an oval shape or any shape you prefer. Place the shaped buns on a baking sheet lined with parchment paper, then cover them again and let them puff up for about 30 minutes.
Step 5: Preheat Oven
While the buns are resting, preheat your oven to 350°F (180°C). This ensures that your Swiss Chocolate Buns will bake evenly, achieving a perfect golden-brown crust when they’re done.
Step 6: Prepare Egg Wash
In a small bowl, beat together one egg yolk with a splash of milk to create an egg wash. Brush this mixture gently over the tops of each bun, giving them a nice shine and golden color during baking.
Step 7: Decorate the Buns
Using a pair of kitchen scissors, cut a few deep triangles or slits into the top of each bun, creating a decorative pattern. This not only adds a rustic touch but also allows steam to escape while baking, enhancing the texture of your Swiss Chocolate Buns.
Step 8: Bake
Carefully place the prepared buns into the preheated oven and bake for 15-20 minutes. Keep an eye on them; they’re done when the tops are golden brown and the buns sound hollow when tapped on the bottom.
Step 9: Cool and Serve
Once baked, remove the Swiss Chocolate Buns from the oven and let them cool on a wire rack for a few minutes. Serve warm for the ultimate indulgence; their soft, fluffy interior and pockets of melted chocolate are sure to delight your family and friends.
Swiss Chocolate Buns Variations & Substitutions
Feel free to let your creativity shine as you customize these delightful treats to suit your taste and dietary needs!
-
Dairy-Free: Substitute lukewarm milk with nut milk and coconut oil for butter to maintain that fluffy texture without dairy.
-
Gluten-Free: Use a gluten-free flour blend to replace all-purpose flour, but be prepared to adjust the liquid as needed for consistency.
-
Sweetener Swap: Replace granulated sugar with coconut sugar or honey for a different sweetness profile, enhancing the buns’ natural flavor.
-
Nutty Delight: Add chopped nuts like walnuts or pecans to the dough for added crunch and a burst of flavor. This can create a delightful contrast to the soft texture.
-
Fruity Burst: Toss in dried fruits like raisins or apricots for a sweet surprise. Their chewy texture pairs beautifully with the soft bun, creating an enjoyable experience with every bite.
-
Flavored Chocolate: Replace dark chocolate with flavored options like orange or mint chocolate for a twist on the traditional taste.
-
Spicy Kick: Add a sprinkle of cinnamon or a pinch of cayenne pepper for a gentle warmth that complements the chocolate.
-
Fun Shapes: Get creative with your shaping! Try forming into dinosaur shapes for a fun treat that kids will adore. These whimsical designs make baking a shared joy among family.
For a scrumptious addition to your dessert table, don’t forget to try out my popular Chocolate Rum Balls next! They pair perfectly with coffee, just like these lovely Swiss Chocolate Buns, and promise to impress your guests!
Expert Tips for Swiss Chocolate Buns
-
Check Yeast Freshness: Always use fresh active dry yeast for optimal rising, ensuring your Swiss Chocolate Buns come out fluffy and light.
-
Correct Milk Temperature: Lukewarm milk is essential—too hot will kill the yeast, preventing the dough from rising.
-
Avoid Over-Kneading: Knead just until smooth; overdoing it can create dense buns. A gentle touch is key to fluffy results!
-
Shape with Joy: Experiment with shapes and sizes; whether ovals or fun designs, let your creativity shine, making baking a family-friendly activity!
-
Perfect Chocolate Placement: Distribute chocolate chunks evenly within the dough to avoid uneven melty pockets in your Swiss Chocolate Buns.
-
Cool Before Serving: Allow buns to cool briefly on a wire rack; they’ll be softer and easier to enjoy when served warm.
Make Ahead Options
These delightful Swiss Chocolate Buns are perfect for busy home cooks looking to save time during the week! You can prepare the dough up to 24 hours in advance by following the first rise, then punch it down and shape the buns. Place them in an airtight container or cover them tightly with plastic wrap, refrigerating until you’re ready to bake. Allow the buns to sit at room temperature for about 30 minutes before proceeding with the egg wash and baking. Alternatively, you can bake the buns, let them cool completely, and then store them in an airtight container for up to 3 days. To enjoy their fresh, warm taste, simply reheat in the oven before serving—just as delicious as the day they were made!
What to Serve with Authentic Schoggiweggli: Swiss Chocolate Buns
Elevate your experience of these chocolatey delights with the perfect accompaniments that add flavor and warmth to your table.
-
Fresh Fruit Compote: A vibrant berry or apple compote adds a tart contrast that balances the rich chocolate, enhancing every bite. Imagine the delightful harmony of sweet and tangy flavors mingling together!
-
Creamy Vanilla Yogurt: This luscious yogurt brings a cool, smooth texture that complements the warm buns and adds a hint of creaminess that’s simply irresistible.
-
Rich Hot Chocolate: Warm up the indulgence by sipping on a cup of rich hot chocolate, echoing the chocolatey goodness of the Schoggiweggli. The combination promises a cozy, comforting moment.
-
Espresso or Coffee: Brew a perfect espresso or a cup of your favorite coffee; the bitter notes pair beautifully with sweet chocolate, heightening the overall experience as you savor each bite.
-
Nutty Granola: A sprinkle of homemade granola adds a delightful crunch and a hint of nutty flavor, elevating the soft texture of the buns and making each mouthful delightful.
-
Honey or Maple Syrup: Drizzle with honey or pure maple syrup for a touch of sweetness that beautifully enhances the flavor profile of these Swiss Chocolate Buns.
-
Powdered Sugar Dusting: A light sprinkle of powdered sugar after baking creates an elegant presentation and adds just a whisper of sweetness, making your chocolate buns look as delightful as they taste.
-
Cinnamon Butter Spread: Whip up a cinnamon butter to slather on each bun for a warm, aromatic twist that complements the luscious chocolate with a spiced touch. It’s all about cozy, comforting indulgence!
How to Store and Freeze Swiss Chocolate Buns
Room Temperature: Store the buns in an airtight container for up to 2 days at room temperature. This keeps them soft and delicious.
Fridge: If you need to store them longer, refrigeration extends their life to about a week, but be sure to wrap them tightly to prevent drying out.
Freezer: For longer storage, freeze the cooled Swiss Chocolate Buns in a single layer, then transfer to a freezer bag. They’ll remain fresh for up to 3 months.
Reheating: To enjoy them warm again, simply reheat in a 350°F (180°C) oven for about 10 minutes, bringing back that delightful softness and gooey chocolate goodness.
Schoggiweggli (Swiss Chocolate Buns) Recipe FAQs
How do I know if my yeast is fresh?
To ensure your active dry yeast is fresh, always check the expiration date on the package. A quick test is to combine it with lukewarm milk (105-115°F) and a pinch of sugar. If the mixture becomes frothy and bubbly after about 10 minutes, your yeast is fresh and ready to use!
What’s the best way to store Swiss Chocolate Buns?
Store your Swiss Chocolate Buns in an airtight container at room temperature for up to 2 days. If you need to extend their shelf life, wrap them well and refrigerate for up to a week. Just remember, the key is to prevent air exposure to keep them soft and delicious!
Can I freeze the Swiss Chocolate Buns?
Absolutely! Allow the cooled buns to cool completely, then place them in a single layer on a baking sheet and freeze them for about 1-2 hours. Once frozen, transfer them to a freezer-safe bag or container. They’ll stay fresh for up to 3 months. When ready to enjoy, simply reheat them in a 350°F oven for approximately 10 minutes.
What can I do if my dough is too sticky?
If your dough is too sticky, try sprinkling in a little more flour, about a tablespoon at a time, and knead gently until you reach a manageable texture. But be careful not to add too much flour, as this can cause your buns to become dense. Another tip is to make sure your hands are floured while handling the dough to prevent sticking.
Are there any dietary considerations for Swiss Chocolate Buns?
Yes! If you’re baking for someone with allergies or dietary restrictions, you can easily adapt this recipe. For a dairy-free version, substitute milk with nut milk, butter with coconut oil, and eggs with aquafaba. Make sure to use a gluten-free flour blend for a gluten-free option, though you may need to adjust the liquid ratios slightly for the best texture.
How can I ensure my buns are perfectly golden?
To achieve a beautiful golden crust, make sure you brush them with an egg wash before baking. If you’re sticking to a vegan diet, a mixture of plant-based milk and a pinch of turmeric for color will work just as well! Keep an eye on them as they bake, looking for that lovely golden brown finish and a hollow sound when tapped on their bottoms.
Delightful Swiss Chocolate Buns: Soft, Sweet, and Homemade Treats
Ingredients
Equipment
Method
- Activate the Yeast: In a small bowl, combine the active dry yeast with lukewarm milk (105-115°F) and stir gently. Let sit for about 10 minutes until frothy.
- Make the Dough: In a large mixing bowl, whisk together the flour, sugar, and salt. Add the yeast mixture, egg, butter, and vanilla. Mix until a dough forms, then knead on a floured surface for 8-10 minutes, adding chocolate chunks.
- First Rise: Place the dough in a greased bowl, cover, and let rise in a warm area for 1-2 hours, until doubled.
- Shape the Buns: Punch down the dough, divide into 8 pieces, and shape into ovals. Let them puff up for 30 minutes on a lined baking sheet.
- Preheat Oven: Preheat the oven to 350°F (180°C).
- Prepare Egg Wash: Beat together the egg yolk and milk. Brush over the buns.
- Decorate the Buns: Cut slits into the tops of each bun to create a decorative pattern.
- Bake: Place buns in the oven and bake for 15-20 minutes until golden brown and hollow sounding when tapped.
- Cool and Serve: Let the buns cool on a wire rack for a few minutes and serve warm.
Leave a Reply