
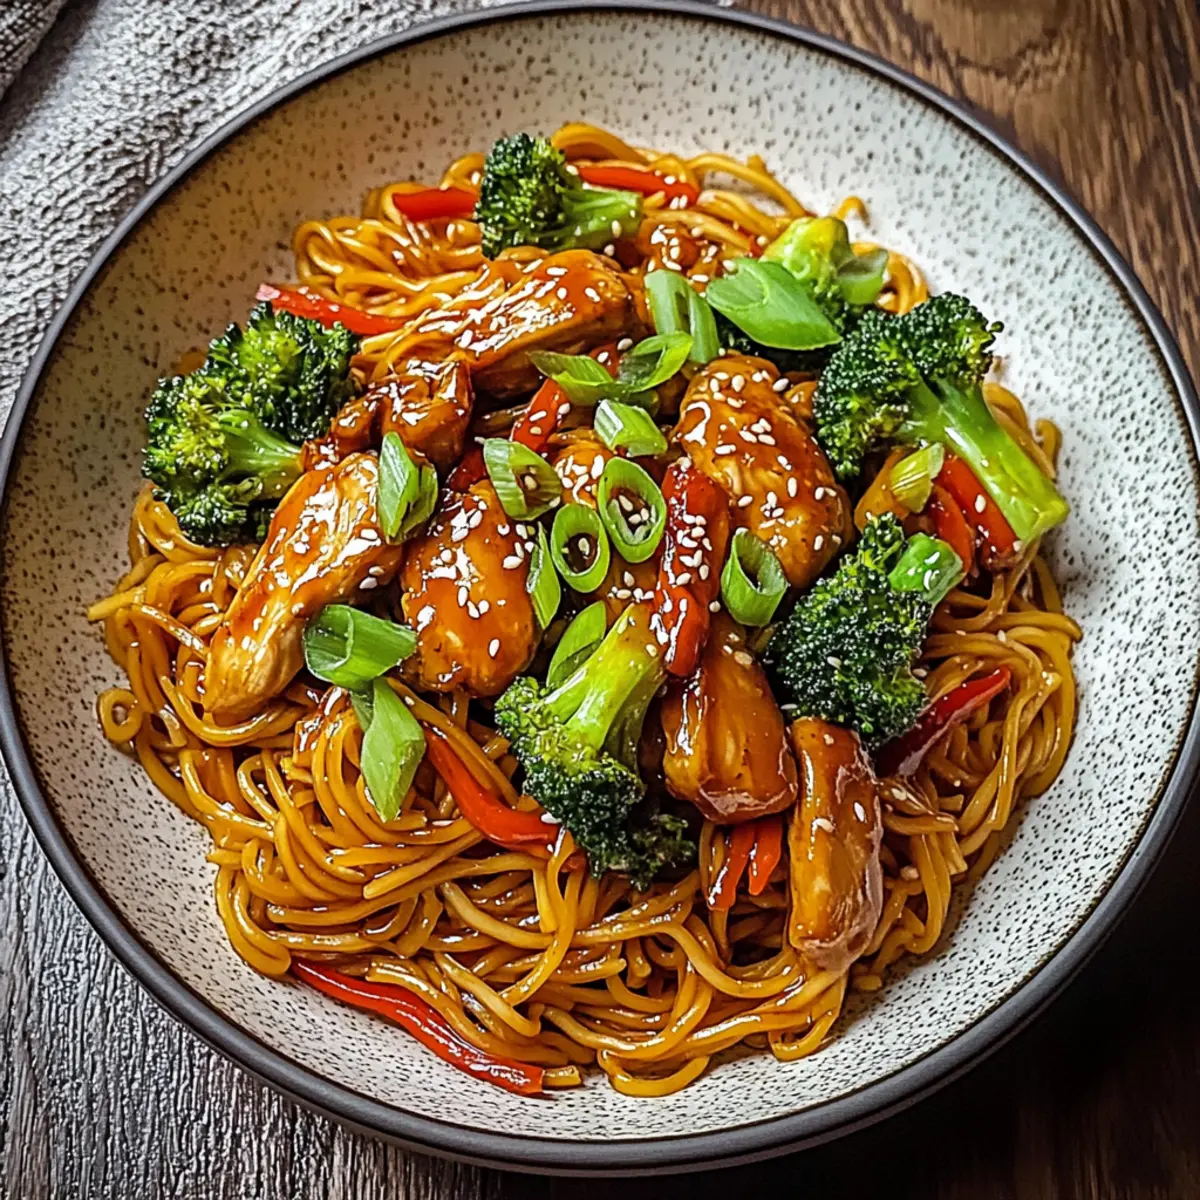
The tantalizing aroma of garlic sizzling in a hot skillet instantly transports me to my favorite Asian bistro, where each dish dances on the palate. In today’s recipe, we’ll bring that vibrant experience home with Sticky Garlic Chicken Noodles—a quick and flavorful one-skillet dinner that will revolutionize your weeknight meals. This dish combines tender chicken thighs with colorful bell peppers and crisp broccoli, all intertwined with al dente egg noodles, enveloped in a glossy garlic sauce. What makes this recipe shine, apart from its mouthwatering taste, is its adaptability; feel free to swap in your favorite vegetables or make it gluten-free with a simple substitution. It’s a hassle-free option for busy evenings, ready in just 35 minutes! Can you feel your taste buds tingling in anticipation? Let’s dive into this savory journey together!
Why are Sticky Garlic Chicken Noodles irresistible?
Quick Preparation: Ready in just 35 minutes, this dish is perfect for busy weeknights, making dinner stress-free and enjoyable.
Flavor Explosion: The combination of garlic and rich sauces creates a mouthwatering glaze that clings beautifully to the noodles.
Customizable Delight: With options to substitute veggies or proteins, you can tailor this recipe to suit your family’s preferences or what’s in your fridge.
Family-Friendly Appeal: This dish is sure to please both kids and adults, making it a crowd-pleaser at your dining table.
Comforting Textures: Experience the delightful contrast between the tender chicken, crisp veggies, and chewy noodles dancing together in harmony.
One-Skillet Wonder: Easy cleanup makes this recipe a winner, allowing you to savor the flavors without worrying about a mountain of dishes.
Sticky Garlic Chicken Noodles Ingredients
For the Noodles
• Egg Noodles – Provide a soft, chewy base that absorbs the garlic sauce perfectly; consider rice noodles for a gluten-free option.
For the Chicken
• Boneless Chicken Thighs – Tender and juicy to absorb all the delicious flavors; swap for chicken breasts if you prefer a leaner choice.
• Vegetable Oil – Essential for searing the chicken and sautéing veggies; can be substituted with canola or grapeseed oil.
• Salt and Pepper – Simple seasonings that elevate the natural flavors beautifully.
For the Vegetables
• Garlic – Minced for maximum impact in this Sticky Garlic Chicken Noodles dish; fresh garlic is a must for that aromatic essence.
• Red Bell Pepper – Adds a sweet crunch and vibrant color to your plate; feel free to mix in snap peas or carrots for variety.
• Broccoli Florets – Earthy and nutrient-rich, providing a delightful texture contrast.
For the Sauce
• Soy Sauce – A salty umami flavor that ties everything together; use tamari to keep it gluten-free.
• Oyster Sauce – Gives a glossy sheen and complex savory notes; make sure to choose gluten-free if needed.
• Brown Sugar – Adds a hint of sweetness to balance the savory elements perfectly.
• Chili Flakes – Optional for a kick of heat; adjust the amount to your spice preference.
For Garnish
• Green Onions – Freshness and a mild onion flavor elevate the dish visually and taste-wise.
• Sesame Seeds – Toasted for a nutty crunch that finishes this Sticky Garlic Chicken Noodles beautifully.
Step‑by‑Step Instructions for Sticky Garlic Chicken Noodles
Step 1: Cook the Noodles
Begin by bringing a large pot of salted water to a boil over high heat. Add the egg noodles and cook according to package instructions until al dente, typically around 5-7 minutes. Make sure to stir occasionally to prevent sticking. Once cooked, drain the noodles in a colander, then set them aside while you prepare the rest of the dish.
Step 2: Sear the Chicken
In a large skillet, heat 1 tablespoon of vegetable oil over medium-high heat. Season the boneless chicken thighs with salt and pepper, then add them to the hot skillet. Cook for about 5-7 minutes until they are golden brown and cooked through, stirring occasionally for even browning. Once ready, remove the chicken from the skillet and let it rest on a plate.
Step 3: Sauté the Garlic
Using the same skillet, add another tablespoon of vegetable oil. Reduce the heat to medium and add minced garlic, stirring constantly for about 30 seconds until fragrant and golden but not burnt. You want to ensure that the garlic is aromatic without crossing the line into bitterness, as this is a crucial element of the Sticky Garlic Chicken Noodles.
Step 4: Stir-Fry the Vegetables
Add the sliced red bell pepper and broccoli florets to the skillet, stir-frying them for about 3-4 minutes, or until they become tender-crisp. You should see vibrant colors and feel the crunch of the veggies as they’re cooked but still retain their fresh flavor. This step adds a wonderful texture and nutrients to the dish while creating a beautiful medley with the garlic.
Step 5: Return the Chicken
Once the vegetables are ready, return the cooked chicken to the skillet. Gently mix it with the sautéed garlic and veggies, ensuring everything is well combined. This allows the flavors to meld together beautifully, making it the heart of your Sticky Garlic Chicken Noodles delightfully savory.
Step 6: Add the Sauces
In a small bowl, whisk together soy sauce, oyster sauce, brown sugar, and optional chili flakes. Pour this rich sauce mixture over the chicken and vegetables in the skillet, stirring gently for about 1-2 minutes to coat everything evenly. The sticky glaze should start to form, enveloping each ingredient in that luscious sauce.
Step 7: Combine with Noodles
Add the drained egg noodles to the skillet. Using tongs or a large spoon, toss everything together for about 2 minutes, allowing the noodles to soak up the sauce and heat through. As you mix, you should see the noodles glistening and well-coated, bringing all the components of the Sticky Garlic Chicken Noodles together in harmony.
Step 8: Garnish and Serve
Finally, remove the skillet from the heat. Transfer the Sticky Garlic Chicken Noodles to serving bowls, and garnish with freshly sliced green onions and a sprinkle of toasted sesame seeds. The vibrant colors and appealing aroma will make this dish look as good as it tastes, ready to delight your family at the dining table.
Sticky Garlic Chicken Noodles Variations & Substitutions
Feel free to get creative and customize these Sticky Garlic Chicken Noodles to suit your taste and dietary needs!
-
Vegetable Swap: Replace red bell peppers with seasonal veggies like zucchini, snap peas, or carrots to keep it fresh.
-
Tofu Twist: For a vegetarian option, substitute chicken with firm tofu, marinating it beforehand to enhance flavor.
-
Gluten-Free Adaptation: Use tamari in place of soy sauce and select gluten-free sauces to make this dish completely gluten-free. You’ll still enjoy that rich umami flavor!
-
Add Crunch: For extra texture, toss in some water chestnuts or pea pods towards the end of sautéing; they’ll add a delightful crunch.
-
Spicy Kick: Boost the heat by incorporating sliced fresh red chilies or adding more chili flakes for those who like a fiery finish.
-
Creamy Upgrade: Stir in a splash of coconut milk or a dollop of peanut butter for a creamy sauce variation that adds richness to the dish.
-
Sweet Variations: Adjust the sweetness by using honey or maple syrup instead of brown sugar for a different flavor profile that still balances the savory notes.
-
Herbal Freshness: Enhance the dish with fresh basil or cilantro sprinkled on top right before serving for a herbaceous touch that brightens every bite.
Want to dive into more exciting flavors? You might enjoy these Chicken Wraps with Garlic Cream Sauce or a delicious plate of Honey Feta Chicken to keep your cooking adventure going!
Expert Tips for Sticky Garlic Chicken Noodles
-
Perfectly Prepare Noodles: Cook the egg noodles just until al dente; undercooking slightly helps them maintain texture when tossed with the sauce.
-
Avoid Garlic Bitterness: Sauté the minced garlic just until fragrant; burning it can create a bitter taste that overshadows the dish.
-
Proper Chicken Searing: Ensure your skillet is hot enough to get a golden sear on the chicken, enhancing both flavor and texture in your Sticky Garlic Chicken Noodles.
-
Customize Wisely: When swapping vegetables, remember that some (like zucchini) cook faster, so adjust cooking times accordingly to retain that perfect crunch.
-
Store Right: For leftovers, place in an airtight container and refrigerate. Gently reheat in a skillet to retain moisture and avoid mushy noodles.
-
Garnish for Impact: Don’t skip the green onions and sesame seeds—they add fresh flavor and a delightful crunch to the final dish.
What to Serve with Sticky Garlic Chicken Noodles
Bring your dining experience to life by pairing it with delightful sides that enhance the vibrant flavors of this dish.
-
Crispy Spring Rolls: These scrumptious bites add texture and a satisfying crunch, making for a delightful contrast with the tender noodles. Perfect for sharing!
-
Steamed Edamame: A light and nutritious option, edamame offers a subtly nutty flavor that complements the savory profile of the noodles beautifully.
-
Mango Salad: Refreshing and tangy, a mango salad with a citrus dressing provides a sweet counterbalance to the rich garlic sauce and will brighten up your plate.
-
Sesame Spinach: Lightly sautéed spinach with sesame oil brings a nutty, earthy note, enhancing the Asian flair of your meal while adding vibrant color and nutrition.
-
Sweet Chili Sauce: Serve with a side of sweet chili sauce for a dip; the sticky sweetness and heat provide a beautiful complement that encourages interaction at the table.
-
Chilled Green Tea: A soothing drink choice, green tea balances the dish’s intensity and helps cleanse the palate between bites, making it perfect for a relaxed dinner experience.
How to Store and Freeze Sticky Garlic Chicken Noodles
Fridge: Store leftovers in an airtight container for up to 3 days. This keeps the flavors fresh and prevents the noodles from drying out.
Freezer: For longer storage, freeze Sticky Garlic Chicken Noodles in a freezer-safe container for up to 2 months. Ensure it’s tightly sealed to prevent freezer burn.
Reheating: To reheat, toss your noodles in a skillet over medium heat with a splash of water or oil to revive their texture. Heat until warmed through, ensuring they don’t stick together.
Airtight Handling: Always ensure containers are sealed properly. When you’re ready to enjoy, it’s best to consume your delightful dish sooner to savor the fresh flavors!
Make Ahead Options
These Sticky Garlic Chicken Noodles are a fantastic choice for meal prep, allowing you to save valuable time during busy weeknights! You can prepare the chicken, vegetables, and sauce up to 24 hours in advance; simply store them in separate airtight containers in the refrigerator to maintain their freshness. Additionally, cook the noodles ahead, but toss them with a little oil to prevent sticking. When you’re ready to serve, reheat the chicken and veggies in a skillet over medium heat for about 5-7 minutes until warmed through, then add the cooked noodles and pour in the sauce, tossing everything together for a quick and delicious dinner that’s just as flavorful!
Sticky Garlic Chicken Noodles Recipe FAQs
How do I choose the right vegetables for Sticky Garlic Chicken Noodles?
Absolutely! When selecting vegetables, look for vibrant, fresh options. Bell peppers should be firm with glossy skin, while broccoli florets should be a bright green without dark spots. You can also mix and match according to what’s in season or your family’s favorites, such as snap peas or carrots for added color and crunch!
What’s the best way to store leftovers of Sticky Garlic Chicken Noodles?
Very! Store your leftovers in an airtight container in the fridge for up to 3 days. This ensures they maintain their flavor and texture. Just be sure to let the noodles cool slightly before sealing, which helps prevent moisture buildup inside the container.
Can I freeze Sticky Garlic Chicken Noodles, and how do I do it?
Absolutely! To freeze, let the dish cool completely, then transfer it to a freezer-safe container and seal tightly, ensuring no air can escape. It’s best enjoyed within 2 months. When you’re ready to eat, thaw overnight in the fridge before reheating gently in a skillet over medium heat, adding a splash of water or oil to regain moisture.
What if I have trouble with the sauce being too thick or too thin?
No worries! If the sauce seems too thick, simply add a tablespoon of water or chicken broth to loosen it while stirring. For a thicker consistency, let it simmer for an additional minute or two without the lid on, allowing it to reduce further. Just remember to keep an eye on it, so it doesn’t get too thick too quickly.
Is this recipe suitable for those with gluten allergies?
Very! You can easily make Sticky Garlic Chicken Noodles gluten-free by swapping regular soy sauce for tamari and ensuring the oyster sauce used is gluten-free as well. This way, everyone can enjoy the comforting flavors without worry!
Can I substitute the chicken in this recipe?
Absolutely! For a lighter option, you can use tofu instead of chicken—just be sure to press it beforehand to remove excess moisture. Alternatively, if you have a preference for seafood, shrimp can also be a delightful choice, cooking in about 3-4 minutes until pink and opaque.
Sticky Garlic Chicken Noodles That Bring Comfort Home
Ingredients
Equipment
Method
- Cook the Noodles: Bring a pot of salted water to a boil, add egg noodles and cook until al dente, about 5-7 minutes. Drain and set aside.
- Sear the Chicken: Heat vegetable oil in a skillet over medium-high heat, season chicken with salt and pepper, and cook until golden brown and cooked through, about 5-7 minutes. Remove and let rest.
- Sauté the Garlic: In the same skillet, add more oil, reduce heat, and sauté minced garlic for about 30 seconds until fragrant.
- Stir-Fry the Vegetables: Add red bell pepper and broccoli, stir-fry for 3-4 minutes until tender-crisp.
- Return the Chicken: Add chicken back to the skillet, mix with garlic and veggies.
- Add the Sauces: Whisk soy sauce, oyster sauce, brown sugar, and chili flakes in a bowl, pour over chicken and vegetables, stirring for 1-2 minutes.
- Combine with Noodles: Add drained noodles, toss everything together for about 2 minutes until well-coated.
- Garnish and Serve: Transfer noodles to bowls, garnish with green onions and sesame seeds, and serve.
Leave a Reply