
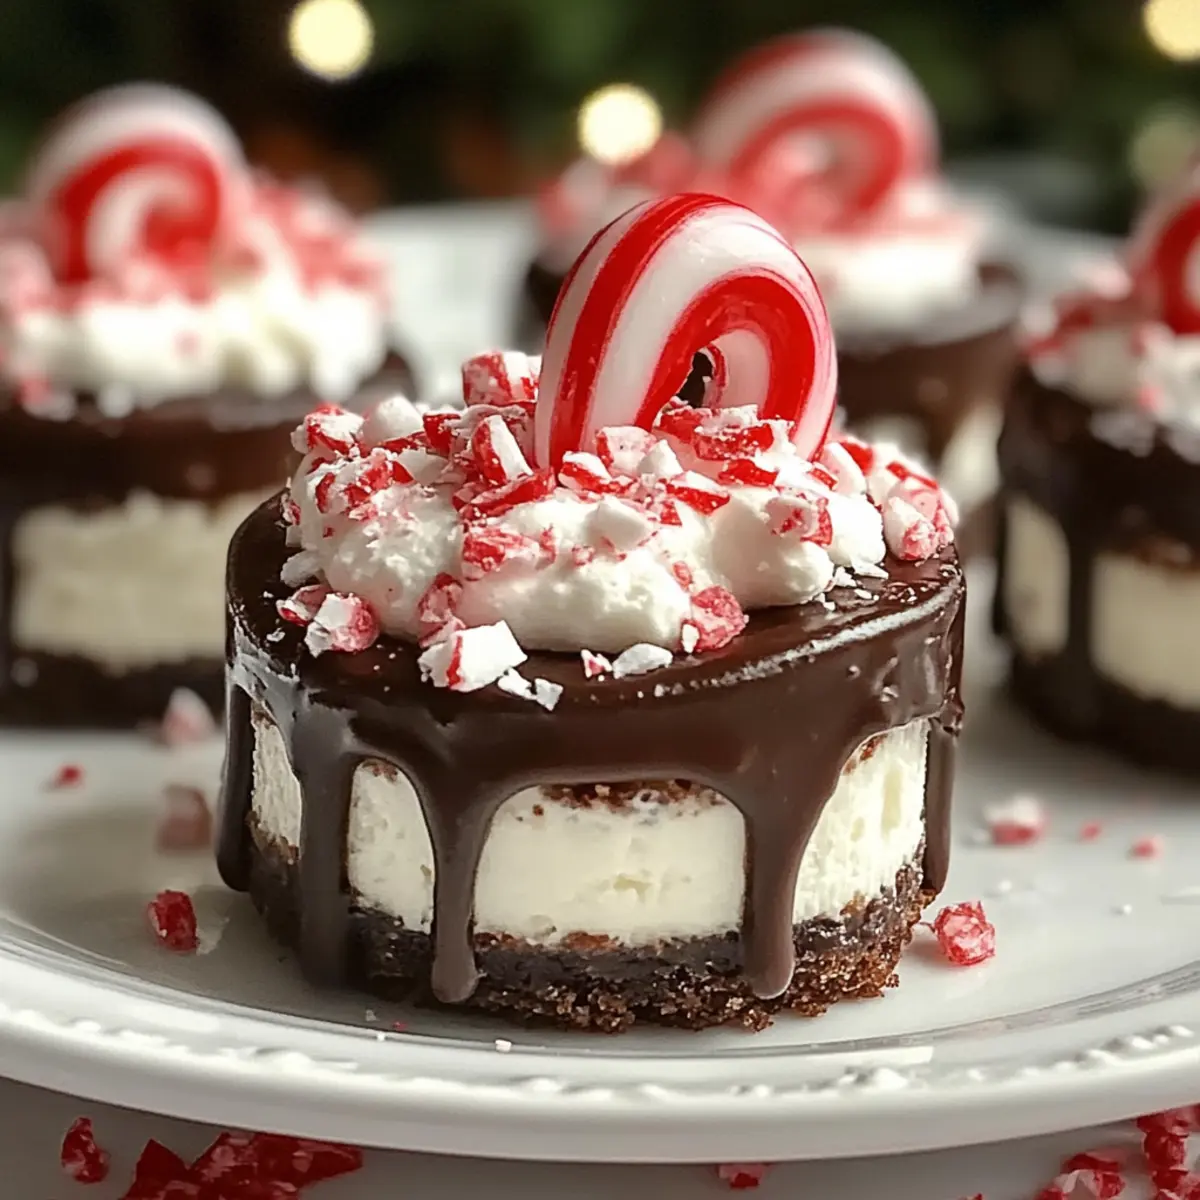
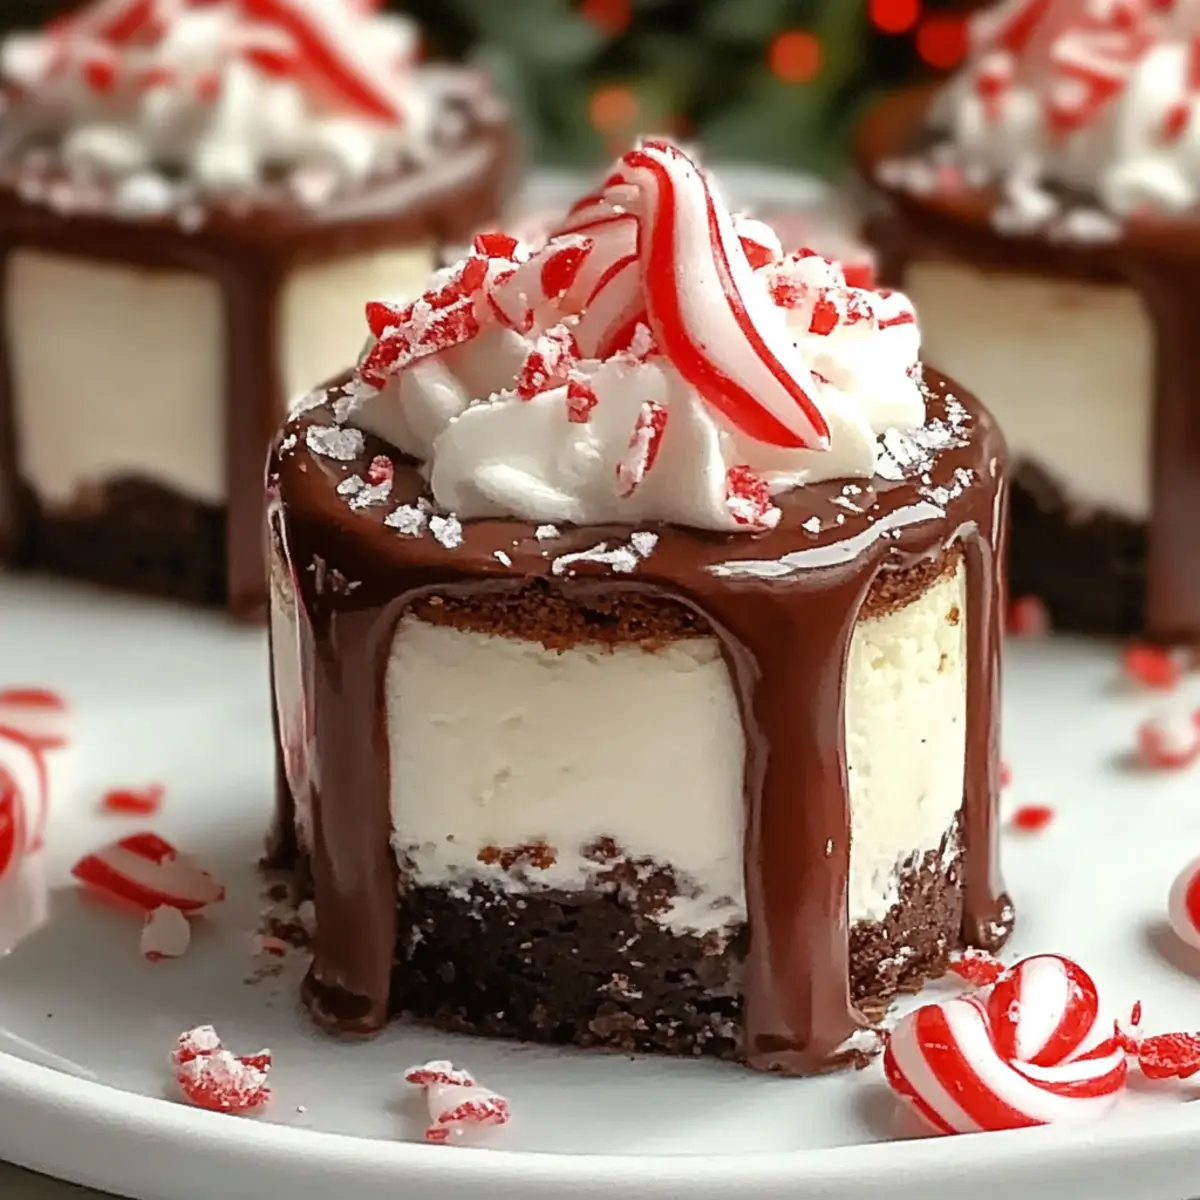
As the chill of winter wraps around us, I can’t help but crave something warm and sweet. Enter the No-Bake Hot Cocoa Peppermint Cheesecake Bites—a delightful fusion of rich chocolate and creamy cheesecake that practically screams holiday cheer. This quick, no-bake dessert takes merely 30 minutes to prepare, making it perfect for both spontaneous gatherings and planned festivities. But don’t let their simplicity fool you; these bites are undeniably a crowd-pleaser, appealing to both families and friends alike. With flavors of chocolate and a refreshing peppermint twist, these treats not only satisfy your sweet tooth but also add a festive touch to any occasion. Curious about how to whip up this easy recipe and impress your guests? Let’s dive right in!

Why are Hot Cocoa Peppermint Bites a Must-Try?
Irresistible Flavor: Each bite combines creamy cheesecake with rich cocoa and a festive peppermint kick, making them an indulgent treat for any holiday gathering.
No-Bake Convenience: Forget about turning on the oven! With just a quick 30 minutes of prep, you can easily whip these up and have them ready to impress.
Customizable Options: Whether you need dairy-free or gluten-free versions, or want to experiment with flavors like orange or nutty crunch, these bites offer versatility that caters to every preference.
Family-Friendly Fun: Kids and adults alike will adore these delightful treats, making them a hit for family gatherings or holiday parties!
Perfect Pairing: Enjoy them alongside a steaming cup of hot cocoa or with a scoop of vanilla ice cream for a delightful contrast.
Prepare to wow your guests with these delicious bites! If you’re looking for more easy dessert ideas, check out my Hot Chocolate Cookies recipe for another holiday favorite!
Hot Cocoa Peppermint Bites Ingredients
For the Cheesecake Mixture
- Cream Cheese – Ensures a creamy and rich base. Use full-fat cream cheese for best results; soften to room temperature for easy blending.
- Powdered Sugar – Sweetens the mix. Adjust to your taste for the perfect sweetness.
- Unsweetened Cocoa Powder – Provides a rich chocolate flavor. Opt for high-quality cocoa for enhanced taste.
- Peppermint Extract – Infuses holiday cheer. Adjust the amount based on your preferred level of mintiness.
- Whipped Cream – Lightens the mixture. Substitute with whipped coconut cream for a dairy-free version.
For the Crust
- Chocolate Graham Cracker Crumbs – Creates a flavorful crust. Can swap with regular or gluten-free graham crackers.
- Melted Butter – Binds the crust mixture. Coconut oil works nicely for a dairy-free option.
For the Topping
- Crushed Peppermint Candies – Adds festive flair and crunch. Chocolate sprinkles can be a fun substitute.
- Chocolate Syrup – Drizzle for extra sweetness and a visual appeal. This adds an irresistible touch to your Hot Cocoa Peppermint Bites.
Get ready to create some unforgettable flavors this holiday season!
Step‑by‑Step Instructions for Hot Cocoa Peppermint Bites
Step 1: Prepare Cheesecake Mixture
Begin by beating 8 ounces of softened cream cheese in a large mixing bowl until creamy, about 2 minutes with an electric mixer. Gradually add in 1 cup of powdered sugar, ¼ cup of unsweetened cocoa powder, and 1 teaspoon of peppermint extract, mixing until fully incorporated. Gently fold in 1 cup of whipped cream until the texture is smooth and fluffy, creating a delightful filling for your Hot Cocoa Peppermint Bites.
Step 2: Create Crust
In a separate bowl, combine 1 cup of chocolate graham cracker crumbs with 4 tablespoons of melted butter, stirring until the crumbs are well-coated. The mixture should resemble wet sand and hold together when pressed between your fingers. This will serve as the flavorful base for your cheesecake bites, giving them a crisp texture to complement the creamy filling.
Step 3: Form Bites
Line a mini muffin tin with 12 paper liners to create individual servings. Press approximately 1 tablespoon of the crust mixture into the bottom of each liner, ensuring it is compact and forms an even layer. Next, spoon the cheesecake mixture into each muffin cup, filling them about ¾ full. Top your mixture generously with crushed peppermint candies for that festive crunch!
Step 4: Freeze
Place the muffin tin in the freezer for at least 2 hours, allowing the Hot Cocoa Peppermint Bites to firm up completely. They should be solid to the touch but not frozen hard. This step is critical for maintaining their shape while you dip them in chocolate later, creating a delicious and chilled dessert.
Step 5: Chocolate Coating
Once the bites have set, melt 1 cup of dark or milk chocolate in a microwave-safe bowl for about 1-2 minutes, stirring every 30 seconds until smooth. Remove the cheesecake bites from the freezer and dip each one into the melted chocolate, allowing the excess to drip off before transferring them to a parchment-lined baking sheet. This process gives your Hot Cocoa Peppermint Bites an indulgent chocolate shell.
Step 6: Set
Let the chocolate-coated bites sit at room temperature until the chocolate firms up, which can take about 30 minutes. For quicker results, place them back in the refrigerator for about 15 minutes. Once set, your delightful Hot Cocoa Peppermint Bites are ready to serve, perfect for holiday celebrations or cozy gatherings.
Hot Cocoa Peppermint Bites Variations
Feel free to get creative and customize these delightful bites to suit your taste or dietary needs!
-
Dairy-Free: Substitute cream cheese with plant-based cream cheese for a delicious dairy-free version that everyone can enjoy.
-
Gluten-Free: Swap chocolate graham cracker crumbs with gluten-free alternatives to make these bites suitable for those avoiding gluten.
-
Nutty Crunch: Change crushed peppermint candies to chopped nuts for a delightful nutty twist, adding both flavor and texture.
-
Citrus Twist: Replace peppermint extract with orange extract for a refreshing citrus variation that brightens the creamy filling.
-
Spicy Touch: Add a pinch of cayenne pepper or a sprinkle of cinnamon to the cheesecake mixture for a warm, spicy kick—perfect for adventurous palates!
-
Chocolate Lovers: Incorporate mini chocolate chips into the cheesecake mixture for an extra burst of chocolate goodness that will satisfy even the biggest chocoholics.
-
Festive Swirl: Fold in crushed holiday cookies or candy canes into the mixture for a unique candy cane twist that adds festive flair and flavor.
With so many options to choose from, your Hot Cocoa Peppermint Bites can be a dazzling centerpiece for any gathering. If you’re looking for more fun recipes to try, don’t miss my tasty Hot Chocolate Cookies or the savory Cordon Bleu Bites. Dive in and create your own delicious variations!
Expert Tips for Perfect Hot Cocoa Peppermint Bites
-
Room Temperature Cream Cheese: Ensure your cream cheese is softened to room temperature; this guarantees a smooth, creamy mixture without lumps.
-
Freezing is Key: Freeze the cheesecake bites before dipping them in chocolate to help retain their shape and prevent melting during the coating process.
-
Controlled Chocolate Drip: When dipping your bites in melted chocolate, tap gently to let excess chocolate drip off; this will help achieve a neat coating without a messy finish.
-
Taste as You Go: Adjust the sweetness of your mixture by adding more powdered sugar if needed. Always taste your filling before coating for that perfect balance.
-
Experiment with Flavors: Don’t hesitate to play around! Consider adding a hint of cayenne for a spicy touch or orange extract for a fruity twist to your Hot Cocoa Peppermint Bites.
-
Storage Tip: Keep leftovers in an airtight container in the refrigerator for up to a week, or freeze them for a longer shelf life while preserving their delightful taste.
What to Serve with Hot Cocoa Peppermint Bites
Imagine tucking into a warm, inviting atmosphere, where sweet scents mingle with festive cheer and laughter fills the air.
-
Warm Hot Cocoa: A classic pairing that enhances the chocolaty flavors of the bites; perfect for a cozy winter night.
-
Classic Vanilla Ice Cream: The cold creaminess complements the rich chocolate and peppermint, providing a delightful textural contrast.
-
Spiced Apple Cider: This comforting drink adds a seasonal touch, its spices enriching the flavors of the cheesecake bites beautifully.
-
Chocolate-Peppermint Biscotti: A crunchy biscuit that echoes the flavor profile, perfect for dipping and enhancing your dessert experience.
-
Gingerbread Cookies: Festive and sweet, these cookies introduce a hint of warm spices, balancing the cheesecake’s richness effectively.
-
Decadent Brownies: Fudgy brownies elevate the chocolate theme and create a satisfying, indulgent dessert spread for gatherings.
-
Cranberry Relish: A tart and bright contrast to the sweetness of the bites, this dish adds a fresh and festive flair to your dessert table.
-
Peppermint Tea: A soothing drink that complements the peppermint extract in the bites, offering a refreshing finish to your sweet treat.
-
Cheesecake Flavored Milkshake: This indulgent drink turns dessert into a fun beverage, enticing both kids and adults alike!
Make Ahead Options
These Hot Cocoa Peppermint Cheesecake Bites are perfect for busy home cooks who want to save time without sacrificing flavor! You can prepare the cheesecake mixture and crust up to 24 hours in advance; just refrigerate them separately in airtight containers. This allows the flavors to meld beautifully while preventing the crust from becoming soggy. When you’re ready to serve, simply assemble the bites by filling the prepared crust with the cheesecake mixture, freeze them for about 2 hours until firm, and then dip in melted chocolate as per the original instructions. This way, you’ll have delicious treats ready to impress your guests with minimal last-minute effort!
Storage Tips for Hot Cocoa Peppermint Bites
Fridge: Store the bites in an airtight container for up to 1 week. Keep them layered with parchment paper to avoid sticking together.
Freezer: For longer storage, freeze the bites in a single layer on a baking sheet before transferring them to a freezer-safe bag or container. They can be frozen for up to 2 months.
Thawing: When ready to enjoy, transfer frozen bites to the fridge for a few hours or leave them at room temperature for about 30 minutes to soften before serving.
Reheating: There’s no need to reheat these chilled delights—enjoy them cold for the best texture!

Hot Cocoa Peppermint Bites Recipe FAQs
How do I choose ripe ingredients for my Hot Cocoa Peppermint Bites?
Absolutely! When selecting cream cheese, look for a high-quality brand with no additives for the creamiest texture. For peppermint extract, go for pure rather than imitation for the best flavor. Always check the expiration date on your ingredients to ensure freshness!
How should I store leftover Hot Cocoa Peppermint Bites?
You can store these delightful bites in an airtight container in the refrigerator for up to 1 week. I often layer them with parchment paper to prevent sticking. If you want to keep them longer, freezing is an excellent option!
Can I freeze Hot Cocoa Peppermint Bites?
Yes! Freeze the bites in a single layer on a baking sheet for about 2 hours before transferring them to a freezer-safe bag or container. They can be enjoyed frozen for up to 2 months. When ready to devour, simply thaw them in the refrigerator for a few hours or leave them out at room temperature for about 30 minutes.
What should I do if my cheesecake mixture is lumpy?
Very! Ensure your cream cheese is at room temperature before mixing; this helps achieve a smooth mixture. If you find lumps, continue beating the mixture for a minute or two. You can also try straining the mixture through a fine mesh sieve to remove any remaining lumps before proceeding.
Are there any dietary considerations I should be aware of with these bites?
The Hot Cocoa Peppermint Bites are vegetarian-friendly, but they can easily accommodate dairy-free and gluten-free diets by using plant-based substitutes for cream cheese and gluten-free graham crackers. Always read labels for any allergies, especially with the chocolate and peppermint candies!
How can I make these bites more festive?
Absolutely! You can enhance the holiday spirit by adding festive sprinkles or a drizzle of chocolate syrup on top of your bites. You might also consider incorporating a hint of cinnamon or nutmeg in the cheesecake mixture for a warm, spiced flavor that complements the peppermint beautifully.
Irresistible Hot Cocoa Peppermint Bites for Cozy Holidays
Ingredients
Equipment
Method
- Begin by beating 8 ounces of softened cream cheese in a large mixing bowl until creamy, about 2 minutes with an electric mixer. Gradually add in 1 cup of powdered sugar, ¼ cup of unsweetened cocoa powder, and 1 teaspoon of peppermint extract, mixing until fully incorporated. Gently fold in 1 cup of whipped cream until the texture is smooth and fluffy, creating a delightful filling for your Hot Cocoa Peppermint Bites.
- In a separate bowl, combine 1 cup of chocolate graham cracker crumbs with 4 tablespoons of melted butter, stirring until the crumbs are well-coated. The mixture should resemble wet sand and hold together when pressed between your fingers.
- Line a mini muffin tin with 12 paper liners. Press approximately 1 tablespoon of the crust mixture into the bottom of each liner, ensuring it is compact and forms an even layer. Spoon the cheesecake mixture into each muffin cup, filling them about ¾ full. Top your mixture generously with crushed peppermint candies.
- Place the muffin tin in the freezer for at least 2 hours, allowing the Hot Cocoa Peppermint Bites to firm up completely.
- Once the bites have set, melt 1 cup of dark or milk chocolate in a microwave-safe bowl for about 1-2 minutes, stirring every 30 seconds until smooth. Dip each cheesecake bite into the melted chocolate, allowing excess to drip off.
- Let the chocolate-coated bites sit at room temperature until the chocolate firms up, or refrigerate for about 15 minutes.
Leave a Reply