
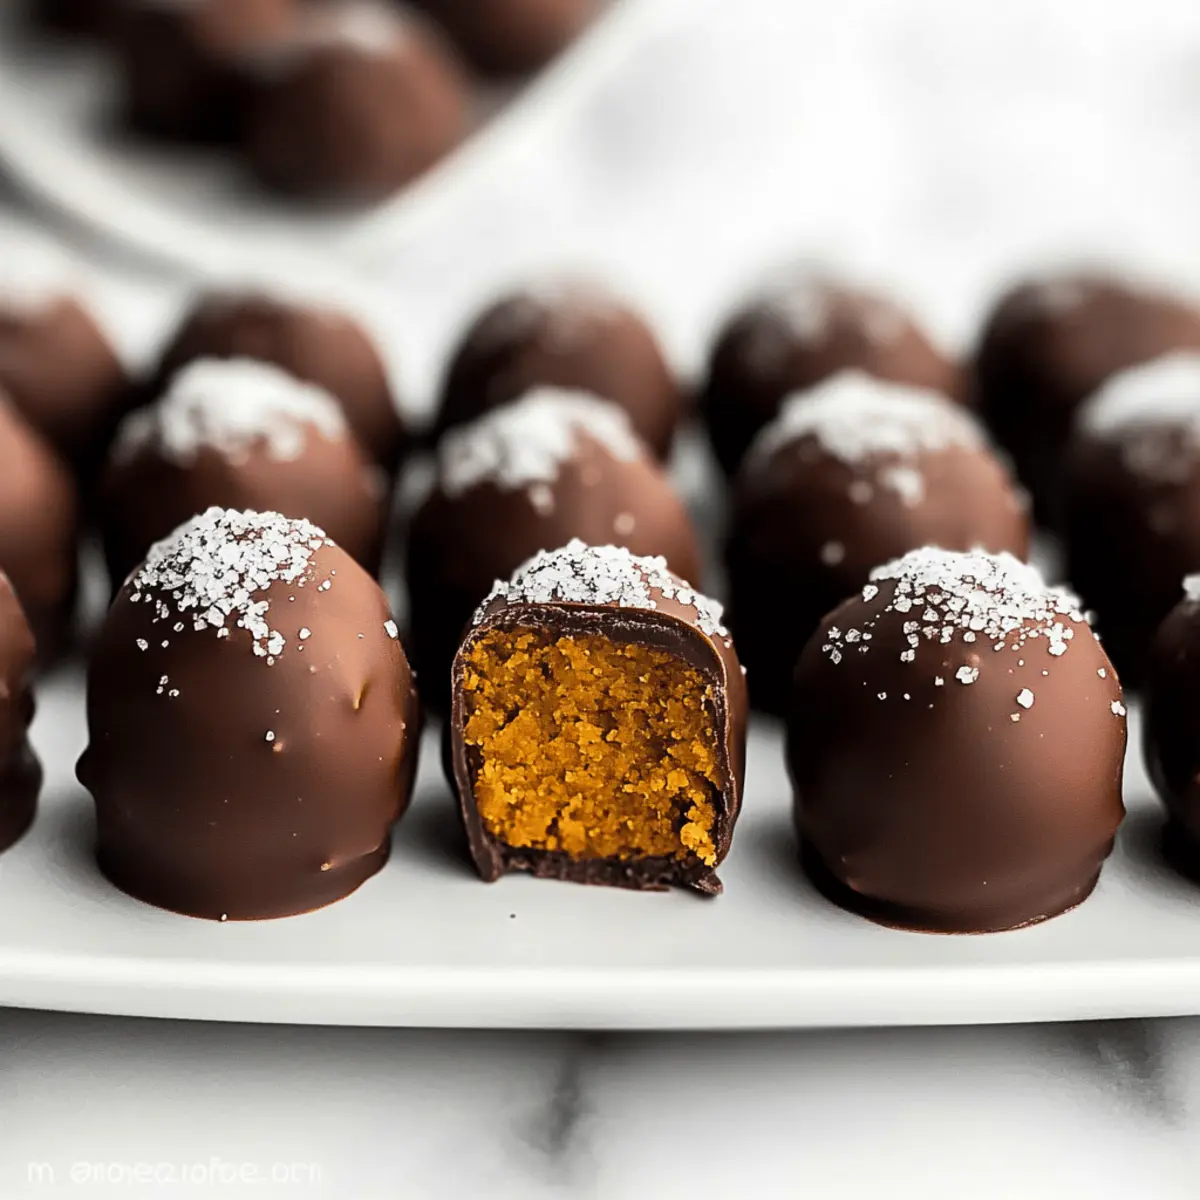
As the leaves turn and a crispness settles in the air, I find myself craving all things pumpkin, especially these Healthy Pumpkin Truffles. With a creamy, spiced filling that captures the essence of fall, these blissful bites are a no-bake marvel that won’t weigh you down. They marry the sweet indulgence of pumpkin pie with a rich, dark chocolate coating, making them a guilt-free treat that’s perfect for any occasion. These truffles are not only vegan and gluten-free, but they also align with clean eating principles—ideal for anyone looking for delicious yet wholesome homemade snacks. Plus, they’re quick to whip up, offering a delightful escape from the usual store-bought sweets. Are you ready to make your kitchen smell like autumn while treating yourself to a healthier dessert?
Why Are These Pumpkin Truffles Irresistible?
Indulgent Yet Guilt-Free: These Healthy Pumpkin Truffles combine the rich flavors of pumpkin and dark chocolate in a wholesome treat that’s low in calories.
No-Bake Convenience: Whip them up quickly—no oven required—making them a perfect last-minute dessert for gatherings or cozy nights at home.
Tailored for Everyone: Whether you’re vegan, gluten-free, or following a clean eating lifestyle, these truffles fit right in!
Versatile Flavor Base: Experiment with ingredient substitutions like sweet potato or different sweeteners to customize them to your taste.
Crowd-Pleaser: Serve these truffles at fall festivities or offer them to guests with coffee; they’re bound to impress! Don’t miss trying them alongside delightful treats like Pumpkin Cream Cheese or Pumpkin Spice Rice.
Healthy Pumpkin Truffle Ingredients
• Note: Gather these wholesome ingredients for your delightful Healthy Pumpkin Truffles!
For the Filling
- Pumpkin Purée – Provides moisture and sweetness, reminiscent of fall flavors. Important: Use canned pumpkin puree, not pumpkin pie mix.
- Homemade Pumpkin Spice – Adds warm undertones to the truffle filling. Substitution: Store-bought pumpkin spice can work in a pinch, but homemade offers a richer taste.
- Salt – Enhances sweetness and elevates overall flavor. No substitutes necessary.
- Liquid Stevia – A no-calorie sweetener that aligns with clean eating practices. Substitution: Replace with ¼ cup of coconut sugar or brown sugar; adjustments may be needed for the texture.
- Oat Flour – Serves as the base, giving structure to each truffle. Alternative: Any flour except coconut flour for maintaining texture.
For the Coating
- Dark Chocolate – A sumptuous layer that perfectly complements the filling. Tip: Opt for quality chocolate bars like Ghirardelli or Lindt for a smoother melt.
- Flaky Sea Salt (optional) – A touch for a gourmet finish and extra flavor. Highly recommended for that upscale touch.
Step‑by‑Step Instructions for Healthy Pumpkin Truffles
Step 1: Prepare the Baking Tray
Begin by lining a baking tray with wax or parchment paper to prevent sticking. This will be your setup to hold the truffles as they chill. Ensure the paper is smooth and flat against the tray for easy placement and removal later on, creating a tidy workspace for your Healthy Pumpkin Truffles.
Step 2: Make the Filling
In a medium mixing bowl, combine the pumpkin purée, homemade pumpkin spice, salt, and liquid stevia. Use a spatula to mix these ingredients thoroughly until well blended. Gradually fold in oat flour, a little at a time, until the mixture becomes a cohesive dough. It should be slightly moist but hold together well, ensuring a creamy and flavorful filling for your Healthy Pumpkin Truffles.
Step 3: Form the Truffles
Lightly oil your hands with a bit of coconut oil or any neutral oil to prevent sticking. Scoop a portion of the mixture and roll it into bite-sized spheres, roughly the size of a tablespoon. Aim for uniformity to ensure even coating later. Once rolled, place each truffle on the prepared baking sheet, leaving space between them for easy handling.
Step 4: Melt the Chocolate
In a microwave-safe bowl, break the dark chocolate into smaller pieces for quicker melting. Heat the chocolate in the microwave at 30-second intervals, stirring well between each, until it’s fully melted and smooth. This should take about 1 to 2 minutes total. Be careful not to overheat the chocolate to maintain its luxurious texture for coating your Healthy Pumpkin Truffles.
Step 5: Coat the Truffles
Using forks, dip each truffle into the melted chocolate, ensuring they are completely covered. Allow excess chocolate to drip off by lifting the truffle with a second fork. Gently shake off any excess before placing the coated truffle back onto the baking sheet. Repeat this process for all the truffles, creating a beautiful chocolate shell around your healthy pumpkin filling.
Step 6: Finish with Sea Salt
While the chocolate coating is still wet, sprinkle a pinch of flaky sea salt over each truffle. This step not only elevates the flavor but also adds a delightful visual contrast against the dark chocolate. The salt enhances the sweetness of the filling, making your Healthy Pumpkin Truffles even more irresistible.
Step 7: Hardening Phase
Finally, place the baking sheet in the refrigerator and chill for 15 to 20 minutes until the chocolate is firmly set. This cooling period will give your Healthy Pumpkin Truffles a perfect finish and make them easier to handle. Once set, you can enjoy these delightful treats or store them in an airtight container, ready to impress family and friends!
What to Serve with Healthy Pumpkin Truffles
As you indulge in these heavenly bites, consider pairing them with delightful accompaniments that elevate your sweet experience.
-
Chai Tea: The spicy notes of chai beautifully complement the pumpkin flavors, enhancing the warm, cozy feeling of fall.
-
Coconut Whipped Cream: A dollop of this light topping adds creaminess while offering a tropical twist to the rich truffles.
-
Apple Slices with Almond Butter: The crispness of fresh apples with nutty almond butter creates a delightful contrast in texture and flavor.
-
Chocolate Covered Pretzels: The salty crunch pairs wonderfully, balancing the sweetness of the pumpkin while bringing an extra layer of enjoyment.
-
Pumpkin Spice Latte: Bring together all the autumn flavors with this creamy coffee treat that pairs harmoniously with your truffles.
These pairings bring out the best in your Healthy Pumpkin Truffles while creating a beautifully balanced tasting experience full of seasonal warmth.
Expert Tips for Healthy Pumpkin Truffles
-
Precision Matters: Measure oat flour accurately to ensure the filling has the right texture. Too much can lead to dry truffles.
-
Maintain Chocolate Consistency: To keep melted chocolate smooth for coating, use a warming method like a panini press or electric grill.
-
Avoid Chocolate Chips: Using quality chocolate bars instead of chocolate chips ensures a smoother melt, avoiding lumps and graininess in your Healthy Pumpkin Truffles.
-
Customize Sweetness: If using other sweeteners, adjust the oat flour and pumpkin purée as needed to maintain the right moisture and consistency in the filling.
-
Chill Properly: Don’t skip the hardening phase! Refrigerating the truffles not only sets the chocolate but also helps the flavors meld beautifully together.
How to Store and Freeze Healthy Pumpkin Truffles
Fridge: Keep your Healthy Pumpkin Truffles in an airtight container in the refrigerator for up to 5 days to maintain freshness and flavor.
Freezer: For longer storage, freeze the truffles in a single layer on a baking sheet until firm, then transfer them to a freezer-safe container or bag for up to 3 months.
Thawing: To enjoy frozen truffles, simply transfer them to the fridge for a few hours or leave them at room temperature for about 30 minutes before serving.
Reheating: There’s no need to reheat these truffles; they are best enjoyed chilled straight from the fridge or after thawing from the freezer!
Make Ahead Options
These Healthy Pumpkin Truffles are perfect for meal prep enthusiasts! You can make the filling and roll the truffles into balls up to 24 hours in advance, just refrigerate them on the lined baking tray to maintain their shape and texture. Additionally, you can melt the chocolate up to 3 days prior; store it in an airtight container at room temperature to keep it smooth. When you’re ready to enjoy, simply dip the pre-formed truffles into the melted chocolate and chill for 15-20 minutes to set. This way, you’ll have delicious, handcrafted treats ready with minimal effort, making your busy weeknights a little sweeter!
Healthy Pumpkin Truffles: Delicious Variations
Feel free to get creative with your truffles! Each variation offers a delightful twist on an already scrumptious treat.
-
Sweet Potato Swap: Replace pumpkin purée with sweet potato for a sweeter, Earthier flavor. You’ll love how it changes the profile!
-
Nuttier Texture: Add chopped walnuts or pecans to the filling for a tasty crunch. Their rich, nutty flavor will elevate each bite.
-
Dried Fruit Delight: Mix in chopped dried cranberries or apricots for a delightful burst of sweetness and chewiness! This twist provides both texture and a fruity contrast to the chocolate.
-
Different Sweeteners: Use maple syrup or agave nectar instead of liquid stevia for a different sweetness profile. Just note that adjustments may be needed to achieve the right consistency.
-
Protein Boost: Incorporate some protein powder into the filling to amp up the nutritional value. This makes them a great post-workout snack!
-
Spice It Up: Experiment with adding a pinch of cayenne or chili powder to the chocolate for a fun, spicy kick! The warmth perfectly balances the sweetness of the chocolate.
-
Flavored Chocolate: Use white or milk chocolate instead of dark for a sweeter coating. These variations will certainly appeal to different taste buds!
For additional pumpkin inspiration, be sure to check out the Iced Pumpkin Cream for a refreshing drink and discover how to make holiday sides with our delicious Pumpkin Spice Rice recipe.

Healthy Pumpkin Truffles Recipe FAQs
What type of pumpkin purée should I use?
Absolutely! Make sure to use canned pumpkin purée rather than pumpkin pie mix, as the latter contains added sugars and spices that alter the truffle’s flavor and sweetness. If you’re feeling adventurous, you can also make your own purée by roasting and blending fresh pumpkin.
How should I store my Healthy Pumpkin Truffles?
For optimal freshness, store your Healthy Pumpkin Truffles in an airtight container in the refrigerator. They will remain delicious for up to 5 days. Just be sure to keep them cool to maintain that creamy interior and smooth chocolate coating!
Can I freeze Healthy Pumpkin Truffles?
Very! To freeze, place the truffles in a single layer on a baking sheet and let them freeze until firm. Then, transfer them to a freezer-safe container or bag. They can be stored in the freezer for up to 3 months. This is a great way to make a batch ahead of time!
What if my filling is too crumbly?
No need to worry! If your truffle filling turns out too crumbly after adding oat flour, start by adding a teaspoon of milk slowly until the mixture holds together. It’s all about finding that sweet spot for the right texture; it should be moist yet firm enough to form into spheres.
Are there any dietary concerns I should be aware of?
Keep in mind that these Healthy Pumpkin Truffles are vegan and gluten-free, making them suitable for many dietary preferences! However, as with any recipe involving chocolate, it’s essential to check the labels for any potential allergens, especially for those with nut allergies or specific dietary restrictions. Enjoy making these for everyone!
Irresistibly Healthy Pumpkin Truffles That Melt in Your Mouth
Ingredients
Equipment
Method
- Prepare the Baking Tray: Line a baking tray with wax or parchment paper to prevent sticking.
- Make the Filling: Combine pumpkin purée, homemade pumpkin spice, salt, and liquid stevia in a bowl. Mix thoroughly, fold in oat flour until cohesive.
- Form the Truffles: Lightly oil hands, scoop mixture, and roll into bite-sized spheres. Place on the prepared baking sheet.
- Melt the Chocolate: Break dark chocolate into pieces, microwave at 30-second intervals until melted and smooth.
- Coat the Truffles: Dip each truffle in melted chocolate, allow excess to drip off, and place back on the baking sheet.
- Finish with Sea Salt: Sprinkle flaky sea salt over each truffle while chocolate is still wet.
- Hardening Phase: Refrigerate for 15 to 20 minutes until chocolate is set.
Leave a Reply