
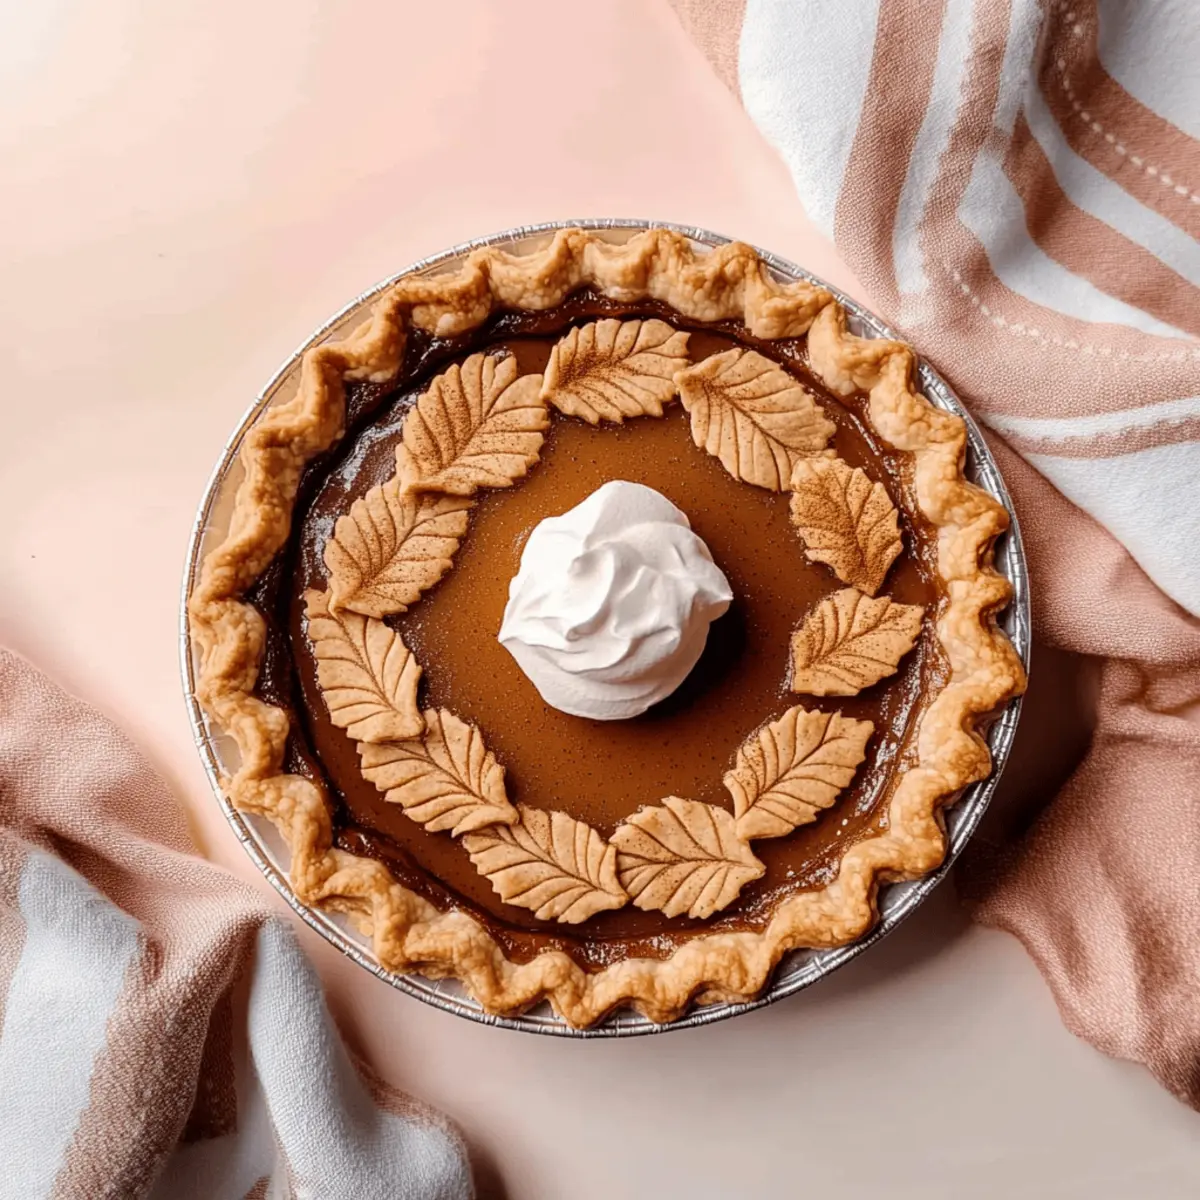
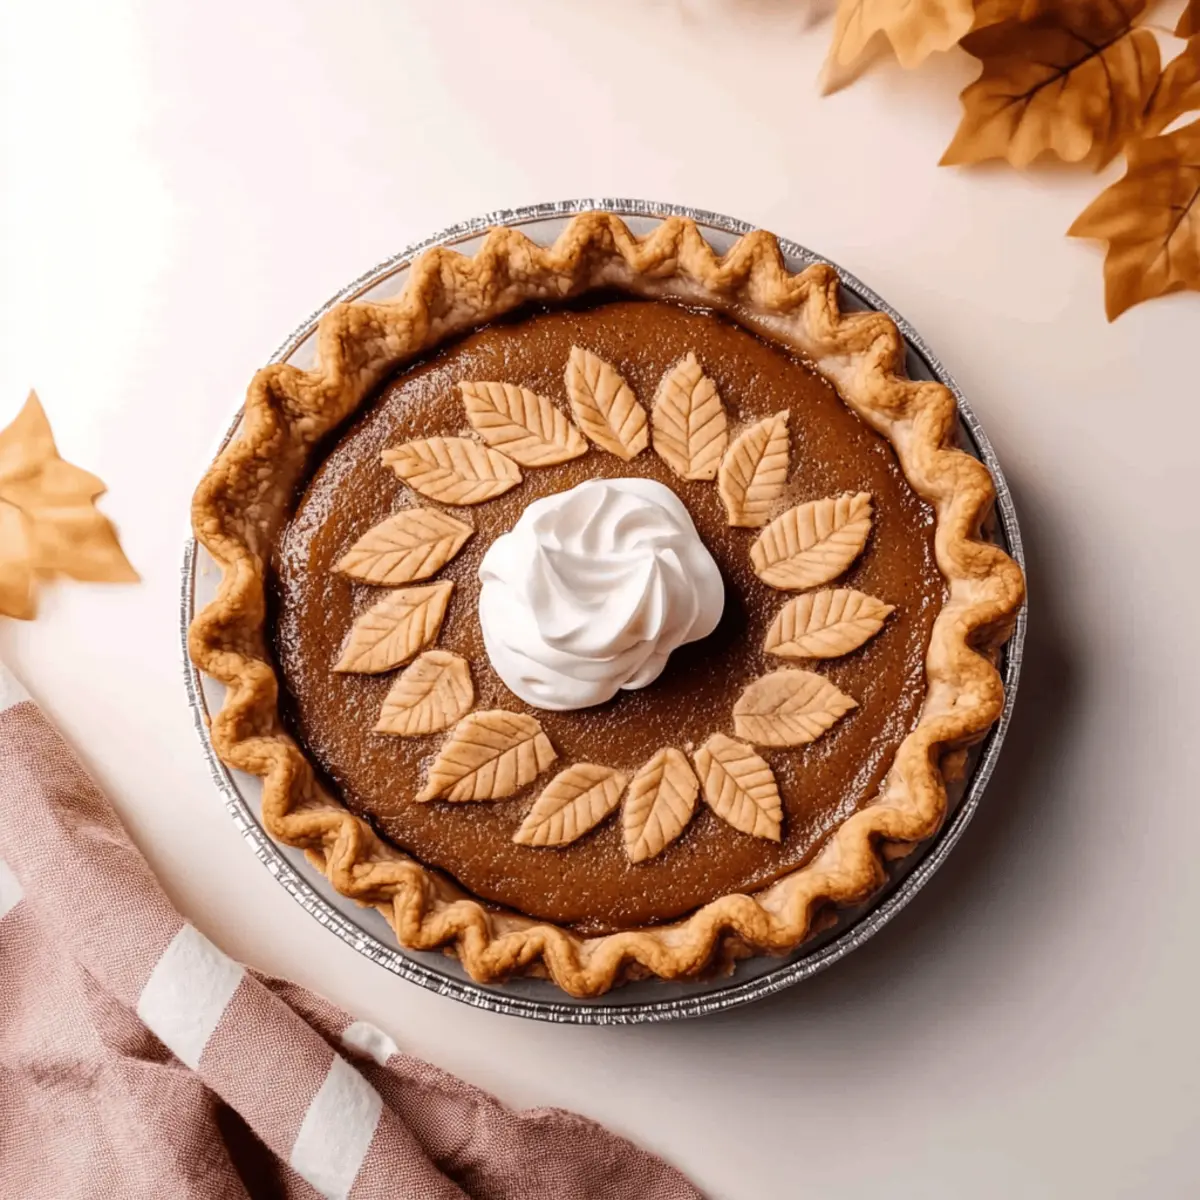
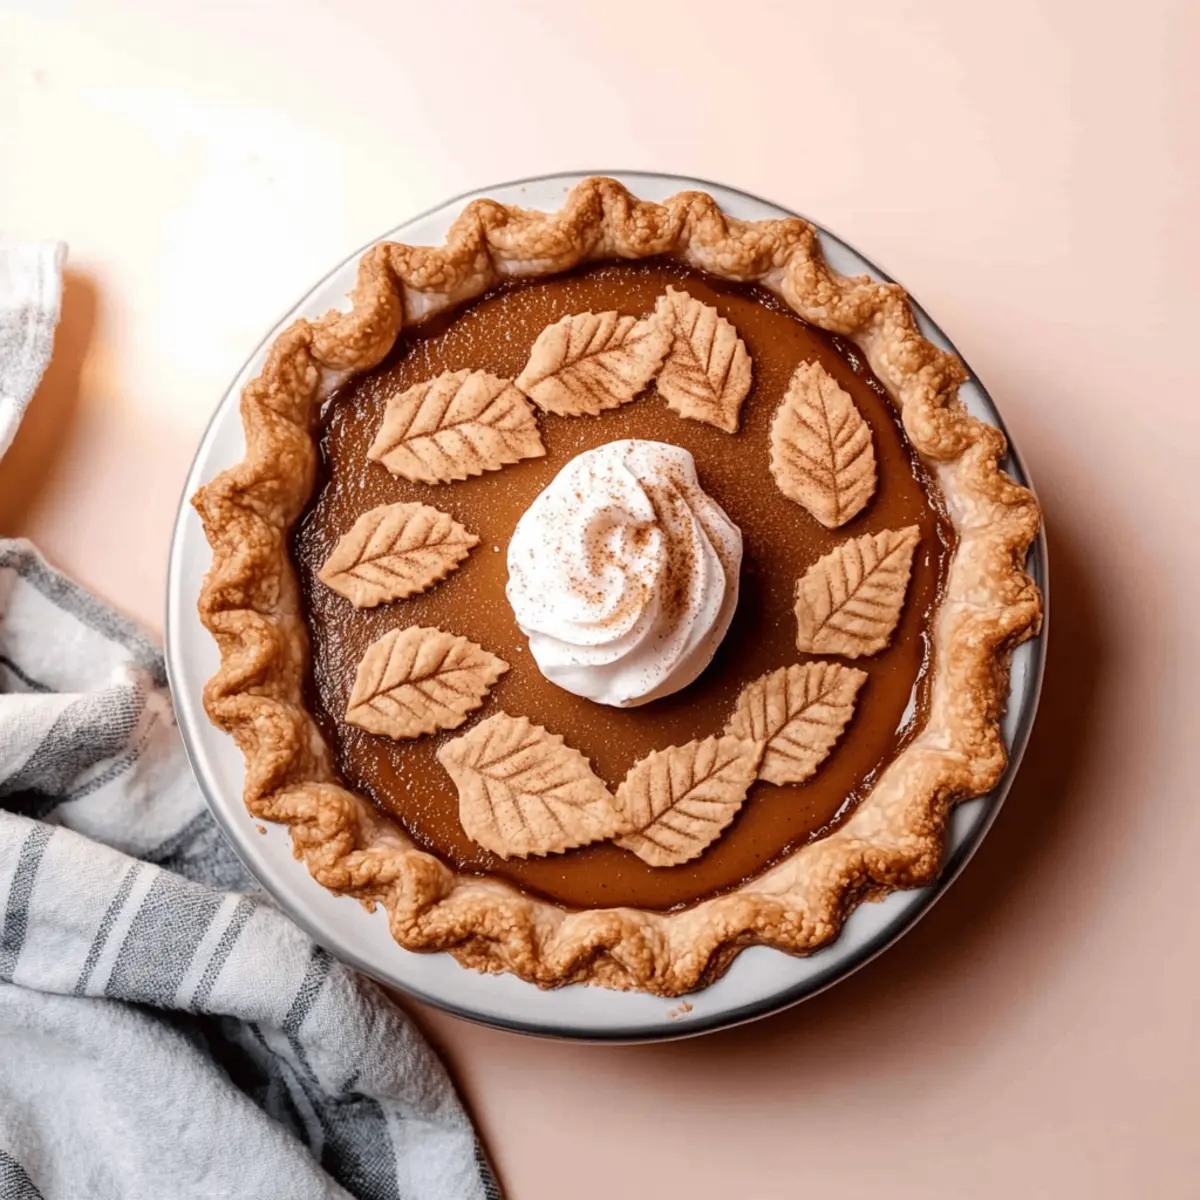
As the crisp autumn air settles in, the aroma of baked apples wafts through my kitchen, transporting me back to cozy family gatherings. This Easy Apple Butter Pie is my go-to dessert for those chilly evenings when comfort food is essential. With a silky-smooth custard filling infused with rich apple butter, this pie is not only a delightful twist on traditional fall desserts but also incredibly easy to make—just whisk, pour, and bake! Whether you’re surprising guests or savoring a quiet night in, its creamy texture and wholesome spelt crust make it a true crowd-pleaser. Plus, it’s an irresistible option for those looking to embrace healthier ingredients without sacrificing flavor. Ready to discover how to craft this fall favorite? Let’s get started!

Why is Apple Butter Pie a Fall Favorite?
Flavorful simplicity: This Apple Butter Pie offers the rich taste of spiced apples with minimal effort—perfect for busy home cooks!
Wholesome crust: The spelt crust adds a nutty depth, transforming traditional pie into a healthier indulgence.
Crowd-pleaser: Ideal for gatherings, its creamy texture delights both kids and adults alike.
Versatile options: Feel free to experiment with different flavored butters or crusts for a personalized touch—there’s no wrong way to enjoy it!
Quick prep: With just a few easy steps, you can whip up this dessert in no time, leaving you more moments to savor the cozy season.
Serve chilled: Pair with Maple Whipped Cream for an unforgettable finish that enhances its already delightful flavor profile!
Apple Butter Pie Ingredients
• Ready to create a delicious Apple Butter Pie? Here’s what you’ll need!
For the Filling
- Apple Butter – This is the star of the show; feel free to use store-bought or homemade for a personal touch.
- Eggs – They add structure and richness to the custard filling, ensuring a delightful texture.
- Heavy Cream – Adds a luxurious creaminess that enhances the custard quality.
- Sugar – This sweetens the filling; adjust to taste for your preferred sweetness level.
- Spices (cinnamon, nutmeg) – These enhance the flavor profile; feel free to tweak based on your spice preference.
For the Crust
- Spelt Flour – Provides a hearty, whole-grain flavor that pairs beautifully with the filling; perfect for a healthier choice! If you don’t have it, alternatives like Pâte Sablée or Graham Cracker Crust work wonderfully too.
- Salt – Balances the sweetness of the pie; a pinch is all you need!
Step‑by‑Step Instructions for Easy Apple Butter Pie
Step 1: Preheat the Oven
Begin by preheating your oven to 375°F (190°C). This ensures that your oven is perfectly hot when it’s time to bake the pie, promoting an even texture in your Apple Butter Pie. While the oven heats, you can prepare your crust, either opting for a wholesome spelt crust or any alternative you prefer.
Step 2: Prepare the Crust
Roll out your spelt pie crust into a 9-inch pie dish, pressing it gently against the bottom and sides. If using an alternative crust, follow the respective instructions to fit it into the dish. Once the crust is ready, use a fork to poke small holes in the bottom to prevent bubbling, then bake it in the preheated oven for about 15 minutes until it’s lightly golden.
Step 3: Mix the Filling
In a large mixing bowl, whisk together the apple butter, eggs, heavy cream, sugar, and spices until smooth and well-combined. Aim for a silky texture without any lumps to ensure a creamy filling in your Easy Apple Butter Pie. This step takes just a few minutes and fills your kitchen with fragrant spices!
Step 4: Pour the Mixture
Carefully pour the prepared filling into your pre-baked crust, using a spatula to evenly distribute the mixture. Ensure that the filling doesn’t exceed the edge of the crust to prevent overflow while baking. This pie is all about that rich, custardy goodness, so take care to keep it even for the best result.
Step 5: Bake the Pie
Place the filled pie back into the oven and bake for approximately 40-50 minutes. You’re looking for the filling to be set but still slightly wobbly in the center, similar to a soufflé. The top should have a beautiful golden color, signaling that your Apple Butter Pie is almost ready.
Step 6: Cool and Refrigerate
Once baked, remove the pie from the oven and allow it to cool at room temperature for about 1 hour. This cooling phase is important to finish the cooking process. After cooling, cover the pie and place it in the refrigerator for at least 6 hours, or preferably overnight, to fully set and develop its flavors.
Step 7: Serve and Enjoy
When ready to serve, take the pie out of the fridge. It can be enjoyed chilled or at room temperature; either way, the creamy texture of your Apple Butter Pie is sure to impress! Serve it with a dollop of Maple Whipped Cream for an extra special touch that enhances the rich apple flavors beautifully.
Make Ahead Options
These Easy Apple Butter Pie options are perfect for meal prep, saving you time on busy days! You can prepare the spelt crust up to 24 hours in advance by rolling it out and storing it wrapped tightly in plastic wrap in the refrigerator. The filling can also be whisked together and stored in an airtight container for up to 3 days; just give it a quick stir before pouring it into the prepared crust. When you’re ready to enjoy, simply bake the pie as directed, and let it cool before refrigerating to set. This way, you’ll have a delicious, homemade dessert ready with minimal fuss, maintaining all its delightful flavor and creamy texture!
What to Serve with Easy Apple Butter Pie
The perfect dinner party calls for dishes that complement each other, and this indulgent pie is no exception!
-
Maple Whipped Cream: A must-have topping, this rich cream adds delightful sweetness and enhances the warm autumn spices in the pie.
-
Cinnamon Sugar Cookies: These soft, chewy cookies provide a sweet crunch that pairs beautifully with the smooth custard of the pie.
-
Spiced Apple Cider: Served warm, this drink mirrors the apple flavor, perfect for cozy evenings and a festive fall atmosphere.
-
Fresh Fruit Salad: A refreshing mixture of seasonal fruits brightens the meal, offering a contrasting texture and balancing sweetness.
-
Pecan Crumble Topping: Scatter this over the pie for added crunch, the nuts complementing the creamy filling while adding a bit of indulgence.
-
Bourbon Caramel Sauce: Drizzle on slices of pie for a decadent finish that takes your dessert experience to the next level.
-
Chai Latte: This spiced, creamy beverage creates a warm hug in a mug, reflecting the cozy flavors of your Apple Butter Pie.
-
Roasted Squash Salad: The earthy notes and textures in this salad enhance the pie while incorporating a healthy, fresh element to the meal.
Expert Tips for Apple Butter Pie
-
Perfect Crust: Ensure your spelt crust is blind baked until lightly golden; this prevents a soggy bottom and gives a delightful crunch.
-
Watch the Baking: Avoid over-baking the pie; look for the edges to puff up while the center slightly wobbles for that perfect custard texture.
-
Flavor Boost: Feel free to adjust spices like cinnamon and nutmeg to your taste; a little extra can elevate your Apple Butter Pie to new heights!
-
Chill Time: Don’t skip the refrigeration after baking! This step is crucial for the filling to set completely and enhances the flavors.
-
Use Quality Ingredients: Opt for high-quality apple butter and heavy cream for the best-tasting pie. Your effort will shine through in every bite!
Apple Butter Pie Variations & Substitutions
Get ready to play around with this delightful recipe and make it your own! Each variation adds a unique touch and flavor to your delicious Apple Butter Pie.
-
Gluten-Free: Substitute spelt flour with almond flour or a gluten-free all-purpose blend for a nutty and tender crust. This option opens up the pie to a whole new range of eaters without sacrificing that beloved texture.
-
Dairy-Free: Use coconut cream in place of heavy cream and substitute your eggs with flaxseed meal mixed with water for a rich custard finish that’s dairy-free and just as comforting.
-
Additional Flavor Boost: Stir in a teaspoon of vanilla extract or a splash of bourbon into the filling for an aromatic twist that complements the apple butter beautifully. It adds a depth of flavor that will keep your guests coming back for seconds!
-
Nutty Crust Option: Try a pecan or almond crust for a crunchy contrast to the creamy filling. Ground nuts mixed with a bit of melted butter creates a delightful texture that pairs wonderfully with the apple goodness.
-
Seasonal Spice: Experiment with adding ground ginger or allspice to your filling for a different spice profile that will warm your soul on those chilly fall nights. The heartwarming aroma will make your kitchen feel like a cozy haven.
-
Fruit Fusion: Replace some of the apple butter with other fruit butters like pear or peach for a playful summery hint in your pie. This twist takes the classic fall dessert into a delightful new territory.
-
Salted Caramel Drizzle: For an indulgent touch, add a salted caramel drizzle on top before serving. The sweet and salty combination will elevate the flavors, making for an unforgettable dessert experience.
-
Cocoa Dusting: If you’re feeling adventurous, sprinkle some unsweetened cocoa powder on top before serving for a chocolatey surprise that plays beautifully with the flavors of apple and spice.
Feel free to try these variations and rethink your Apple Butter Pie every time you make it. With so many options, there’s no limit to the delectable creations you can whip up in your kitchen! And remember, don’t hesitate to serve with a touch of Maple Whipped Cream or a scoop of vanilla ice cream for that extra comforting touch.
How to Store and Freeze Apple Butter Pie
Fridge: Store your Apple Butter Pie in the refrigerator, covered tightly with plastic wrap or aluminum foil, for up to 3 days. This helps enhance the flavor while keeping it fresh.
Freezer: If you want to extend its shelf life, freeze the pie for up to 2 months. Make sure it’s well-wrapped in plastic wrap followed by aluminum foil to prevent freezer burn.
Thawing: To enjoy your frozen Apple Butter Pie, transfer it to the fridge for at least 6 hours or overnight to thaw. This method preserves the creamy custard texture ensuring a delightful dessert experience.
Reheating: For serving, you can either enjoy the pie chilled or bring it to room temperature. If preferred warm, bake it in a preheated oven at 350°F (175°C) for about 10–15 minutes, just until heated through.
Apple Butter Pie Recipe FAQs
What type of apple butter is best to use?
Absolutely, using homemade apple butter can elevate the flavor of your pie! However, store-bought varieties work just as well; look for ones with a rich, spiced profile and minimal additives. Opt for a brand that uses high-quality apples and has a smooth texture for best results.
How should I store my Apple Butter Pie?
To keep your pie fresh, store it in the refrigerator, covered tightly with plastic wrap or aluminum foil, for up to 3 days. Chilling not only helps it set but also enhances the flavors! You’ll be able to enjoy it gradually without sacrificing taste.
Can I freeze Apple Butter Pie?
Definitely! To freeze your pie, first let it cool completely, then wrap it tightly in plastic wrap followed by aluminum foil to prevent freezer burn. You can freeze it for up to 2 months. When you’re ready to enjoy it, thaw the pie in the refrigerator for at least 6 hours, allowing it to maintain its creamy custard texture.
Why is my pie filling not setting properly?
Very! If your pie filling doesn’t set, it could be due to over or under baking. Make sure you bake it until the edges are puffed but the center still has a slight wobble—that’s the key to a creamy custard texture. If using fresh apple butter, too much moisture can also affect the set; try reducing the liquid in your filling if you’re experimenting.
Are there any dietary concerns for this recipe?
Certainly! This Apple Butter Pie contains eggs and heavy cream, which may be a concern for those with egg or dairy allergies. For a dairy-free option, you can substitute heavy cream with coconut cream or a nut-based cream alternative. Just be cautious about ensuring any substitutes suit your dietary needs.
Can I use other types of crust for this pie?
Of course! While the spelt crust adds a wholesome flavor, you can use various alternatives, like Pâte Sablée, Pâte Sucrée, or even a Biscoff or Graham Cracker Crust for a sweeter base. Choose based on your preference and dietary requirements; there’s a delicious way to enjoy this Apple Butter Pie no matter your crust choice!
Irresistible Apple Butter Pie with Wholesome Spelt Crust
Ingredients
Equipment
Method
- Preheat your oven to 375°F (190°C).
- Roll out your spelt pie crust into a 9-inch pie dish, press it gently against the bottom and sides, and poke small holes in the bottom.
- Bake the crust for about 15 minutes until lightly golden.
- In a large mixing bowl, whisk together the apple butter, eggs, heavy cream, sugar, cinnamon, and nutmeg until smooth.
- Pour the prepared filling into the pre-baked crust, ensuring it doesn’t exceed the edge.
- Bake the pie for approximately 40-50 minutes until the filling is set but slightly wobbly in the center.
- Allow the pie to cool at room temperature for about 1 hour, then refrigerate for at least 6 hours or overnight.
- Serve chilled or at room temperature, optionally with Maple Whipped Cream.
Leave a Reply