
The aroma of teriyaki chicken wafting through the kitchen is enough to make anyone’s mouth water. This Teriyaki Chicken Onigiri recipe combines the heartiness of marinated drumsticks with the delightful stickiness of sushi rice, creating a portable snack that’s a hit at any gathering or a perfect companion for your busy day. Not only is this dish incredibly easy to prepare, but it’s also gluten-free when made with the right soy sauce, ensuring everyone can enjoy these delectable rice balls! Picture these bite-sized delights packed for lunch or presented as a fun picnic treat; their savory flavors and satisfying texture will leave you craving more. So, are you ready to roll up your sleeves and create some irresistible Chicken Onigiri? Let’s dive in!
Why is Chicken Onigiri a Must-Try?
Flavor Explosion: Each bite combines the rich, savory taste of teriyaki chicken with the perfect sticky rice texture, making it irresistible!
Easy Prep: This simple recipe requires minimal cooking skills, perfect for both novice cooks and seasoned chefs.
Portable Delight: Enjoy these delicious rice balls as a snack, or pack them in your lunch for a satisfying midday treat.
Customization Galore: Feel free to swap chicken for tofu or try different fillings, like spicy tuna or veggies, to match your tastes!
Gluten-Free Option: Use gluten-free soy sauce, ensuring that everyone can savor this Japanese-inspired dish!
Pair them with a side of Savory Chicken Wraps for a delightful lunch or try them alongside Honey Feta Chicken for a complete meal.
Chicken Onigiri Ingredients
• Here’s everything you need to make these delightful Chicken Onigiri!
For the Rice
- Sushi Rice – 4 cups cooked sushi rice; ensures the onigiri holds together with the right sticky texture.
- Salt – ½ teaspoon fine salt; enhances flavor in the rice and aids in seasoning.
- Furikake – 2 tablespoons (optional); adds flavor and seasoning for an extra taste punch.
For the Chicken
- Boneless Skinless Chicken – ½ pound (drumsticks recommended); main protein source that can be substituted with thighs or ground chicken.
- Soy Sauce – 2 teaspoons + 1 ½ tablespoons; brings out the umami flavor essential for the marinade and finished glaze.
- Sake – 1 tablespoon (or water); enhances flavor and adds authenticity to the dish.
- Baking Soda – ¼ teaspoon; tenderizes the chicken for a succulent texture.
- Cornstarch – 1 teaspoon; helps create a mesmerizing glaze for the chicken when cooked.
- Mirin – 1 tablespoon; this sweet rice wine provides depth to the teriyaki sauce.
- Brown Sugar – 1 tablespoon, firmly packed; adds a touch of sweetness to balance the savory sauce.
- Oil – 1 tablespoon; for cooking the chicken; both vegetable or sesame oils work well.
- Minced Garlic – 1 tablespoon; infuses a wonderful aromatic flavor throughout the dish.
For Assembly
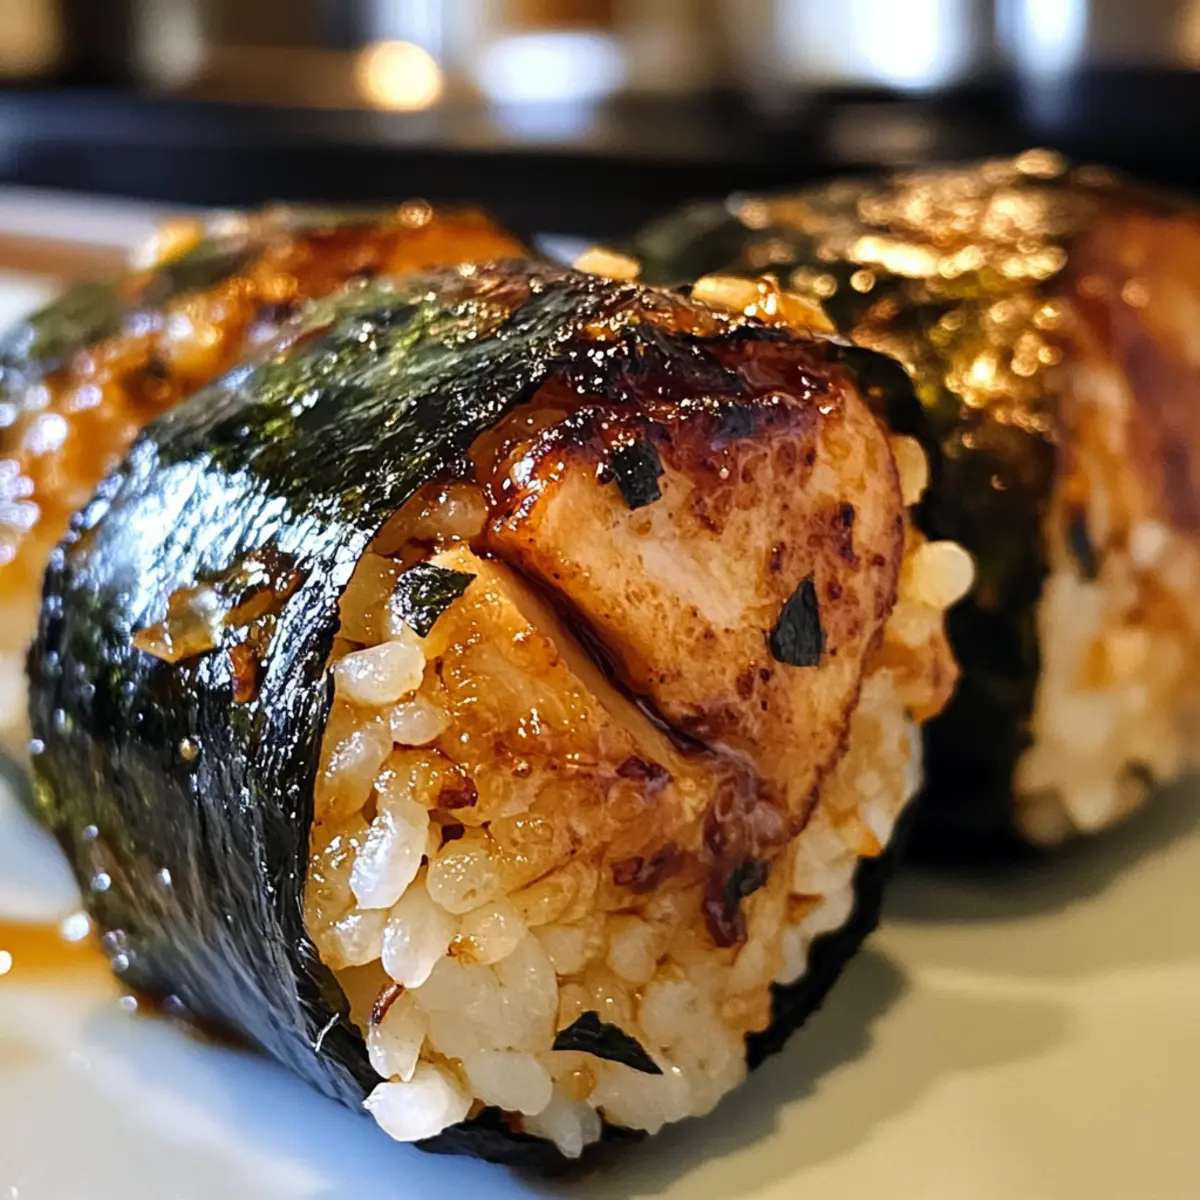
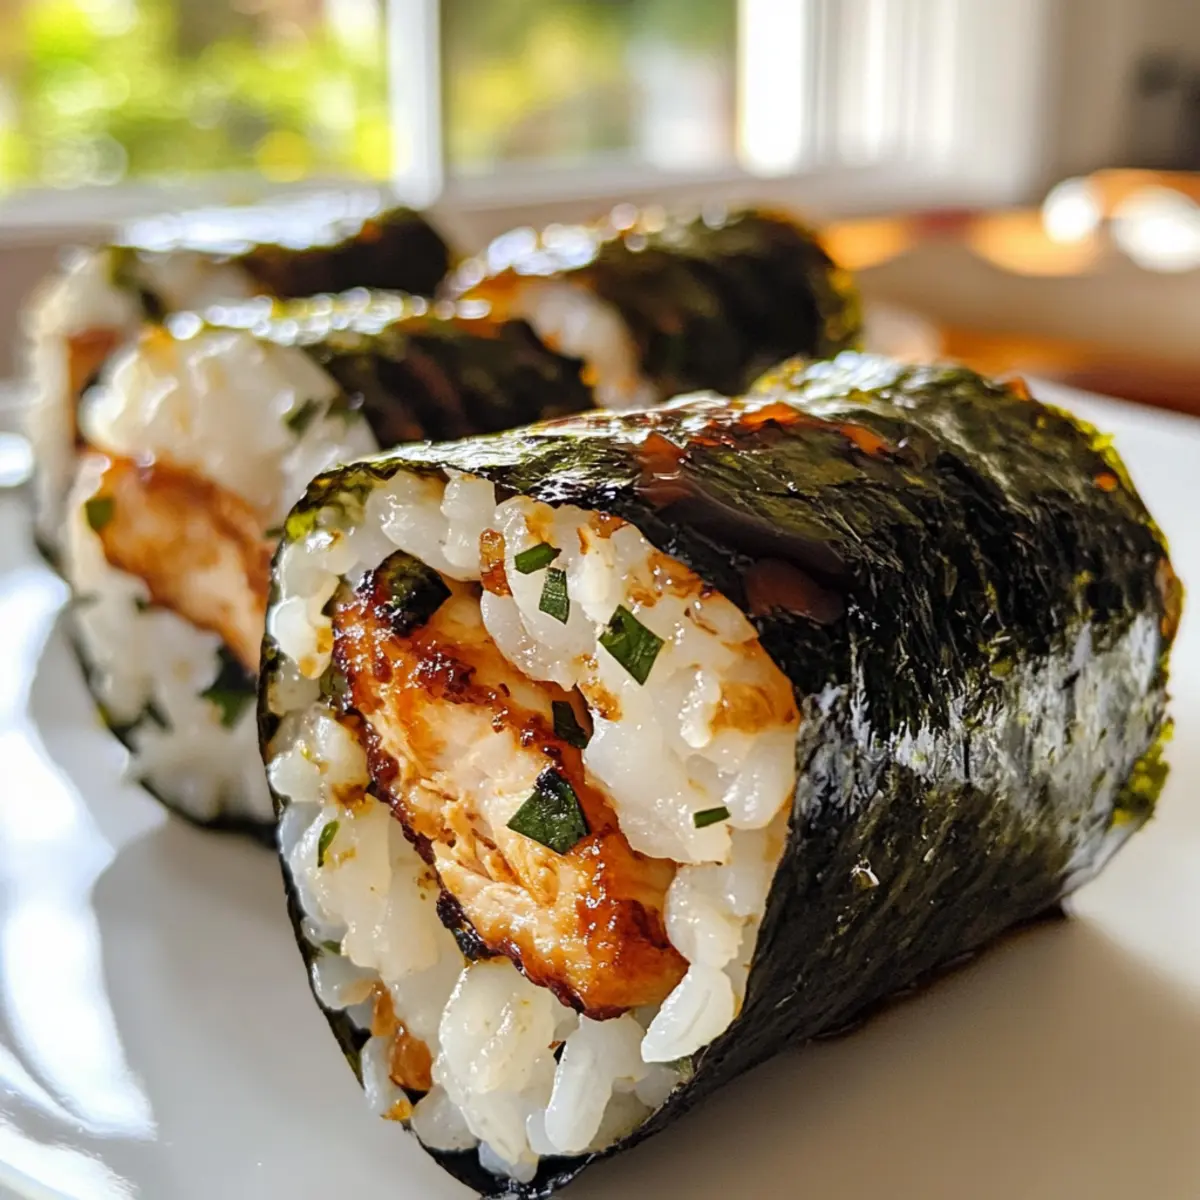
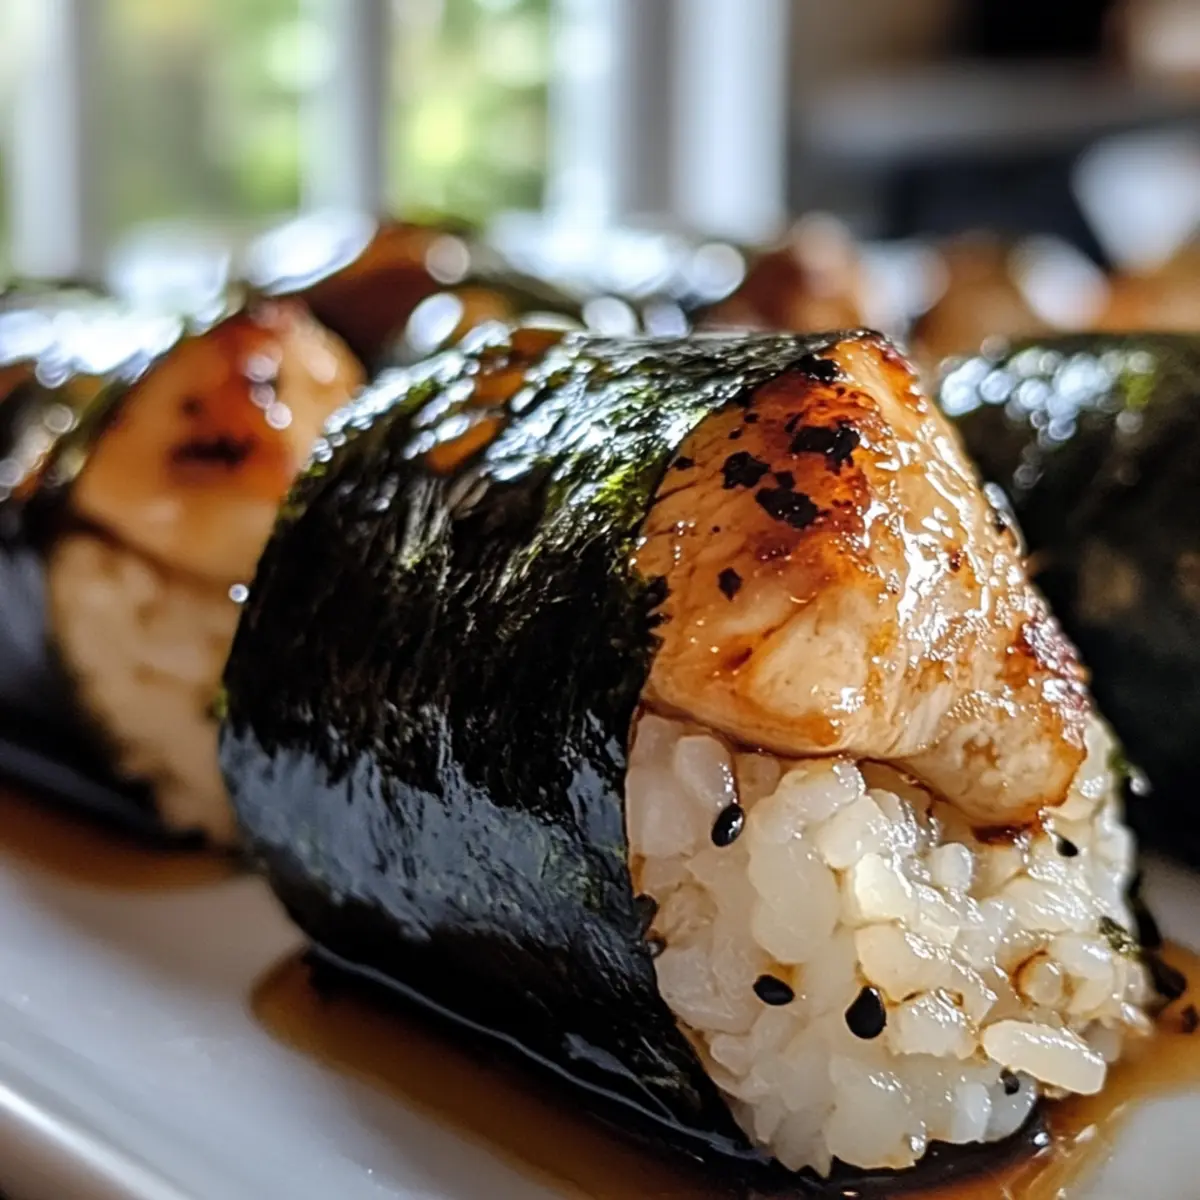
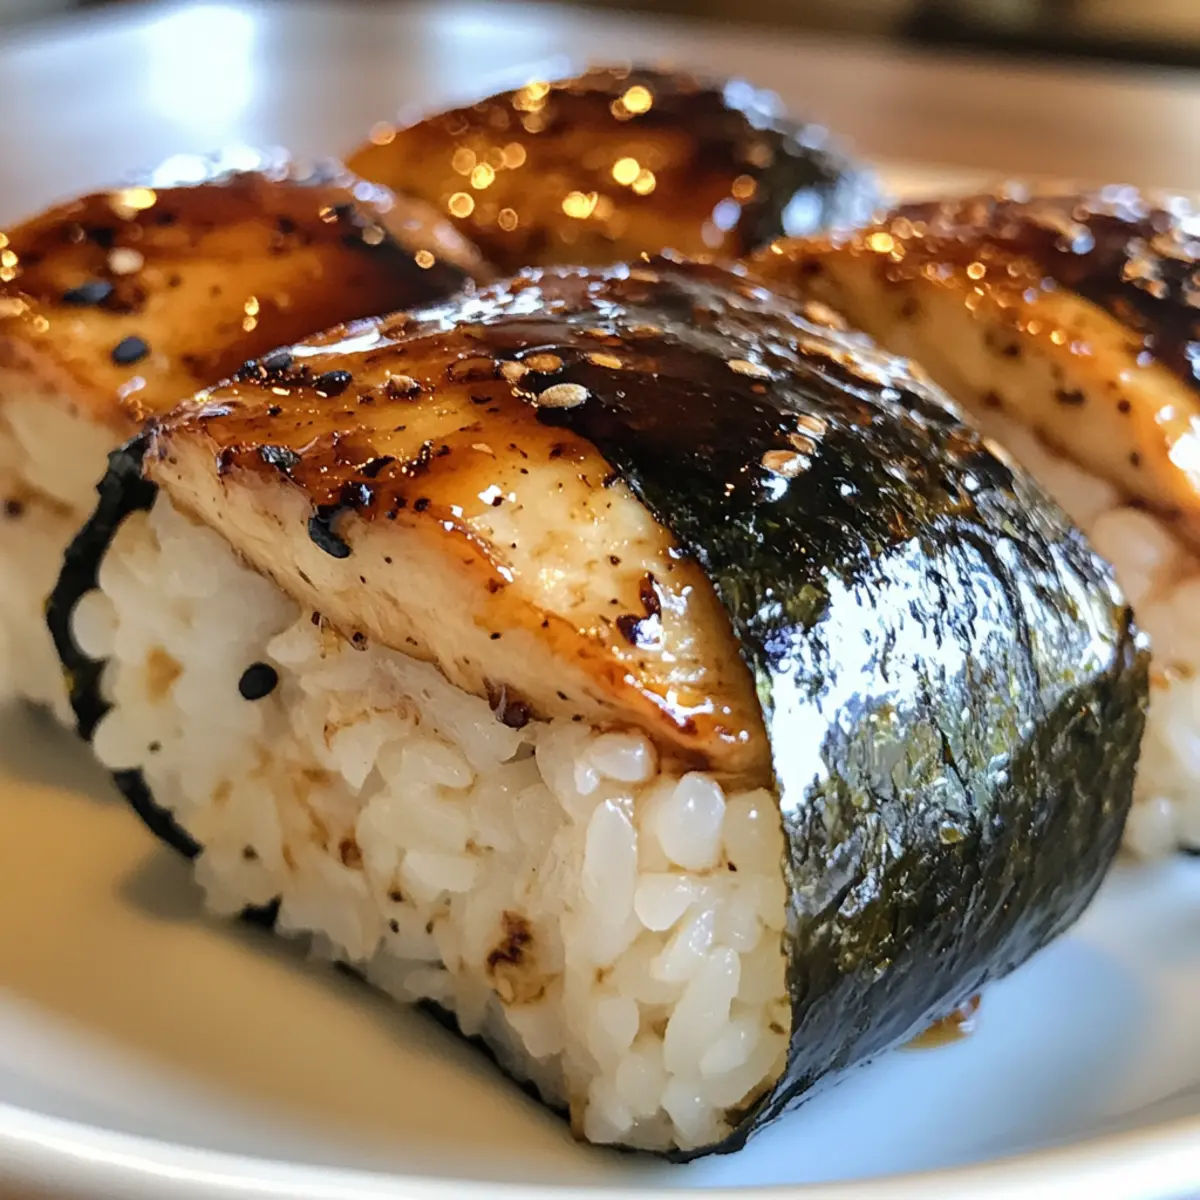
- Nori – 1 sheet cut into small rectangles; used for wrapping the onigiri, adding a delightful sea flavor.
These Chicken Onigiri, filled with savory goodness, are sure to become your new favorite portable snack!
Step‑by‑Step Instructions for Chicken Onigiri
Step 1: Cook the Sushi Rice
Begin by preparing the sushi rice in a rice cooker according to the manufacturer’s instructions. Use 4 cups of short-grain rice, ensuring to add about 15% more water than usual for perfect stickiness. Once cooked, transfer the rice to a large bowl, and sprinkle in ½ teaspoon of fine salt and optional 2 tablespoons of furikake. Gently fold the ingredients together until well combined.
Step 2: Marinate the Chicken
While the rice cools, dice ½ pound of boneless, skinless chicken into small, bite-sized pieces. In a bowl, mix together 2 teaspoons of soy sauce, 1 tablespoon of sake, ¼ teaspoon of baking soda, and 1 teaspoon of cornstarch. Add the chicken to this marinade, ensuring each piece is well coated, and let it sit for about 30 minutes. This will enhance the flavor and tenderness of your filling for the Chicken Onigiri.
Step 3: Prepare the Teriyaki Sauce
In a small bowl, whisk together 1 ½ tablespoons of soy sauce, 1 tablespoon of mirin, and 1 tablespoon of firmly packed brown sugar. Set this mixture aside; it will be added to the chicken later to create a flavorful glaze. Make sure to blend well until the sugar is dissolved, which will elevate the overall taste of your Chicken Onigiri.
Step 4: Cook the Chicken
Heat 1 tablespoon of oil in a large nonstick pan over medium-high heat. Once hot, add the marinated chicken to the pan, spreading it out to ensure even cooking. Sauté for about 2-3 minutes, or until the chicken is browned and cooked through. This step will create a delightful crispy texture on the outside, while remaining juicy on the inside—perfect for your Chicken Onigiri filling.
Step 5: Add Garlic and Sauce
Reduce the heat to medium and incorporate 1 tablespoon of minced garlic into the pan with the chicken. Sauté for about 30 seconds to release the aromatic flavors. Next, pour your prepared teriyaki sauce over the chicken, stirring to combine. Allow the mixture to cook for an additional 2-3 minutes until the sauce thickens into a glossy glaze that beautifully coats the chicken.
Step 6: Shape the Onigiri
To form your Chicken Onigiri, wet your hands to prevent sticking. Take about ⅓ cup of the prepared sushi rice and press it gently into your palm, creating a small well in the center. Spoon in 1 tablespoon of the teriyaki chicken mixture, then cover it with another ⅓ cup of rice. Mold the rice into a triangular shape, pressing gently but firmly to ensure it holds together well.
Step 7: Wrap and Serve
Once your onigiri are shaped, cut a sheet of nori into small rectangles. Wrap each onigiri with a piece of nori to add a delightful sea flavor. Let the shaped onigiri rest for a few minutes to firm up before serving. Enjoy your Chicken Onigiri as a delicious, portable snack or a delightful meal on-the-go!
What to Serve with Teriyaki Chicken Onigiri
Unlock a world of delicious pairing possibilities to elevate your meal and enrich the flavors of your onigiri.
- Miso Soup: A warm bowl of miso soup adds depth and a comforting touch to your meal, perfectly balancing the flavors of the rice balls.
- Japanese Pickles: The tangy crunch of tsukemono (Japanese pickles) provides a refreshing contrast to the savory onigiri, enhancing your dining experience.
- Steamed Edamame: Lightly salted edamame adds a nutty flavor and delightful texture that pairs beautifully with the teriyaki chicken filling.
- Green Tea: A cup of fragrant green tea complements the meal and helps cleanse the palate between bites of savory onigiri.
- Seaweed Salad: The delicate flavors of seaweed salad bring a fresh element alongside the teriyaki-glazed chicken, enhancing the overall dining experience.
- Fruit Skewers: Add a sweet touch with colorful fruit skewers; their freshness balances the savory richness of the onigiri and makes for a delightful dessert.
- Cucumber Salad: A light cucumber salad dressed in rice vinegar provides a refreshing side, harmonizing the flavors and adding a crisp texture alongside the onigiri.
- Sake: For an authentic Japanese pairing, a chilled glass of sake enhances the flavors of the dish and offers a delightful dining experience.
Expert Tips for Chicken Onigiri
-
Perfect Rice: Use short-grain sushi rice for the ideal texture; it’s essential for preventing the onigiri from falling apart.
-
Marinate Thoroughly: Allow the chicken to marinate for at least 30 minutes. This enhances flavor and tenderness, making your Chicken Onigiri even more delicious.
-
Hand Tricks: Keep your hands wet while shaping the onigiri to stop the rice from sticking. This makes forming those perfect triangles a breeze!
-
Rest Time: Let the shaped onigiri sit for a few minutes before serving. This helps them firm up, making them easier to handle.
-
Custom Fillings: Don’t hesitate to try different fillings! Whether swapping chicken for tofu or adding veggies, get creative with your Chicken Onigiri.
Make Ahead Options
These Chicken Onigiri are a lifesaver for meal prep enthusiasts! You can marinate the chicken up to 24 hours in advance to enhance its flavor, ensuring that dinner comes together effortlessly. Additionally, the sushi rice can be cooked a day ahead and stored in an airtight container in the refrigerator to maintain its freshness. When you’re ready to assemble, simply heat the marinated chicken and shape it into onigiri with the prepped rice. To keep the onigiri from becoming soggy, wrap them in plastic wrap until serving and add the nori just before enjoying. This preparation method saves you precious time during busy weeknights while delivering delicious Chicken Onigiri just as delightful as when freshly made!
Variations & Substitutions for Chicken Onigiri
Feel free to unleash your creativity in the kitchen with these exciting variations and substitutions, each promising a unique twist!
-
Vegetarian Delight: Swap chicken for tofu, marinated in the same teriyaki sauce for a delicious plant-based option. You’ll still get all those mouthwatering flavors wrapped in rice!
-
Seafood Option: Try using cooked shrimp or spicy tuna as a filling, which adds a delightful contrast to the sticky rice and will impress seafood lovers!
-
Nutty Twist: Mix in some sesame seeds into the rice or on top of the onigiri for a delightful crunch and nutty flavor that elevates each bite.
-
Spicy Kick: Add a drizzle of sriracha or some chili oil to the chicken mixture for an exciting heat level that makes your Chicken Onigiri pop with flavor!
-
Flavored Rice: Infuse the sushi rice with herbs or spices, like ginger or wasabi, for an intriguing taste that complements the teriyaki chicken beautifully.
-
Nori Alternatives: If you’re not a fan of seaweed, wrap your onigiri in lettuce leaves or use rice paper for a fresh and crunchy twist.
-
Interesting Fillings: Play around with fillings like avocado or pickled vegetables to add a unique flavor and texture to your onigiri creations.
-
Asian Fusion: Incorporate ingredients from other cuisines, like barbecue pulled pork or buffalo chicken, blending them with the concepts of the onigiri for a fun gourmet experience.
As you embark on this flavor journey, don’t forget to pair your Chicken Onigiri with mouthwatering sides like Chicken Ranch Macaroni to round out your meal perfectly. Happy cooking! 🍚🍗
How to Store and Freeze Chicken Onigiri
Fridge: Store leftover Chicken Onigiri in an airtight container in the refrigerator for up to 2 days. Wrap each onigiri in plastic wrap to maintain freshness and prevent drying out.
Freezer: If you want to enjoy Chicken Onigiri for longer, freeze them for up to 1 month. Make sure to wrap each onigiri tightly in plastic wrap, followed by foil or a zip-top bag for extra protection.
Reheating: To reheat, simply thaw in the fridge overnight, and then steam the onigiri for a few minutes until warmed through. Alternatively, use a microwave on low power for about 20 seconds.
Serving Tip: Enjoy them as a quick snack by dabbing a bit of soy sauce or your favorite dipping sauce for an extra flavor boost!
Chicken Onigiri Recipe FAQs
How do I choose the right rice for Chicken Onigiri?
Absolutely! For the best results, always opt for short-grain sushi rice, which has the ideal stickiness to hold the onigiri together. Make sure it’s labeled as “sushi rice” and remember to add about 15% more water than you normally would when cooking to achieve that perfect texture.
What is the best way to store Chicken Onigiri?
Very! You can store your Chicken Onigiri in an airtight container in the refrigerator for up to 2 days. To keep them fresh, wrap each onigiri in plastic wrap to prevent drying out and maintain their delightful texture.
Can I freeze Chicken Onigiri?
Absolutely! To freeze Chicken Onigiri, wrap each one tightly in plastic wrap, and then place them in a zip-top bag or foil for added protection. They’ll stay fresh in the freezer for up to 1 month. When you’re ready to enjoy them, thaw in the fridge overnight and reheat by steaming or microwaving on low.
What should I do if the rice doesn’t stick together?
Don’t worry! If your rice isn’t sticking, you might need to adjust the water ratio slightly. Ensure you’re using short-grain sushi rice, as it’s essential for that sticky texture. If you face this issue, add a bit more cooked rice to help form and shape your onigiri, while keeping your hands wet to prevent sticking.
Can I make Chicken Onigiri gluten-free?
Definitely! By substituting regular soy sauce with gluten-free soy sauce, you can easily make your Chicken Onigiri gluten-free. This way, more people will be able to enjoy this delicious dish without concern for dietary restrictions.
What are some filling alternatives for Chicken Onigiri?
Very! Feel free to customize your Chicken Onigiri with different fillings. You can swap out chicken for tofu for a vegetarian option or use fillings like spicy tuna, pickled vegetables, or even cooked salmon. The more varieties, the merrier your snack game!
Savory Chicken Onigiri That Will Change Your Snack Game
Ingredients
Equipment
Method
- Prepare the sushi rice in a rice cooker according to the manufacturer's instructions, adding about 15% more water than usual for perfect stickiness. Once cooked, transfer the rice to a bowl, and sprinkle in fine salt and furikake. Gently fold together until combined.
- Dice chicken into small, bite-sized pieces. In a bowl, mix soy sauce, sake, baking soda, and cornstarch. Add chicken to the marinade, coating well, and let it sit for about 30 minutes.
- In a small bowl, whisk together soy sauce, mirin, and brown sugar. Set this mixture aside.
- Heat oil in a pan over medium-high heat. Add the marinated chicken and sauté for about 2-3 minutes until browned and cooked through.
- Reduce heat and add minced garlic, sautéing for 30 seconds. Pour in teriyaki sauce over chicken and cook for 2-3 minutes until the sauce thickens.
- Wet your hands to prevent sticking. Take about ⅓ cup of rice and press into your palm, creating a well in the center. Spoon in 1 tablespoon of the chicken mixture, then cover it with another ⅓ cup of rice. Mold the rice into a triangular shape.
- Wrap each onigiri with a piece of nori. Let the shaped onigiri rest for a few minutes before serving.
Leave a Reply