
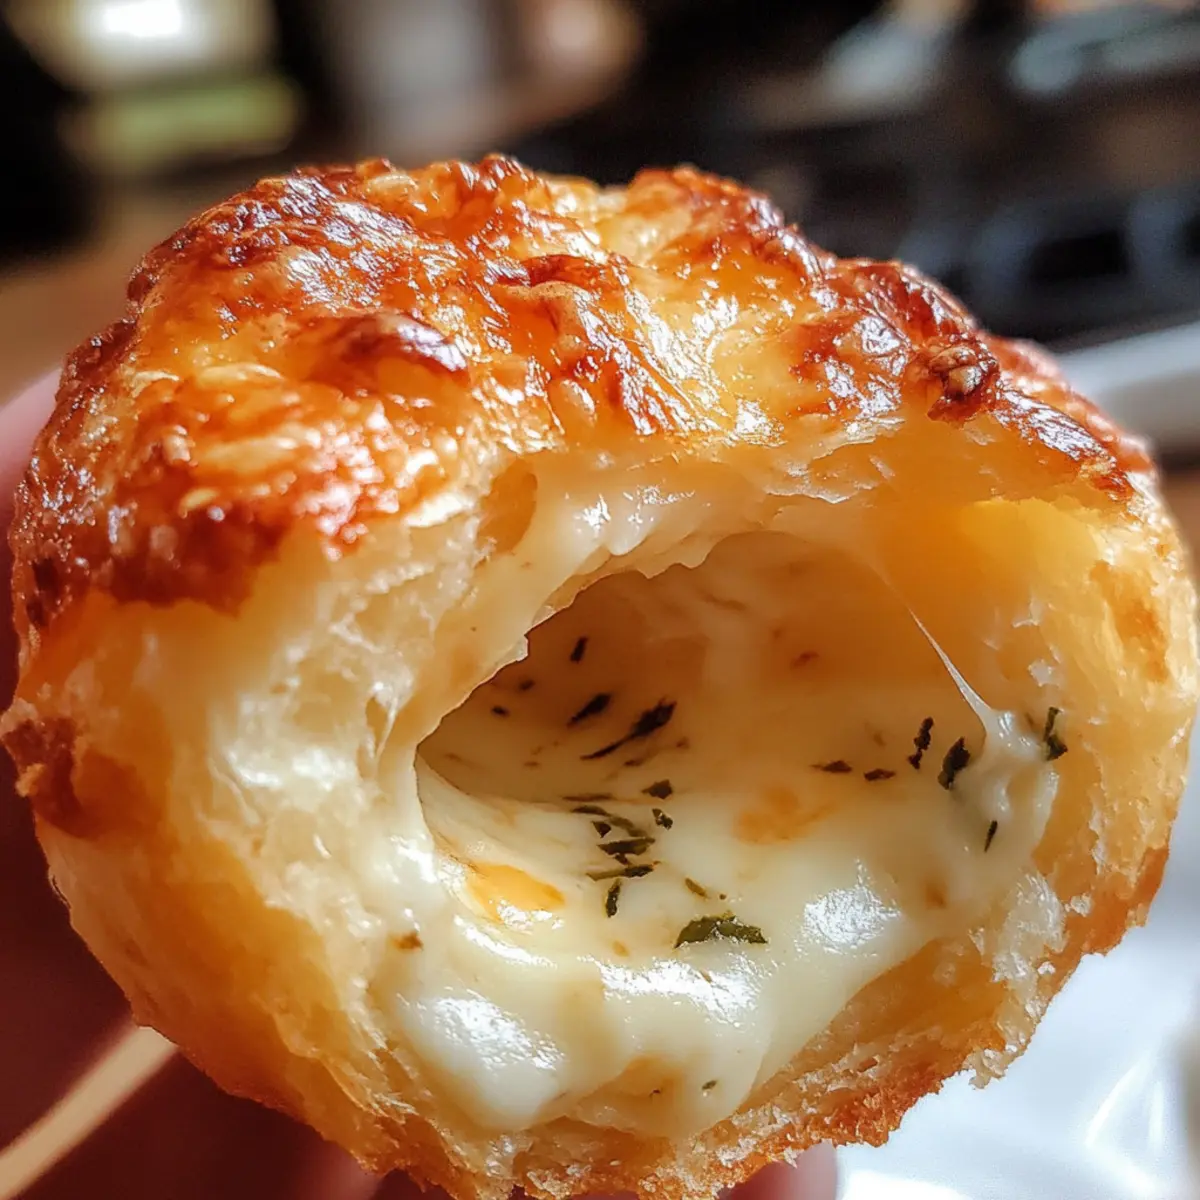
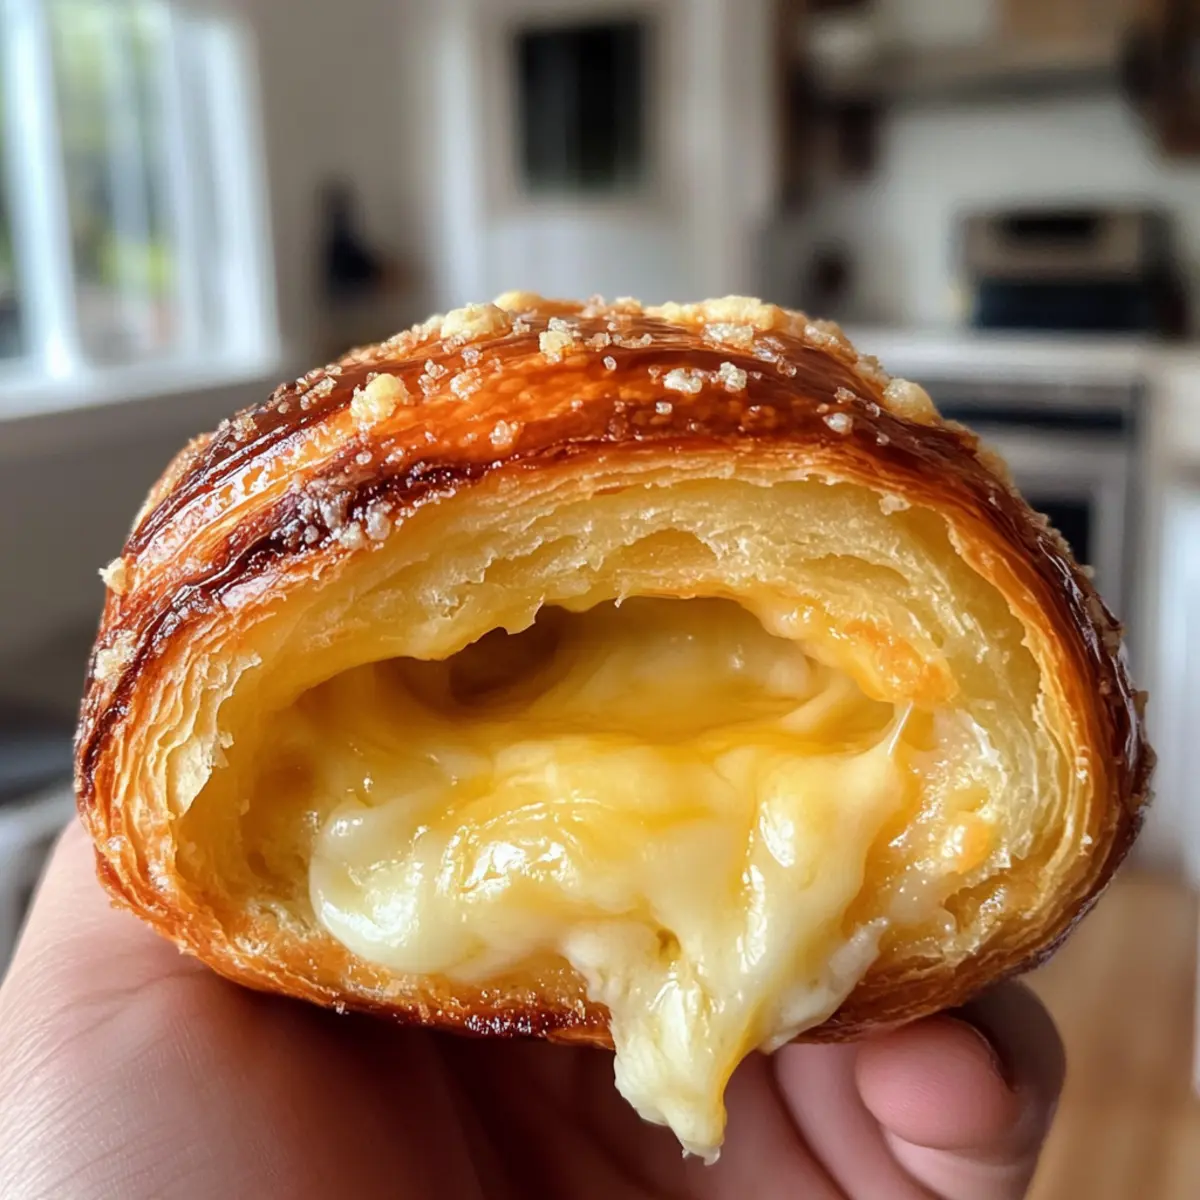
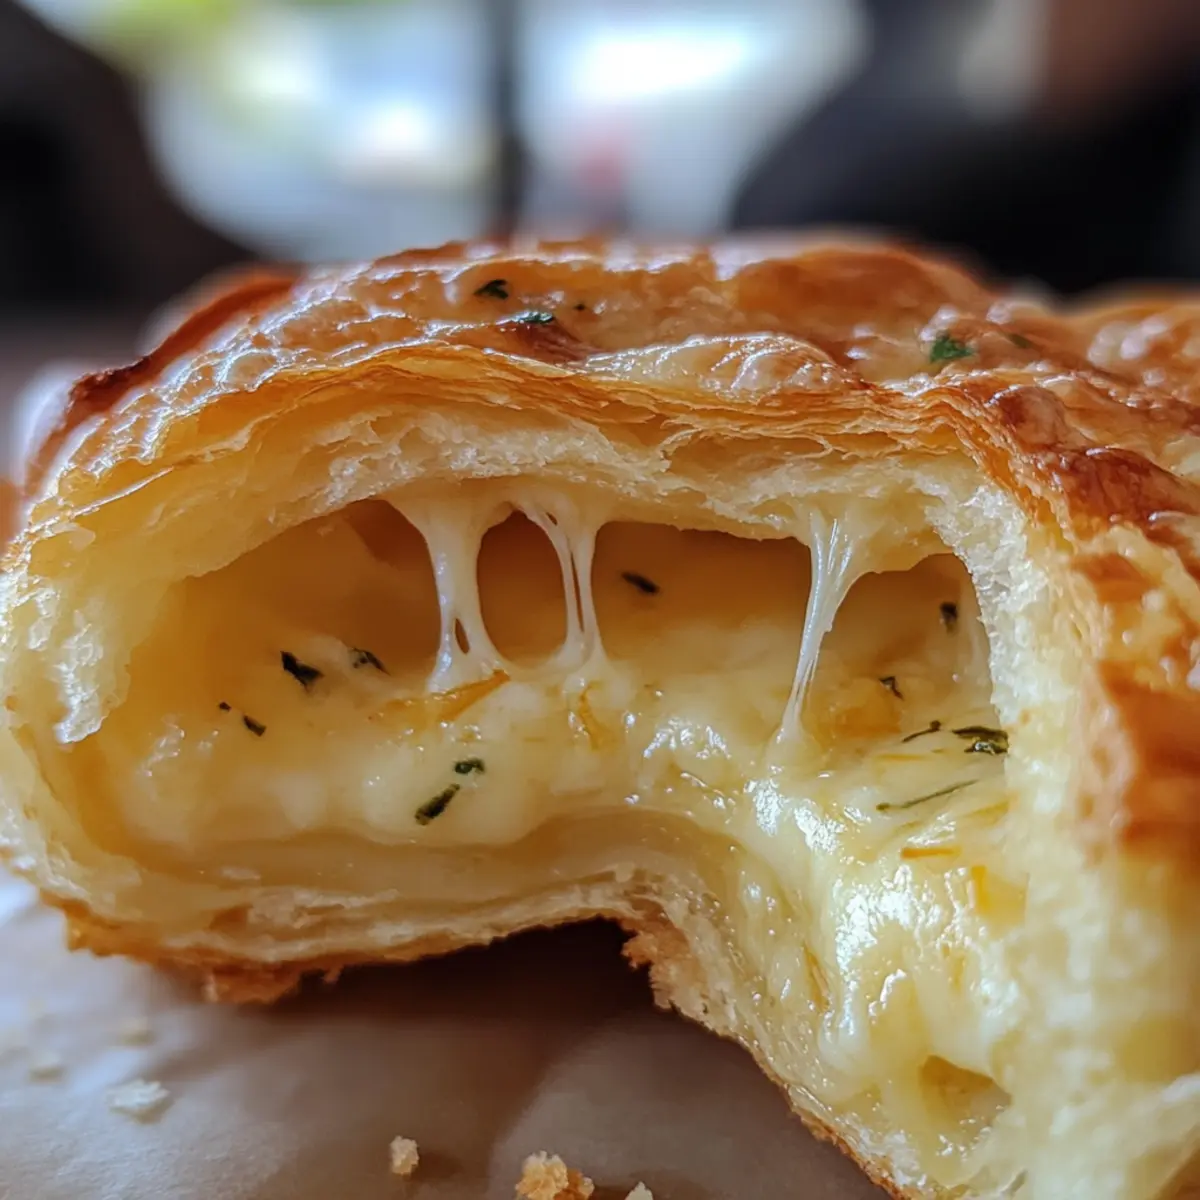
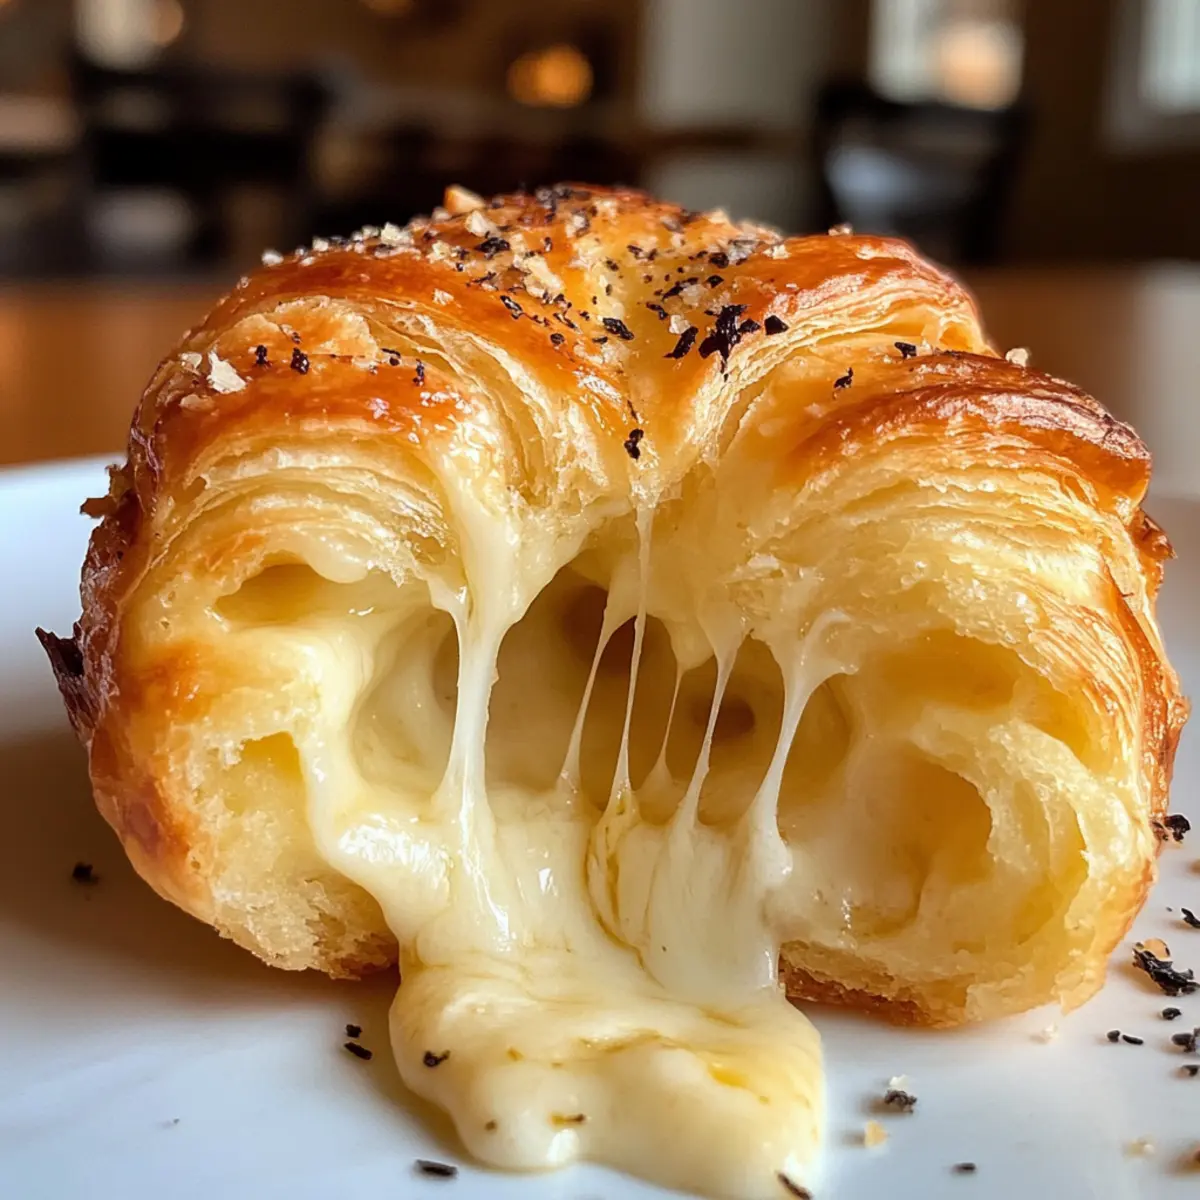
As I rummaged through my kitchen one chilly afternoon, a wave of warm, buttery aroma caught my attention—garlic and cheese beckoning with promises of indulgence. Enter the Cheesy Garlic Cruffin, a delightful hybrid of flaky croissant and comforting muffin. These cruffins are not only a cinch to whip up but also transform any meal into a memorable gathering, perfect for satisfying those savory cravings. Whether enjoyed as a cozy snack or a delightful side, this recipe offers an easy way to impress friends and family without complex pastry techniques. Want to dive into a culinary adventure that will make your kitchen smell divine? Let’s get started!
What makes Cheesy Garlic Cruffins irresistible?
Flavor Explosion: The rich combination of garlic and melted cheese creates an unbelievably savory delight that’s hard to resist.
Easy to Make: With straightforward steps, even beginner bakers can achieve impressive results.
Perfect for Any Occasion: Whether as a snack, side dish, or appetizer, these cruffins elevate any meal, making them a versatile choice.
Ultimate Comfort Food: Their flaky texture and buttery flavor encapsulate everything we love about comfort food. Pair them with a creamy soup or a crisp salad for a full-fledged feast! For more cheesy goodness, check out our Cheesy Texas Toast or Chicken Wraps Garlic.
Crowd-Pleaser: Your friends and family won’t be able to get enough of these delightful bites!
Cheesy Garlic Cruffin Ingredients
For the Dough
- All-Purpose Flour – Provides structure; substitute with gluten-free flour for a gluten-free option.
- Granulated Sugar – Adds a touch of sweetness; can be omitted for a savory flavor.
- Salt – Enhances flavor; essential for taste—no substitute recommended unless using a low sodium alternative.
- Instant Yeast – Allows the dough to rise; ensure it’s fresh for best results.
- Warm Milk – Helps activate the yeast and enrich the dough; can substitute with almond milk for a dairy-free version.
- Unsalted Butter (melted) – Adds richness; substitute with coconut oil for a dairy-free version.
- Warm Water – Hydrates the dough; no substitutes needed.
- Large Egg – Binds ingredients and adds moisture; can be replaced with a flax egg for vegan options.
For the Filling
- Grated Parmesan Cheese – Adds a sharper flavor; substitute with Pecorino Romano for a similar taste.
- Shredded Mozzarella Cheese – Provides a melty texture; can be swapped with cheddar for a different flavor.
- Minced Garlic – Key flavor component; adjust the amount based on preference.
- Unsalted Butter (softened) – Forms the garlic butter mixture; use olive oil as a substitute for a lighter flavor.
- Fresh Parsley (chopped) – Adds freshness; can be left out or replaced with chives.
These ingredients come together beautifully to create the delightful Cheesy Garlic Cruffin, perfect for those craving rich, savory bites!
Step‑by‑Step Instructions for Cheesy Garlic Cruffin
Step 1: Prepare the Dough Base
In a large mixing bowl, combine 3 cups of all-purpose flour, 2 tablespoons of granulated sugar, 1 teaspoon of salt, and 2 teaspoons of instant yeast. Mix the dry ingredients well. Next, make a well in the center and pour in 1 cup of warm milk, 4 tablespoons of melted unsalted butter, and 1/3 cup of warm water. Stir until a messy dough forms, then continue to the kneading stage.
Step 2: Knead the Dough
Transfer the dough onto a floured surface and knead for about 8-10 minutes until it’s smooth and elastic. You’ll know it’s ready when it springs back when gently pressed. This Cheesy Garlic Cruffin dough should feel soft yet cohesive. Place it in a lightly greased bowl, cover with a kitchen towel, and let it rise in a warm spot for approximately 1 hour or until doubled in size.
Step 3: Make the Garlic Butter Filling
While the dough is rising, prepare the savory filling for your Cheesy Garlic Cruffin. In a small bowl, combine 4 tablespoons of softened unsalted butter, 4 minced garlic cloves, and 2 tablespoons of chopped fresh parsley. Mix until well blended, and allow the mixture to sit, enhancing the garlic flavor. Set it aside until ready to use, letting those flavors meld beautifully together.
Step 4: Roll Out the Dough
After the dough has risen, punch it down gently to release air. On a floured surface, roll it out into a rectangle approximately 1/4 inch thick. This step is crucial to achieve the right flaky texture for your Cheesy Garlic Cruffin. If the dough sticks, sprinkle a little more flour as needed. Make sure the rectangle is even for consistent baking.
Step 5: Spread the Filling
Evenly spread the prepared garlic butter mixture over the rolled-out dough, reaching every corner. Then, sprinkle a generous layer of grated Parmesan and shredded mozzarella cheese on top. The melted cheese will create that irresistible savory goodness when baked, elevating your Cheesy Garlic Cruffin to the next level of comfort food.
Step 6: Shape the Cruffins
Starting from one long edge, carefully roll the dough into a log, ensuring it’s tight but not overly compressed. Once rolled, slice the log into 8-10 equal pieces. This creates the beautiful layers you’ll see after baking. Place each slice into a greased muffin tin, standing vertically to form the cruffin shape, ready to rise again.
Step 7: Final Rise and Preheat Oven
Cover the muffin tin with a towel and let the cruffins rest for about 20 minutes. During this time, preheat your oven to 375°F (190°C). This final rise ensures that your Cheesy Garlic Cruffin will be fluffy and light after baking. The dough should puff up again, getting ready for that golden transformation in the oven.
Step 8: Bake to Perfection
Carefully place the muffin tin in the preheated oven and bake for 20-25 minutes until the cruffins are a deep golden brown and the cheese is bubbling. Keep an eye on them, as ovens vary; you want a crisp, flaky exterior that’s golden and inviting. The delicious aroma of garlic and cheese will fill your kitchen, making it hard to wait!
Step 9: Cool and Serve
Once baked, remove the Cheesy Garlic Cruffin from the oven and let it cool slightly in the tin for about 5 minutes. Carefully transfer the cruffins to a wire rack to cool for a few moments longer, which keeps the bottoms from getting soggy. Serve them warm, either as a delightful side dish or a comforting snack that brings everyone together at the table!
Expert Tips for Cheesy Garlic Cruffin
- Fresh Yeast Check: Ensure your instant yeast is fresh to guarantee that the dough rises beautifully. Expired yeast will lead to flat cruffins.
- Flavor Infusion: Let your garlic butter mixture sit for a few minutes before spreading it on the dough. This allows the garlic flavor to deepen, enhancing your Cheesy Garlic Cruffin.
- Baking Precision: Watch the baking time closely! Overbaking can dry out the cruffins; aim for a rich golden brown.
- Muffin Tin Prep: Greasing your muffin tin well is essential for easy removal. If they stick, you may lose the cruffin’s delicate shape.
- Serving Warm: Enjoy these cruffins fresh from the oven for that melty cheese goodness. They’re perfect as a snack or side dish, elevating any meal.
Cheesy Garlic Cruffin Variations
Feel free to explore these tasty alternatives to make the Cheesy Garlic Cruffin your own!
- Cheese Swap: Replace mozzarella with gouda or cheddar for a different cheesy flavor profile. Each option adds its unique twist, elevating your cruffins in delicious ways.
- Protein Boost: Add chopped cooked bacon or diced ham for a heartier option that will satisfy meat lovers. The salty, savory bits pair perfectly with the cheese and garlic.
- Herb Infusion: Experiment with fresh herbs like thyme or rosemary to add a fragrant touch. A sprinkle of dried herbs can even serve as a delightful flavor enhancer.
- Spicy Kick: Incorporate red pepper flakes or diced jalapeños for a gentle heat that complements the garlic beautifully. Spice lovers will appreciate this tasty twist!
- Sweet Surprise: Try adding a sprinkle of cinnamon and sugar on top for a sweet and savory contrast, making an unexpectedly delightful treat.
- Vegan Delight: Substitute the egg with a flax egg and use plant-based cheese and butter for a fully vegan version that still satisfies. You won’t miss the dairy with this rich and tasty alternative!
- Gluten-Free Option: Use a gluten-free all-purpose flour blend to make this a guilt-free indulgence for those with gluten sensitivities. Your cruffins can still be light, flaky, and delicious!
- Savory Veggie Addition: Toss in some sautéed spinach or sun-dried tomatoes for an extra layer of flavor and nutrients. These additions transform your cruffins into a versatile dish that’s both tasty and healthy.
For more cheesy indulgences, pair these with our warming Keto Garlic Squid for a delightful appetizer or enjoy as a side with creamy soups!
How to Store and Freeze Cheesy Garlic Cruffin
- Room Temperature: Store leftover cruffins in an airtight container at room temperature for up to 2 days to maintain their flakiness and flavor.
- Fridge: If you need to keep them longer, wrap each cruffin tightly and refrigerate for up to 5 days. Reheat in the oven for best results.
- Freezer: For longer storage, freeze the cruffins individually wrapped in foil or plastic wrap, then place them in a freezer bag for up to 3 months.
- Reheating: To enjoy your Cheesy Garlic Cruffin, reheat from frozen in a preheated oven at 350°F (175°C) for about 15-20 minutes, until warmed through and crispy again.
Make Ahead Options
These Cheesy Garlic Cruffins are perfect for busy home cooks looking to save time without compromising flavor! You can prepare the dough up to 24 hours in advance—simply mix and let it rise as usual, then refrigerate it to slow down the fermentation process. The garlic butter filling can also be made and stored in the refrigerator for up to 3 days, ensuring the flavors meld beautifully. When you’re ready to enjoy your cruffins, roll out the chilled dough, spread the garlic butter, shape, and let them rest before baking. This way, you’ll achieve that flaky, comforting texture just as delicious as fresh!
What to Serve with Cheesy Garlic Cruffin
Nothing enhances the comforting experience of cheese and garlic like a thoughtfully curated side or drink to accompany it.
-
Creamy Tomato Soup: The smooth, velvety texture of tomato soup pairs perfectly with the flaky buttery layers of cruffins, creating delightful morsels to savor.
-
Mixed Green Salad: Crisp greens tossed with a tangy vinaigrette offer a refreshing balance to the rich flavors of the cruffins, making each bite feel lighter.
-
Garlic Herb Butter Steak: Elevating the savory theme, a juicy steak with herbed garlic butter infuses rich flavors that harmonize beautifully with the cruffins.
-
Steamy Broccoli: Brighten the plate with steamed broccoli; its slight crunch and earthy taste complement the cheesy decadence, adding much-needed freshness.
-
Savory Yogurt Dip: Whip up a tangy yogurt dip with herbs. The coolness of the dip contrasts the warmth of the cruffins, creating an inviting snacking experience.
-
Chilled White Wine: A chilled glass of Sauvignon Blanc offers crisp citrus notes that cleanse the palate, enhancing the savory indulgence of the Cheesy Garlic Cruffin.
Cheesy Garlic Cruffin Recipe FAQs
What type of flour should I use for Cheesy Garlic Cruffins?
You should use all-purpose flour for the best structure in your Cheesy Garlic Cruffin. If you have dietary restrictions, you can substitute it with a gluten-free flour blend, ensuring it includes xanthan gum for similar texture and elasticity.
How should I store leftover Cheesy Garlic Cruffins?
To keep your cruffins fresh, store them in an airtight container at room temperature for up to 2 days. If you need to keep them longer, wrap each cruffin tightly and refrigerate them for up to 5 days, reheating in the oven for optimal texture.
Can I freeze my Cheesy Garlic Cruffins?
Absolutely! For long-term storage, individually wrap each cruffin in foil or plastic wrap, then place them in a freezer-safe bag. They can be frozen for up to 3 months. When ready to enjoy, reheat from frozen in a preheated oven at 350°F (175°C) for about 15-20 minutes, until warmed through and crispy.
What if my cruffins don’t rise properly?
If your Cheesy Garlic Cruffins don’t rise, it may be due to expired yeast. Always check the expiration date on your instant yeast, and ensure it’s fresh for the dough to puff up beautifully. You can also try placing the dough in a warmer area to help it rise better.
Are Cheesy Garlic Cruffins suitable for people with allergies?
While these cruffins are incredibly delicious, they do contain common allergens such as gluten, dairy, and eggs. For a dairy-free version, you can substitute the butter with coconut oil and use dairy-free cheese alternatives. A flax egg can also replace the large egg for a vegan option.
How long does it take to make Cheesy Garlic Cruffins from start to finish?
From mixing the dough to serving freshly baked cruffins, you can expect the process to take around 2 hours. This includes about 1 hour for the dough to rise and 20-25 minutes of baking. It’s a rewarding time investment for such delightful treats!
Cheesy Garlic Cruffin: Your New Favorite Comfort Snack
Ingredients
Equipment
Method
- In a large mixing bowl, combine 3 cups of all-purpose flour, 2 tablespoons of granulated sugar, 1 teaspoon of salt, and 2 teaspoons of instant yeast. Mix the dry ingredients well. Make a well in the center and pour in 1 cup of warm milk, 4 tablespoons of melted unsalted butter, and 1/3 cup of warm water. Stir until a messy dough forms.
- Transfer the dough onto a floured surface and knead for about 8-10 minutes until smooth and elastic. Place it in a lightly greased bowl, cover, and let it rise in a warm spot for approximately 1 hour or until doubled in size.
- In a small bowl, combine 4 tablespoons of softened unsalted butter, 4 minced garlic cloves, and 2 tablespoons of chopped fresh parsley. Mix until well blended and allow the mixture to sit.
- After the dough has risen, punch it down gently and roll it out into a rectangle approximately 1/4 inch thick.
- Spread the garlic butter mixture over the rolled-out dough. Sprinkle a layer of grated Parmesan and shredded mozzarella cheese on top.
- Starting from one long edge, carefully roll the dough into a log. Slice into 8-10 equal pieces and place each slice into a greased muffin tin, standing vertically.
- Cover the muffin tin and let the cruffins rest for about 20 minutes. Preheat your oven to 375°F (190°C).
- Bake the muffin tin in the preheated oven for 20-25 minutes until deep golden brown and the cheese is bubbling.
- Once baked, remove the cruffins from the oven and let cool slightly in the tin for about 5 minutes. Transfer to a wire rack to cool.
Leave a Reply