
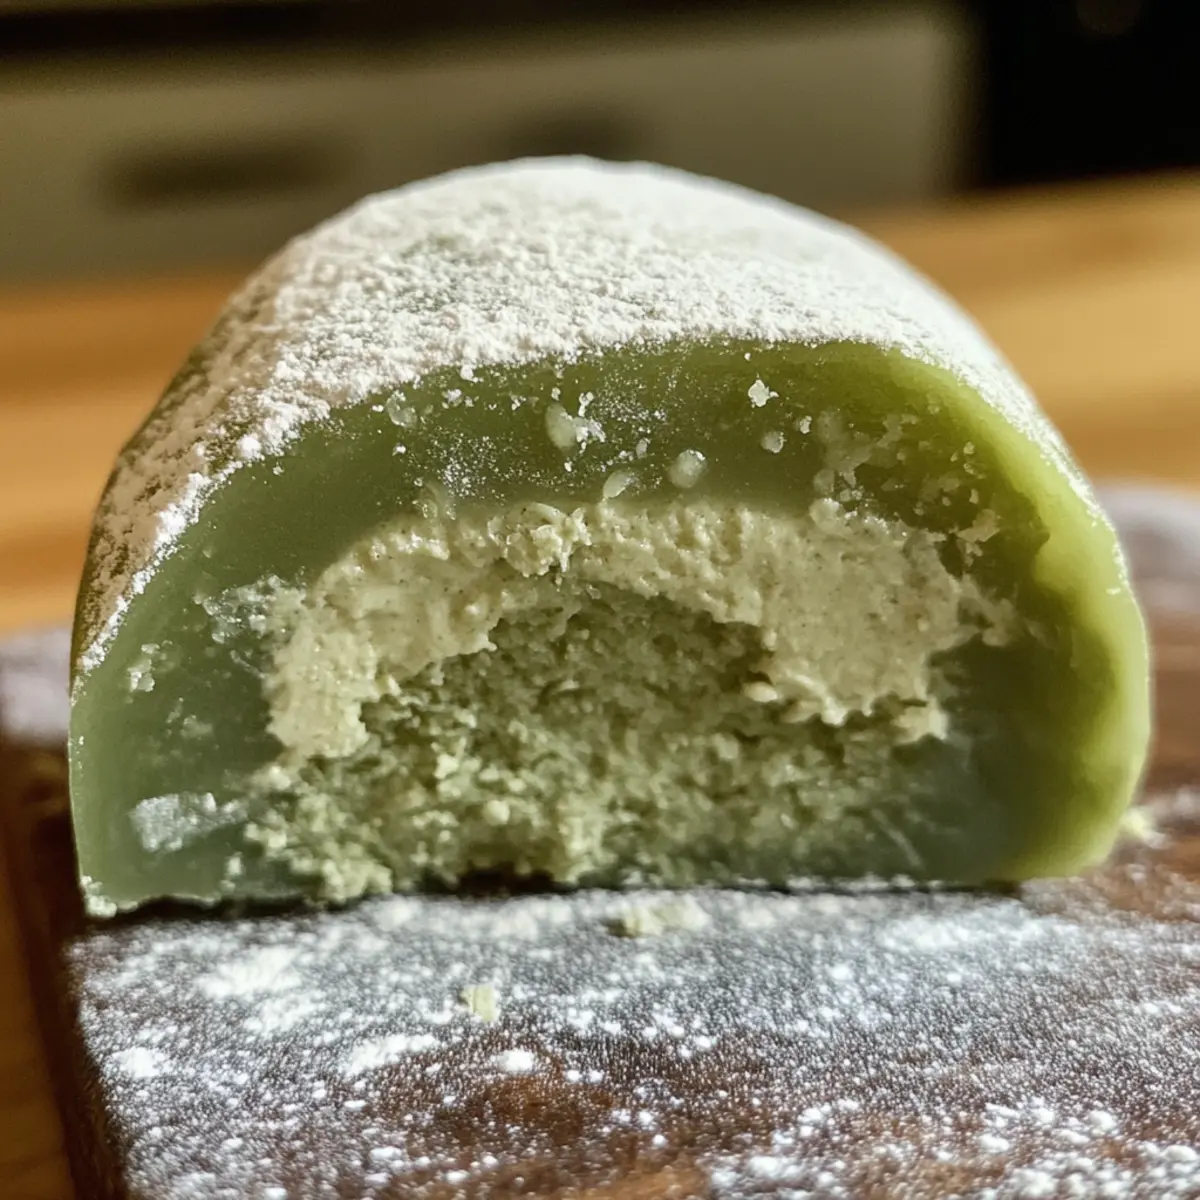
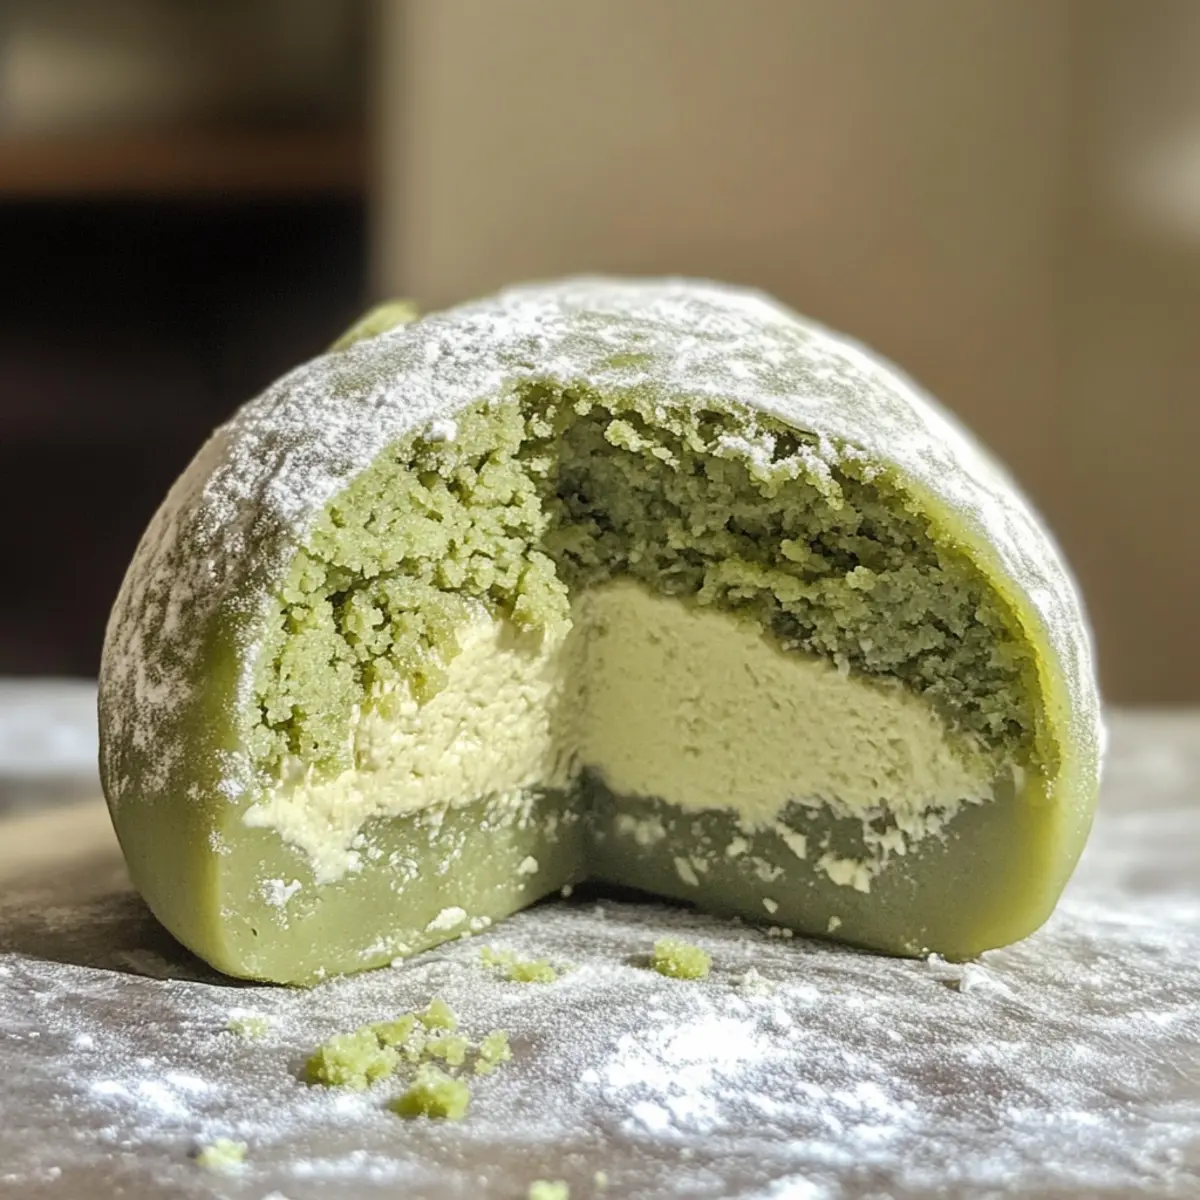
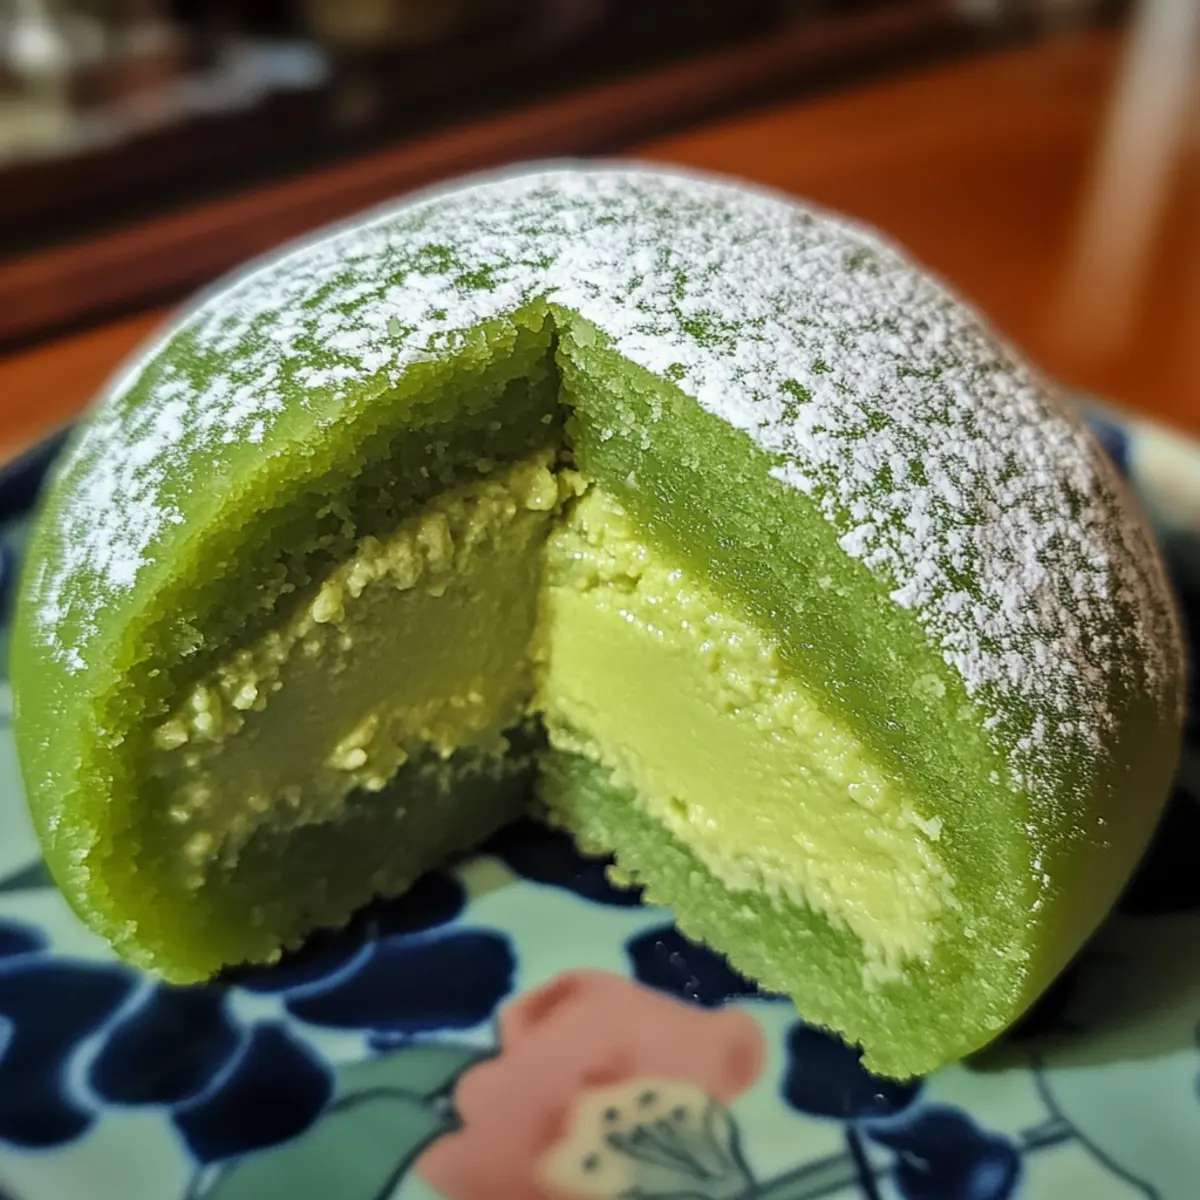
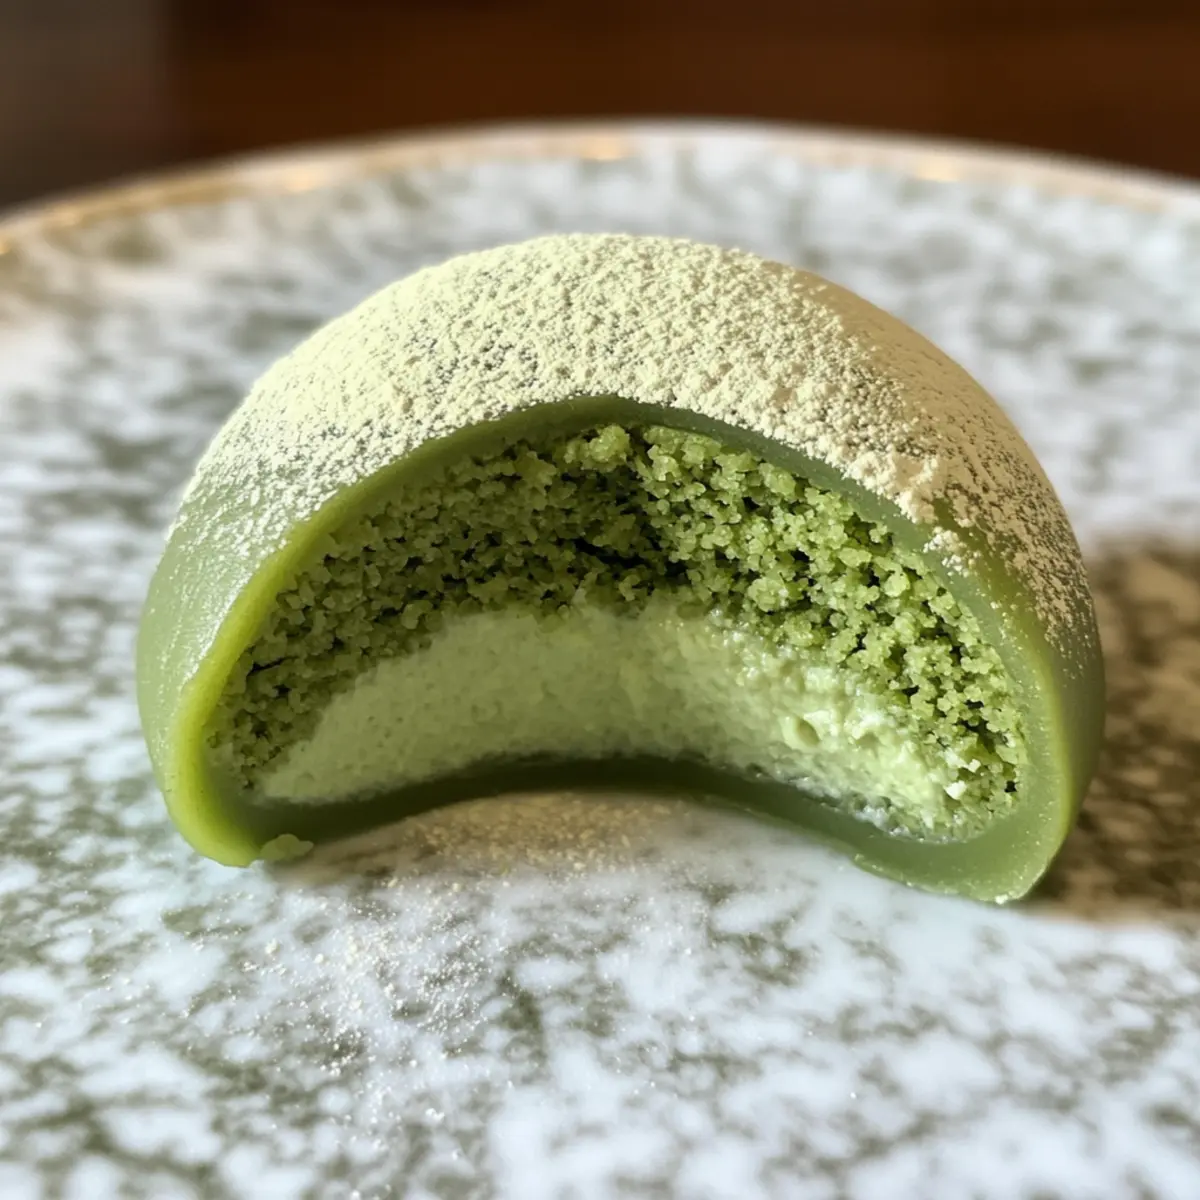
As I sift through the vibrant green matcha powder, a cozy nostalgia washes over me, reminding me of trips to quaint Japanese tea houses. This Homemade Matcha Cheesecake Daifuku is my go-to dessert for satisfying that craving for something deliciously unique. With its soft, chewy mochi exterior embracing a rich, creamy cheesecake center, this treat is not just gluten-free—it’s a delightful experience that merges textures and flavors in perfect harmony. The best part? It’s surprisingly simple to make, making it an ideal choice for impressing friends or indulging in a treat just for yourself. Curious how this scrumptious fusion comes together? Let’s dive in!
Why Choose Matcha Cheesecake Daifuku?
Unique Combination: This Homemade Matcha Cheesecake Daifuku blends traditional Japanese mochi with decadent cheesecake, creating a sweet that’s truly one-of-a-kind.
Gluten-Free Delight: Perfect for those on gluten-free diets, this dessert doesn’t compromise on flavor or texture—it’s a treat everyone can enjoy!
Easy to Make: With just a few simple steps, you’ll whip up this impressive dessert that looks as good as it tastes.
Crowd-Pleasing Flavor: Matcha provides an earthy flavor that pairs beautifully with the rich creaminess of cheesecake, making it a hit at gatherings.
Versatile Enjoyment: Serve it alongside a hot cup of Matcha Latte Cookies or some fresh berries for an unforgettable dessert experience!
Matcha Cheesecake Daifuku Ingredients
Discover the essential components that bring this delightful dessert to life!
For the Cheesecake Filling
- Cream Cheese – Provides a smooth, creamy texture for the filling; opt for full-fat for richness.
- Sugar – Adds sweetness to the cheesecake; feel free to use a sugar alternative for a healthier version.
- Matcha Powder – The star flavor that gives depth and color; high-quality matcha is key for the best taste.
- Heavy Cream – Creates a thick and luscious filling; use chilled cream for optimal whipping.
For the Mochi Dough
- Glutinous Rice Flour – Essential for achieving that soft, chewy texture; do not substitute with regular rice flour.
- Cornstarch – Helps create a smooth batter, ensuring the mochi cooks evenly.
- Whole Milk – Adds moisture and helps create the right consistency for your dough.
- Unsalted Butter – Enriches the dough and enhances elasticity for easy handling.
Dusting Ingredients
- Cooked Glutinous Rice Flour – Prevents sticking during assembly; a must-have for a stress-free experience.
- Matcha Powder (for dusting) – A lovely finishing touch that enhances both color and flavor; optional but highly recommended.
These simple yet crucial ingredients come together to create the exquisite Matcha Cheesecake Daifuku you’ve been dreaming about!
Step‑by‑Step Instructions for Matcha Cheesecake Daifuku
Step 1: Prepare the Cheesecake Filling
Start by blending softened cream cheese and sugar in a mixing bowl until smooth, about 2-3 minutes. Gradually add matcha powder, mixing until fully incorporated, then pour in chilled heavy cream. Whisk for another 3-5 minutes until the mixture thickens and holds soft peaks. Transfer this creamy filling into silicone molds and place them in the freezer for at least 2 hours until solid.
Step 2: Make the Mochi Dough
In a mixing bowl, whisk together glutinous rice flour, cornstarch, and sugar, then gradually stir in whole milk to form a smooth batter. Ensure there are no lumps for the best texture. Pour the mixture into a heatproof dish and steam for 20 minutes over medium heat, checking occasionally; the dough should appear translucent and bouncy when ready.
Step 3: Knead the Dough
Once the mochi dough is cooked, carefully remove it from the steamer and let it cool slightly until it’s warm but manageable. Stir in melted unsalted butter to enrich the dough. Knead the dough on a surface dusted with cooked glutinous rice flour until it’s smooth and elastic, which should take about 5 minutes. Keep the dough warm for better handling.
Step 4: Form Mochi Balls
Divide the kneaded mochi dough into equal portions, roughly the size of a golf ball. Flatten each piece into a disc, making the center thicker to hold the cheesecake filling comfortably. Using your fingers, press down gently on the edges while ensuring the center remains intact for a perfect shape.
Step 5: Fill the Mochi
Take each mochi disc and place a frozen cheesecake center in the middle. Carefully pinch together the sides, ensuring the filling is securely enclosed. Dust each filled daifuku lightly with cooked glutinous rice flour to prevent sticking, forming a beautiful green pouch filled with deliciousness.
Step 6: Final Touches
Once all the Matcha Cheesecake Daifuku are shaped, sift matcha powder over the tops for an elegant finish and extra flavor boost. Refrigerate these delightful treats for at least 30 minutes before serving, allowing them to firm up slightly. The final result, with its sweet, chewy exterior and creamy filling, is a true Japanese dessert delight.
How to Store and Freeze Matcha Cheesecake Daifuku
Fridge: Store your Matcha Cheesecake Daifuku in an airtight container in the refrigerator for up to 2 days to keep them fresh and chewy.
Freezer: For longer storage, freeze the daifuku in a single layer, then transfer to a zip-top bag or airtight container. They can be kept for up to one month.
Thawing: When ready to enjoy, thaw frozen daifuku in the refrigerator overnight for the best texture, ensuring they remain moist and delightful.
Reheating: If you prefer warm daifuku, lightly steam them for a few minutes to revive their chewy texture before serving.
What to Serve with Homemade Matcha Cheesecake Daifuku?
Indulging in delicious sweets is a delightful experience, especially when you pair them with perfect complements that enhance their unique flavors.
-
Roasted Green Tea (Hojicha): This warm, nutty tea balances the sweetness of the daifuku, offering a harmonious contrast that’s both soothing and satisfying.
-
Fresh Berries: Strawberries or raspberries bring a burst of tartness, brightening the palate and elevating the creamy texture of the cheesecake filling.
-
Vanilla Ice Cream: The icy, creamy treat complements the daifuku’s chewy exterior and enriches the overall sweetness, creating a dreamy combination that delights the senses.
-
Sesame Balls: These crispy, sesame-coated treats add a unique crunch and nutty flavor that beautifully contrasts with the soft, chewy daifuku.
-
Yuzu Sorbet: This citrusy, icy treat enhances the matcha without overwhelming it, providing a refreshing palate cleanser that leaves you craving more.
-
Matcha Latte: For the true matcha enthusiast, pairing your daifuku with a warm matcha latte deepens the experience, creating a comforting and indulgent dessert moment.
-
Chilled Coconut Milk: Drizzling chilled coconut milk over your daifuku enriches each bite with a subtle flavor and creamy texture, making for a tropical twist.
Each of these delightful pairings adds a unique twist to your homemade Matcha Cheesecake Daifuku, making your dessert experience even more memorable.
Matcha Cheesecake Daifuku Variations
Feel free to explore these variations and make this delightful treat truly your own!
-
Chocolate Twist: Substitute matcha powder with cocoa powder for a rich, chocolatey daifuku that still has that chewy exterior.
-
Fruity Fusion: Experiment with flavored fillings like strawberry or raspberry puree. This adds a burst of freshness and a vibrant pop of color. Just imagine savoring tangy and sweet flavors with each bite!
-
Yogurt Filling: Swap the cheesecake filling for a creamy yogurt-based alternative. This change creates a lighter, tangy treat that’s perfect for warm days.
-
Nutty Delight: Fold in crushed nuts or almond paste into the cheesecake filling for a delightful crunch and a unique flavor boost.
-
Spicy Kick: Add a pinch of chili powder or cayenne to your cheesecake for a surprising heat that complements the dessert beautifully. This twist will surely wake up your taste buds!
-
Mini Mochi: For a fun presentation, create bite-sized daifuku using smaller molds. These adorable treats are perfect for sharing at parties or special gatherings.
-
Decorative Touches: Enhance the daifuku with edible gold flakes or vibrant fruits for added beauty and an extra layer of flavor. It’s all about impressing your guests!
Feeling inspired? Pair your creations with a side of Oreo Cheesecake Cookie or indulge in a slice of Velvet Strawberry Cheesecake for a delightful dessert spread!
Expert Tips for Matcha Cheesecake Daifuku
-
Smooth Filling: Strain the cheesecampe batter before freezing to ensure a silky texture without lumps. It makes a delightful Matcha Cheesecake Daifuku experience!
-
Dough Warmth: Keep the mochi dough warm while handling it. This enhances elasticity, making it easier to shape without tearing.
-
Quality Matcha: Use high-quality matcha powder for a vibrant color and rich flavor. Lower-quality matcha may yield a dull taste and appearance.
-
Prevent Sticking: Dust each filled daifuku generously with cooked glutinous rice flour. This step is crucial to prevent them from sticking together in storage.
-
Temperature Check: Allow the cheesecake filling to freeze solid before assembly to prevent it from melting into the mochi dough during shaping.
-
Flavor Experimentation: Feel free to add an extra flavor twist by incorporating a splash of vanilla extract in the cheesecake filling for a delightful contrast!
Make Ahead Options
These Homemade Matcha Cheesecake Daifuku are perfect for those busy weeks when you want to delight friends or family without the last-minute rush! You can prepare the cheesecake filling and freeze it up to 3 days ahead of time – just blend all the filling ingredients and pipe them into molds, then stick them in the freezer. Additionally, the mochi dough can be made in advance and stored covered in the refrigerator for up to 24 hours. When you’re ready to serve, simply shape the mochi around the frozen filling, dust with matcha, and refrigerate for about 30 minutes before indulging. This prep-ahead approach means maximum flavor with minimal effort—perfect for any home cook!
Matcha Cheesecake Daifuku Recipe FAQs
How do I choose the right matcha powder?
Absolutely! When selecting matcha powder for your Matcha Cheesecake Daifuku, look for high-quality, ceremonial-grade matcha. It should be vibrant green in color, indicating its freshness and premium quality. Avoid dull, yellowish powders, as they lack flavor and will not produce the desired rich taste.
What’s the best way to store Matcha Cheesecake Daifuku?
Very! Store your Matcha Cheesecake Daifuku in an airtight container in the refrigerator for up to 2 days to maintain their chewy texture. Layer them with parchment paper to prevent sticking. If you want to keep them longer, place them in the freezer for up to one month, making sure they’re in a single layer initially before transferring to an airtight container.
Can I freeze daifuku, and how do I do it?
Of course! To freeze your Matcha Cheesecake Daifuku, first lay them on a baking sheet in a single layer to freeze individually. Once solid, transfer them to a zip-top freezer bag or an airtight container. This method prevents them from sticking together. They can be kept in the freezer for up to one month.
What common issues might I face when making daifuku?
One common issue is having the mochi dough tear during assembly. To avoid this, ensure the dough is warm and well-kneaded. Warm dough will have better elasticity, making it easier to shape without ripping. If the daifuku is sticky while handling, dust your hands and the working surface with plenty of cooked glutinous rice flour.
Can pets eat matcha, and are there any allergies I should be aware of?
Not at all! While matcha has health benefits for humans, it is not suitable for pets, particularly dogs and cats. Always check for allergies to the primary ingredients like dairy in the cream cheese, as some may have sensitivities. If you’re serving guests, it’s a good idea to inquire about dietary restrictions beforehand.
Delicious Matcha Cheesecake Daifuku: A Chewy Sweet Surprise
Ingredients
Equipment
Method
- Blend softened cream cheese and sugar until smooth, then add matcha powder and mix until incorporated. Pour in heavy cream and whisk until it thickens.
- Transfer the filling into silicone molds and freeze for at least 2 hours.
- Whisk together glutinous rice flour, cornstarch, and sugar. Gradually stir in whole milk to form a smooth batter.
- Pour the mixture into a heatproof dish and steam for 20 minutes until it appears translucent and bouncy.
- Remove the mochi dough from the steamer and let it cool slightly. Stir in melted butter, then knead on a surface dusted with cooked glutinous rice flour.
- Divide the kneaded dough into equal portions, flatten each into a disc with a thicker center.
- Place a frozen cheesecake center in each mochi disc and pinch the edges together to enclose the filling. Dust with cooked flour.
- Sift matcha powder over the tops and refrigerate for 30 minutes before serving.
Leave a Reply